はじめに
When the light time you are getting from your SOLA DIVE light is shortening, it’s time for a replacement battery.
You could (and should) send it back for service, but for older models (mine was purchased in 2015) L&M might offer a trade-in. I prefer to replace the weakened battery.
In this guide, I show you how to replace your SOLA DIVE light battery, possibly with a slightly more powerful battery.
This guide applies to most SOLA DIVE models, with the so called 2L body.
必要な工具と部品
-
-
This step may need some force applied to unscrew the lamp head cap.
-
-
-
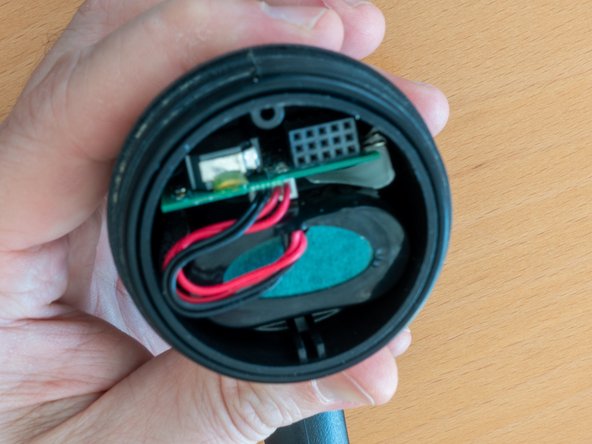
Gently pull the light head by the PCB, not the plastic cover
-
Take note how the light head connector is guided to the PCB connector, all through the plastic cover guide.
-
-
-
-
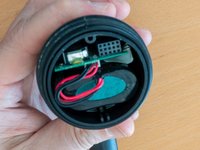
Gently remove the plastic cover guide
-
Take note of the cable management. It will ease the reassembly
-
-
-
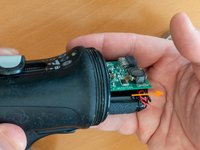
Gently shake the lamp and let the battery and PCB slide in your hand
-
Take note of the location where the PCB will have to slide-in during reassembly
-
-
-
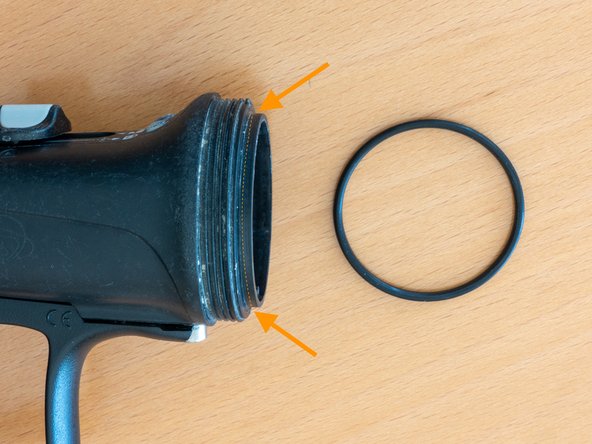
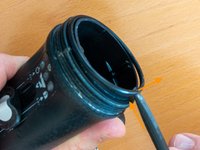
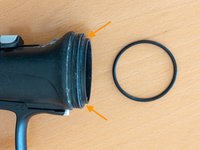
Gently remove the o-ring, clean it and apply o-ring grease
-
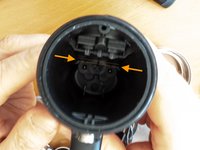
Clean the o-ring seats, both on the body and the metallic cap.
-
-
-
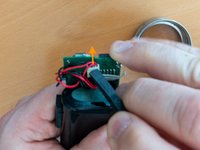
Gently disconnect the battery from the PCB
-
Avoid touching the metallic strips (humidity sensor, to detect flooding) If it happens, gently wipe it with a dry, non abrasive, cloth
-
Connect the new battery
-


To reassemble your device, follow these instructions in reverse order.
Use some force to screw back the lamp head cap, but not too much!
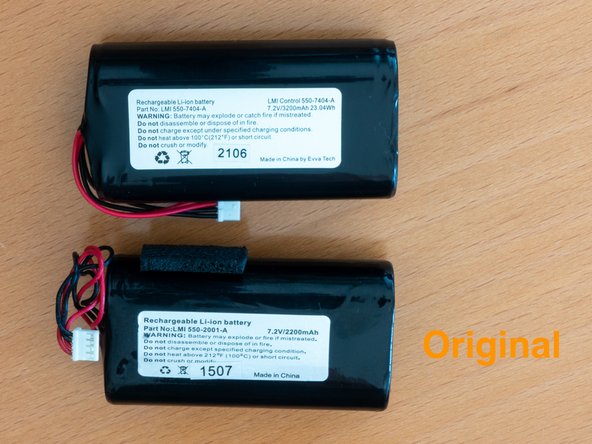
After 3 full discharge cycles, the higher capacity battery will give 65min light at full brightness (vs 45 min with the original battery)
4 の人々がこのガイドを完成させました。
3件のガイドコメント
C'est pas faux, mais les packs d'accus sont généralement appairés par pièces aux caractéristiques aussi semblables que possible.
Il faut sinon démonter le pack d'origine, et récupérer le PCB... cela demande plus d'outillage et de matériel, et il faudra prendre garde à commander des accus avec languettes à souder (à moins de disposer d'un poste de soudure par points).
Pour qui a le temps et les compétences, ça peut effectivement valoir la peine...