メインコンテンツにスキップ

LexiBook Tablet One Camera Replacement

必要な工具と部品

  1. LexiBook Tablet One Camera Replacement, Camera: 手順 1、 3の画像 1 LexiBook Tablet One Camera Replacement, Camera: 手順 1、 3の画像 2 LexiBook Tablet One Camera Replacement, Camera: 手順 1、 3の画像 3
    • Find the seam in the casing. Insert the blue plastic opening tool, and slide to either side carefully undoing the clips. The clips are hidden within the casing and are spaced roughly 1.5 in. apart.

    • When opening the device, be wary of the speaker wire. It is best to open the device from the right side with the camera oriented to the top.

  2. LexiBook Tablet One Camera Replacement: 手順 2、 2の画像 1 LexiBook Tablet One Camera Replacement: 手順 2、 2の画像 2
    • Insert a spudger between the speaker and the casing. Gently pop the speaker out, and set the panel to the side.

  3. LexiBook Tablet One Camera Replacement: 手順 3、 1の画像 1
    • Using a plastic spudger, wedge the tool between the battery and LCD. Repeatedly gouge and work around the edges of the battery until the adhesive breaks free. You will have to apply generous pressure, as long as you push horizontally the components should not be further damaged.

    • Be careful not to damage any wires or to puncture the battery casing when peeling the adhesive.

    • A similar flat tool can be used in place of a plastic spudger.

  4. LexiBook Tablet One Camera Replacement: 手順 4、 3の画像 1 LexiBook Tablet One Camera Replacement: 手順 4、 3の画像 2 LexiBook Tablet One Camera Replacement: 手順 4、 3の画像 3
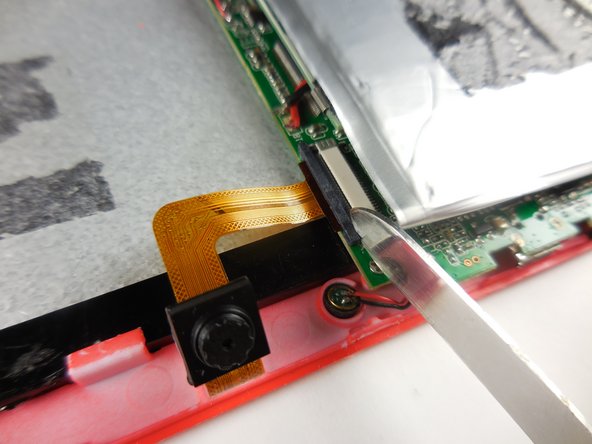
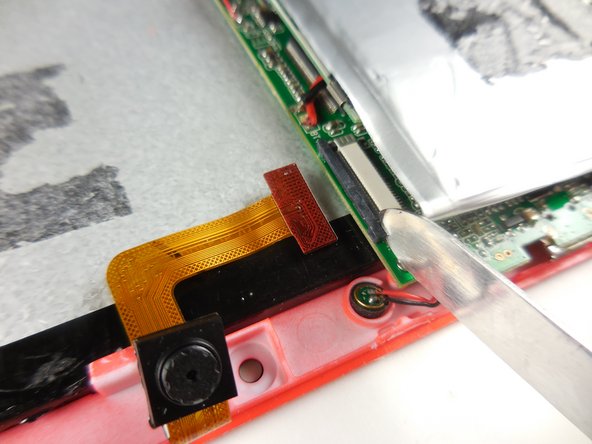
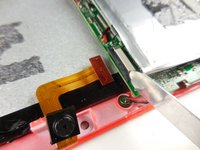
    • Remove the ribbon cable leading to the camera by carefully using a flat headed tool to open the ribbon clip.

    • Gently slide the ribbon cable out while holding the clip open.

  5. LexiBook Tablet One Camera Replacement: 手順 5、 1の画像 1
    • When inserting your new camera, maintain the clip's open position and slide the new ribbon cable in.

    • It is imperative the clip not close partially when installing the new ribbon, or the new cable can be damaged.

    • When the ribbon can go no further into the clip, close the clip.

終わりに

To reassemble your device, follow these instructions in reverse order.

ある他の人がこのガイドを完成しました。

作成者

3人の作成者と共同で作成されました。

Jordan

メンバー登録日: 03/11/15

645 ポイント

4のガイドは作成済み

チーム

Colorado Springs, Team 2-5, Panko Spring 2015 Colorado Springs, Team 2-5, Panko Spring 2015人のメンバー

UCCS-PANKO-S15S2G5

3 メンバー

10のガイドは作成済み

0 件のコメント

コメントを追加

統計データ:

過去 24時間: 0

過去 7 日: 1

過去 30 日: 4

今までの合計 174