メインコンテンツにスキップ

Les Paul Wireless Guitar Strummer Replacement

必要な工具と部品

  1. Les Paul Wireless Guitar Strummer Replacement, Les Paul Wireless Guitar Body Teardown: 手順 1、 1の画像 1
    • Remove batteries

  2. Les Paul Wireless Guitar Strummer Replacement: 手順 2、 2の画像 1 Les Paul Wireless Guitar Strummer Replacement: 手順 2、 2の画像 2
    • Remove void warranty sticker

    • The sticker is covering a torx screw

  3. Les Paul Wireless Guitar Strummer Replacement: 手順 3、 3の画像 1 Les Paul Wireless Guitar Strummer Replacement: 手順 3、 3の画像 2 Les Paul Wireless Guitar Strummer Replacement: 手順 3、 3の画像 3
    • Unscrew the 11 screws securing the back of the body using a T10 Torx screwdriver. Each screw is 1 cm long.

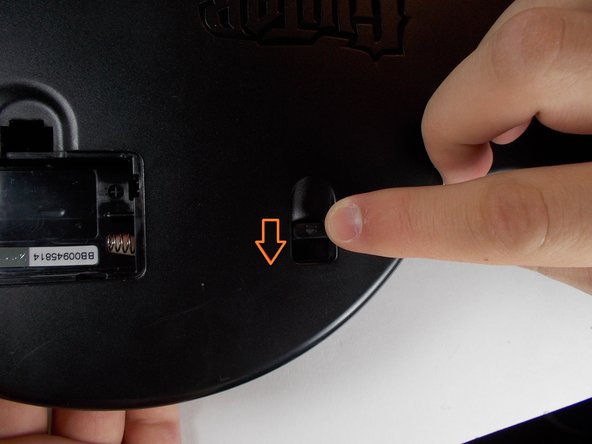
    • Push level, this will detach the back of the guitar from the front.

    • Carefully remove the back of the body

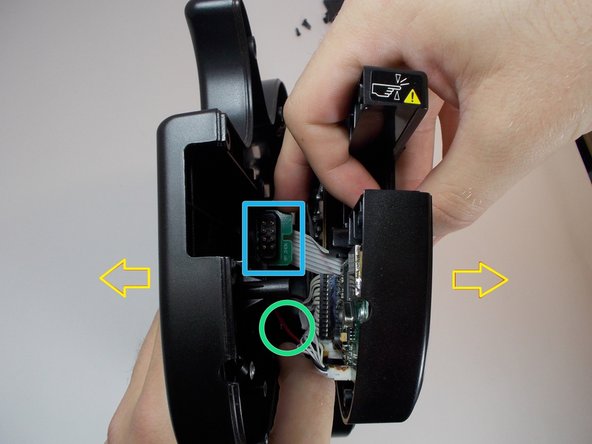
    • The battery pack cord is attached to both sides of the guitar, be careful not to tear it apart.

    • The neck connector may be stuck to the back so be sure to detach it before fully pulling

  4. Les Paul Wireless Guitar Strummer Replacement, Strummer: 手順 4、 2の画像 1 Les Paul Wireless Guitar Strummer Replacement, Strummer: 手順 4、 2の画像 2
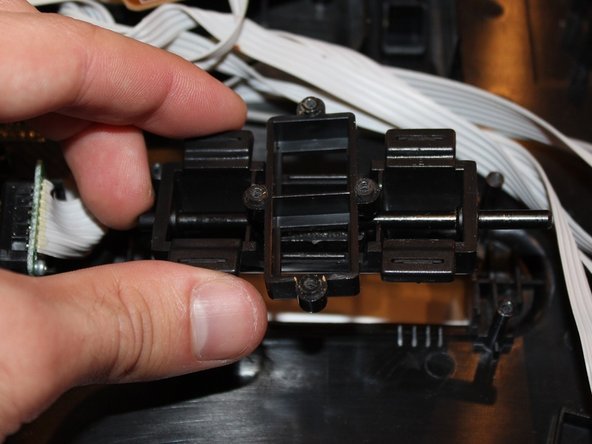
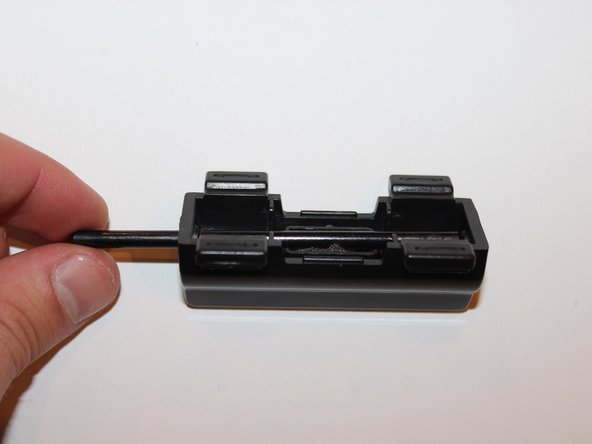
    • Remove the 4 screws from the back of the strum chip using a Phillips PH1 screwdriver. each of these screws are 1.2 cm each.

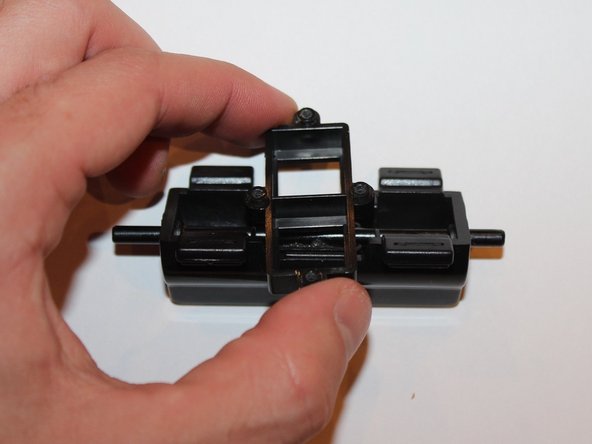
    • Remove the 4 inner screws, each are 0.8 cm.

    • Make sure that when putting back together, the 4 inner screws line up with the small plastic piece underneath.

  5. Les Paul Wireless Guitar Strummer Replacement: 手順 5、 3の画像 1 Les Paul Wireless Guitar Strummer Replacement: 手順 5、 3の画像 2 Les Paul Wireless Guitar Strummer Replacement: 手順 5、 3の画像 3
    • Remove the two plastic holders on the underside of the chip.

    • Pull out the the plastic piece on each side of the strummer.

    • Lift the strummer out of it's location

  6. Les Paul Wireless Guitar Strummer Replacement: 手順 6、 3の画像 1 Les Paul Wireless Guitar Strummer Replacement: 手順 6、 3の画像 2 Les Paul Wireless Guitar Strummer Replacement: 手順 6、 3の画像 3
    • Take the top black cover off the strummer.

    • Slide the black rod out of the side.

    • Clean if needed.

終わりに

To reassemble your device, follow these instructions in reverse order.

4 の人々がこのガイドを完成させました。

作成者

6人の作成者と共同で作成されました。

Chris

メンバー登録日: 10/18/13

881 ポイント

6のガイドは作成済み

4 件のコメント

Hi recently bought this controller again and the up strum has stopped functioning. Hoping this will fix it. Thanks

liamiley91 - 返信

Did this fix your issue? Thinking about trying it.

D. Preston Peek -

Same here, i want to it try but want to know if i will be able to do it altough i’m not really good with these kind of work

Sébastien Fortuny - 返信

This guitar don't have star power with up guitar? Where is sensor?

Leandro Loureiro - 返信

コメントを追加

統計データ:

過去 24時間: 2

過去 7 日: 18

過去 30 日: 91

今までの合計 19,442