メインコンテンツにスキップ

Les Paul Wireless Guitar Peripheral Neck Connection Replacement

必要な工具と部品

  1. Les Paul Wireless Guitar Peripheral Neck Connection Replacement, Les Paul Wireless Guitar Body Teardown: 手順 1、 1の画像 1
    • Remove batteries

  2. Les Paul Wireless Guitar Peripheral Neck Connection Replacement: 手順 2、 2の画像 1 Les Paul Wireless Guitar Peripheral Neck Connection Replacement: 手順 2、 2の画像 2
    • Remove void warranty sticker

    • The sticker is covering a torx screw

  3. Les Paul Wireless Guitar Peripheral Neck Connection Replacement: 手順 3、 3の画像 1 Les Paul Wireless Guitar Peripheral Neck Connection Replacement: 手順 3、 3の画像 2 Les Paul Wireless Guitar Peripheral Neck Connection Replacement: 手順 3、 3の画像 3
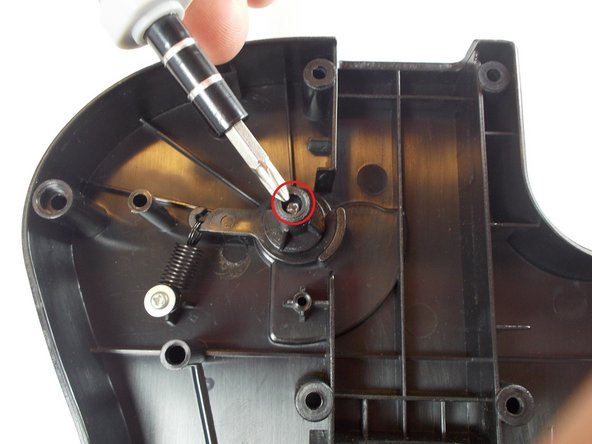
    • Unscrew the 11 screws securing the back of the body using a T10 Torx screwdriver. Each screw is 1 cm long.

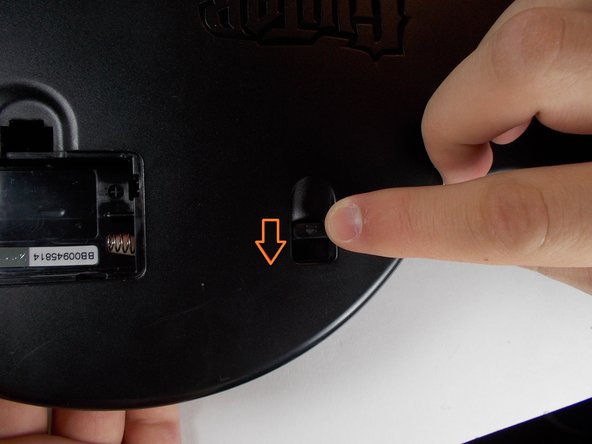
    • Push level, this will detach the back of the guitar from the front.

    • Carefully remove the back of the body

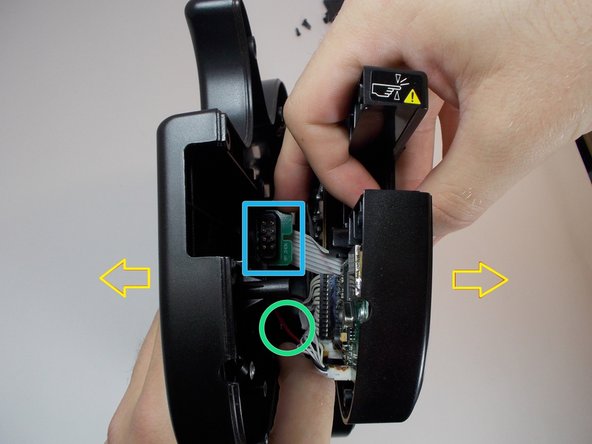
    • The battery pack cord is attached to both sides of the guitar, be careful not to tear it apart.

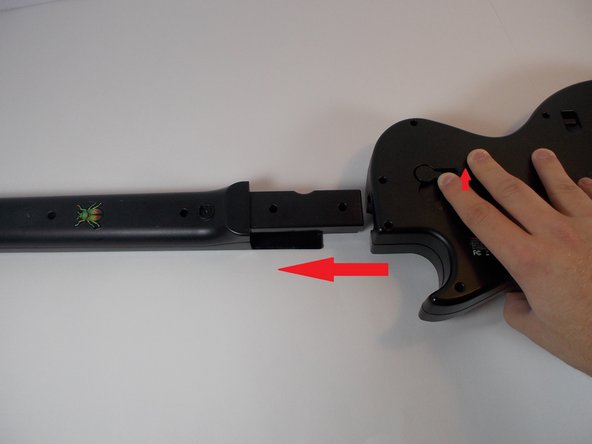
    • The neck connector may be stuck to the back so be sure to detach it before fully pulling

  4. Les Paul Wireless Guitar Peripheral Neck Connection Replacement, Neck Connection: 手順 4、 2の画像 1 Les Paul Wireless Guitar Peripheral Neck Connection Replacement, Neck Connection: 手順 4、 2の画像 2
    • Remove the 10 screws (each are 1 cm long) on the back of the neck using a T-10 Torx security screwdriver.

    • Remove the back of the neck.

  5. Les Paul Wireless Guitar Peripheral Neck Connection Replacement: 手順 5、 2の画像 1 Les Paul Wireless Guitar Peripheral Neck Connection Replacement: 手順 5、 2の画像 2
    • First check to see if the button motherboard is not damaged.

    • Next, make sure the wire is not damaged.

    • Then make sure that the connection motherboard is also not damaged.

    • If any of these parts are damaged, then it will need to be replaced.

  6. Les Paul Wireless Guitar Peripheral Neck Connection Replacement: 手順 6、 1の画像 1
    • Check to see if the neck connection chip is not damaged inside of the guitar.

    • Make sure that all 8 prongs of the chip are not damaged or broken.

    • If the neck chip is damaged then it will need to be replaced.

  7. Les Paul Wireless Guitar Peripheral Neck Connection Replacement: 手順 7、 3の画像 1 Les Paul Wireless Guitar Peripheral Neck Connection Replacement: 手順 7、 3の画像 2 Les Paul Wireless Guitar Peripheral Neck Connection Replacement: 手順 7、 3の画像 3
    • The lock mechanism may be another reason for trouble in your neck connection.

    • Use the guitar tear down to open the guitar to this point.

    • Start by unscrewing the two screws holding down the main connection parts. The first screw is 1 cm and the second screw is 0.8 cm.

  8. Les Paul Wireless Guitar Peripheral Neck Connection Replacement: 手順 8、 1の画像 1
    • Take the spring off the main connection mechanism. It should come off pretty easily.

    • If this spring is broken or snapped, then it will need to be replaced.

  9. Les Paul Wireless Guitar Peripheral Neck Connection Replacement: 手順 9、 2の画像 1 Les Paul Wireless Guitar Peripheral Neck Connection Replacement: 手順 9、 2の画像 2
    • Pull out the main connection mechanism.

    • Make sure that it is not broken or it will need to be replaced.

    • This can be put back together by inserting the mechanism again, attaching the spring and screwing the two screws back in place.

終わりに

To reassemble your device, follow these instructions in reverse order.

2 の人々がこのガイドを完成させました。

作成者

6人の作成者と共同で作成されました。

Chris

メンバー登録日: 10/18/13

881 ポイント

6のガイドは作成済み

0 件のコメント

コメントを追加

統計データ:

過去 24時間: 0

過去 7 日: 12

過去 30 日: 58

今までの合計 11,687