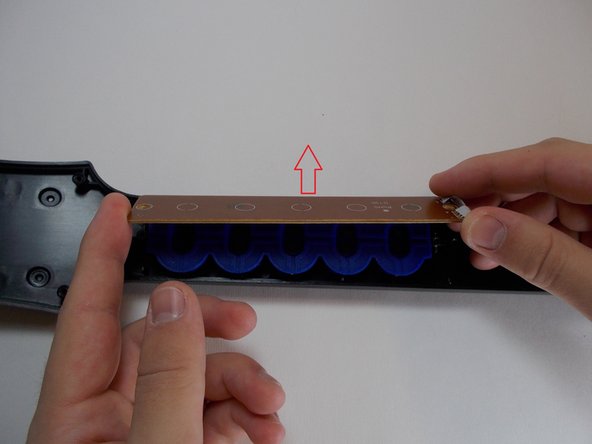
メインコンテンツにスキップ

Les Paul Wireless Guitar Peripheral Fret Buttons Replacement

必要な工具と部品

  1. Les Paul Wireless Guitar Peripheral Fret Buttons Replacement, Fret Buttons: 手順 1、 1の画像 1
    • Pull the Lock on the back of the body to detach the neck from the body.

  2. Les Paul Wireless Guitar Peripheral Fret Buttons Replacement: 手順 2、 2の画像 1 Les Paul Wireless Guitar Peripheral Fret Buttons Replacement: 手順 2、 2の画像 2
    • Remove the 10 screws (each are 1 cm long) on the back of the neck using a T-10 Torx security screwdriver.

    • Remove the back of the neck.

  3. Les Paul Wireless Guitar Peripheral Fret Buttons Replacement: 手順 3、 2の画像 1 Les Paul Wireless Guitar Peripheral Fret Buttons Replacement: 手順 3、 2の画像 2
    • Unscrew the two screws on the fret PCB using a PH1 Phillips head screwdriver. Each screw is 0.8 cm.

    • Remove the fret PCB

    • The fret PCB is in very tight. Be careful not to break it.

    • The connector from the neck to the body can easily slide out of place. Make sure it is in position before closing the neck

  4. Les Paul Wireless Guitar Peripheral Fret Buttons Replacement: 手順 4、 1の画像 1
    • Remove the blue fret button pad.

    • This pad should not be attached in any way

  5. Les Paul Wireless Guitar Peripheral Fret Buttons Replacement: 手順 5、 2の画像 1 Les Paul Wireless Guitar Peripheral Fret Buttons Replacement: 手順 5、 2の画像 2
    • The fret buttons should now easily slide out.

終わりに

To reassemble your device, follow these instructions in reverse order.

6 の人々がこのガイドを完成させました。

作成者

6人の作成者と共同で作成されました。

Chris

メンバー登録日: 10/18/13

881 ポイント

6のガイドは作成済み

コメント 1 件

There are actually 12 screws in Step2. Just in case anyone is confused by that; starting from the right side we have a pair lined horizontally, pair lined vertically, pair lined horizontally....

The two that are vertically between the other two pairs, are not marked in the photo.

Vynneve - 返信

コメントを追加

統計データ:

過去 24時間: 2

過去 7 日: 26

過去 30 日: 108

今までの合計 20,663