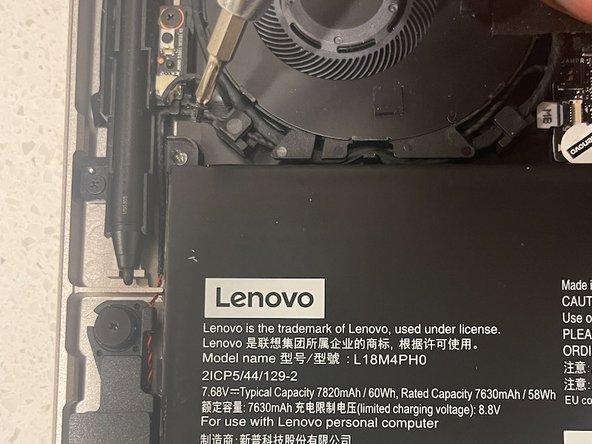
メインコンテンツにスキップ

Lenovo Yoga C940-14IIL Battery Replacement

必要な工具と部品

  1. Lenovo Yoga C940-14IIL Battery Replacement, Battery: 手順 1、 1の画像 1
    • Flip over the laptop so that the underside is facing you.

  2. Lenovo Yoga C940-14IIL Battery Replacement: 手順 2、 3の画像 1 Lenovo Yoga C940-14IIL Battery Replacement: 手順 2、 3の画像 2 Lenovo Yoga C940-14IIL Battery Replacement: 手順 2、 3の画像 3
    • Using a plastic opening tool, remove the rubber foot.

  3. Lenovo Yoga C940-14IIL Battery Replacement: 手順 3、 3の画像 1 Lenovo Yoga C940-14IIL Battery Replacement: 手順 3、 3の画像 2 Lenovo Yoga C940-14IIL Battery Replacement: 手順 3、 3の画像 3
    • Using the Phillips #0 screwdriver, remove the three screws underneath the rubber foot.

  4. Lenovo Yoga C940-14IIL Battery Replacement: 手順 4、 3の画像 1 Lenovo Yoga C940-14IIL Battery Replacement: 手順 4、 3の画像 2 Lenovo Yoga C940-14IIL Battery Replacement: 手順 4、 3の画像 3
    • Using the T5 Torx screwdriver, remove the four remaining screws on the outside of the frame.

  5. Lenovo Yoga C940-14IIL Battery Replacement: 手順 5、 3の画像 1 Lenovo Yoga C940-14IIL Battery Replacement: 手順 5、 3の画像 2 Lenovo Yoga C940-14IIL Battery Replacement: 手順 5、 3の画像 3
    • Starting at the top and working around, carefully pry open the bottom cover.

  6. Lenovo Yoga C940-14IIL Battery Replacement: 手順 6、 3の画像 1 Lenovo Yoga C940-14IIL Battery Replacement: 手順 6、 3の画像 2 Lenovo Yoga C940-14IIL Battery Replacement: 手順 6、 3の画像 3
    • It is ok to use a little force when working around. Don't panic if you hear a few pops as you are doing this.

    • Remove the back cover from the device.

  7. Lenovo Yoga C940-14IIL Battery Replacement: 手順 7、 3の画像 1 Lenovo Yoga C940-14IIL Battery Replacement: 手順 7、 3の画像 2 Lenovo Yoga C940-14IIL Battery Replacement: 手順 7、 3の画像 3
    • The battery is held in place by four screws, one of which is hidden.

    • Remove this small piece of rubber is covering one of the screws with your fingers.

  8. Lenovo Yoga C940-14IIL Battery Replacement: 手順 8、 2の画像 1 Lenovo Yoga C940-14IIL Battery Replacement: 手順 8、 2の画像 2
    • Use the Phillips #0 screwdriver to remove the four screws securing the battery to the device.

  9. Lenovo Yoga C940-14IIL Battery Replacement: 手順 9、 2の画像 1 Lenovo Yoga C940-14IIL Battery Replacement: 手順 9、 2の画像 2
    • To complete the removal of the battery, disconnect the ribbon cable connecting the battery to the computer.

  10. Lenovo Yoga C940-14IIL Battery Replacement: 手順 10、 1の画像 1
    • Remove the battery from the device.

終わりに

To reassemble your device, follow these instructions in reverse order.

For optimal performance, after completing this guide, calibrate your newly installed battery.

Take your e-waste to an R2 or e-Stewards certified recycler.

ある他の人がこのガイドを完成しました。

作成者

3人の作成者と共同で作成されました。

Jeremiah Bush

メンバー登録日: 10/26/21

202 ポイント

1ガイドが承認済み

チーム

University of North Texas, Team 4-4, Thomas Fall 2021 University of North Texas, Team 4-4, Thomas Fall 2021人のメンバー

UNT-THOMAS-F21S4G4

3 メンバー

2のガイドは作成済み

4 件のコメント

Thanks a lot for the clear and thorough guidelines, worked like a charm and saved my 2-year old C940 after its original battery has bloated on its own!

Leonid Glazychev - 返信

Purhcased a replacement laptop battery from CanadaLaptopBattery, they shopped it from overseas (AlosteCell). Followed this guide to replace the battery. Replacing that little rubber piece was probably the biggest pain in the butt (the wire for the right speaker wraps around the rubber at the bottom as you squeeze it in). Thanks to the guide, this was one of the rare times I grabbed the right Torx bit first-try! Just a note; My laptop took several minutes after putting the new battery in (as well as being plugged in) to turn on. The laptop was on as indicated by the powerlight on the side, and the laptop was charging (orange light on the other side), but probably took 2-3 minutes to POST (Lenovo logo on screen). Just thought I'd mention that in case anyone freaks out.

Calvin Ing - 返信

Thanks for the helpful instructions! I have a question though: do you think it’s a bigger problem that I didn’t get the little screw underneath the small rubber thing back in? Because the new battery was built in a way that it wouldn’t fit.

lukas.palla - 返信

This does not show the inside of a Yoga C-940. The battery has 5 screws.

Edmund Jones - 返信

コメントを追加

統計データ:

過去 24時間: 8

過去 7 日: 51

過去 30 日: 316

今までの合計 8,732