メインコンテンツにスキップ

Lenovo Yoga 900-13ISK Speakers Replacement

必要な工具と部品

  1. Lenovo Yoga 900-13ISK Speakers Replacement, Back Cover: 手順 1、 2の画像 1 Lenovo Yoga 900-13ISK Speakers Replacement, Back Cover: 手順 1、 2の画像 2
    • Using a T5 Torx screwdriver, remove the ten 5.5 mm screws from the back case of the laptop.

  2. Lenovo Yoga 900-13ISK Speakers Replacement: 手順 2、 3の画像 1 Lenovo Yoga 900-13ISK Speakers Replacement: 手順 2、 3の画像 2 Lenovo Yoga 900-13ISK Speakers Replacement: 手順 2、 3の画像 3
    • Use a spudger to pry open the back case at the hinges of the laptop.

    • There are plastic clips around the perimeter of the case holding down the back cover. These will need to be popped off as the cover is removed.

    • Use your fingers to completely pop off the back cover.

  3. Lenovo Yoga 900-13ISK Speakers Replacement, Battery: 手順 3、 3の画像 1 Lenovo Yoga 900-13ISK Speakers Replacement, Battery: 手順 3、 3の画像 2 Lenovo Yoga 900-13ISK Speakers Replacement, Battery: 手順 3、 3の画像 3
    • Remove the five 3.6 mm screws from the battery with a Phillips #00 screwdriver.

  4. Lenovo Yoga 900-13ISK Speakers Replacement: 手順 4、 3の画像 1 Lenovo Yoga 900-13ISK Speakers Replacement: 手順 4、 3の画像 2 Lenovo Yoga 900-13ISK Speakers Replacement: 手順 4、 3の画像 3
    • Grab the bottom corners of the battery and gently pull the battery until the cable disconnects from the connector on the motherboard.

    • While reassembling, use a plastic spudger to push the battery cable into the connector on the underside of the motherboard. This will be easier to do before the screws are replaced.

  5. Lenovo Yoga 900-13ISK Speakers Replacement, Speakers: 手順 5、 3の画像 1 Lenovo Yoga 900-13ISK Speakers Replacement, Speakers: 手順 5、 3の画像 2 Lenovo Yoga 900-13ISK Speakers Replacement, Speakers: 手順 5、 3の画像 3
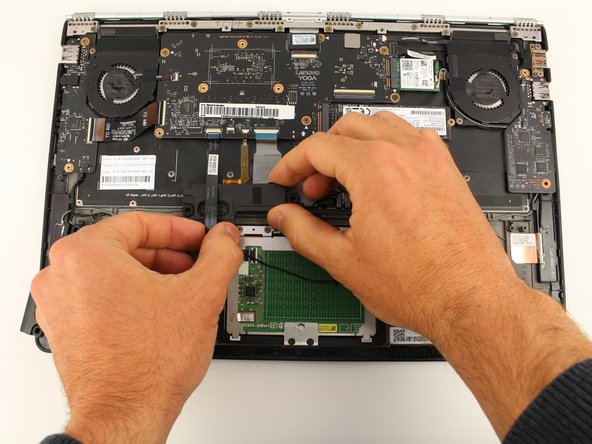
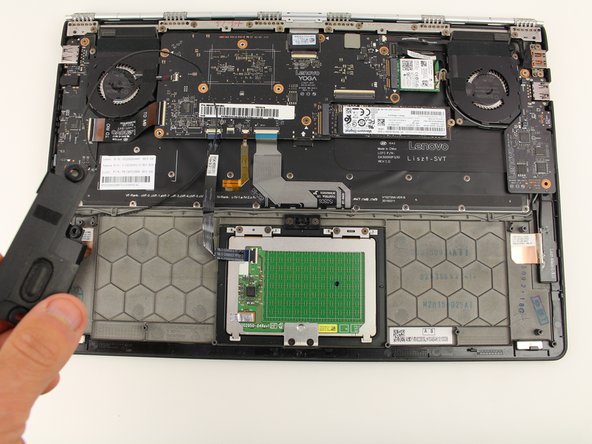
    • Use a pair of blunt nose tweezers or your fingers to pull out the speaker cable from the connector on the lower portion of the daughterboard on the left.

  6. Lenovo Yoga 900-13ISK Speakers Replacement: 手順 6、 3の画像 1 Lenovo Yoga 900-13ISK Speakers Replacement: 手順 6、 3の画像 2 Lenovo Yoga 900-13ISK Speakers Replacement: 手順 6、 3の画像 3
    • Remove the four 2.4 mm Phillips #00 screws from the speakers on either side of the case. (two screws per speaker)

  7. Lenovo Yoga 900-13ISK Speakers Replacement: 手順 7、 3の画像 1 Lenovo Yoga 900-13ISK Speakers Replacement: 手順 7、 3の画像 2 Lenovo Yoga 900-13ISK Speakers Replacement: 手順 7、 3の画像 3
    • Lift up the speaker on the right and start unwinding the cable from the hooks.

    • Thread the right speaker underneath the trackpad ribbon cable.

  8. Lenovo Yoga 900-13ISK Speakers Replacement: 手順 8、 1の画像 1
    • Continue unwinding the speaker cables from the hooks until the entire assembly is free from the case.

終わりに

To reassemble your device, follow these instructions in reverse order.

Austin Blakely

メンバー登録日: 03/11/19

19,506 ポイント

53のガイドは作成済み

チーム

iFixit iFixit人のメンバー

Staff

135 メンバー

16,820のガイドは作成済み

0 件のコメント

コメントを追加

統計データ:

過去 24時間: 2

過去 7 日: 3

過去 30 日: 8

今までの合計 514