はじめに
We have to open the back panel to be able to loosen the hinges, and then remove the display to completely remove them.
必要な工具と部品
-
-
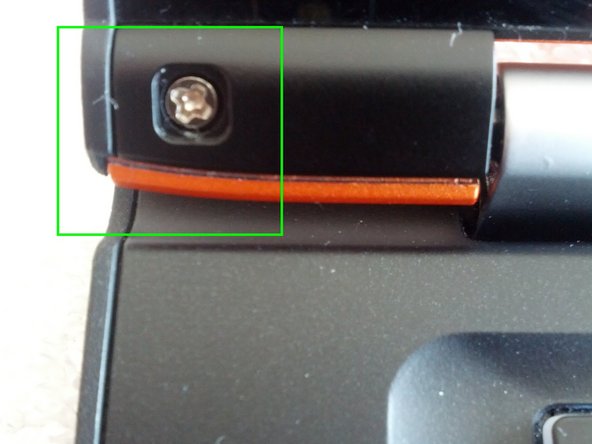
With a T5 Torx screwdriver, remove eleven 6.35 mm screws from the back of the laptop.
-
-
-
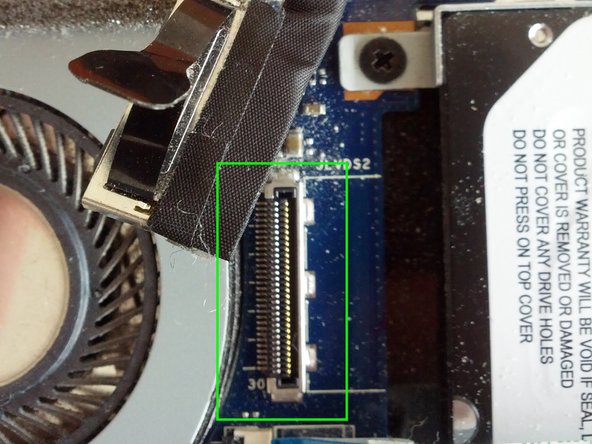
The video connector can be pulled out with the attached noose. Pull gently possibly supported by lifting the connector with a screwdriver.
-
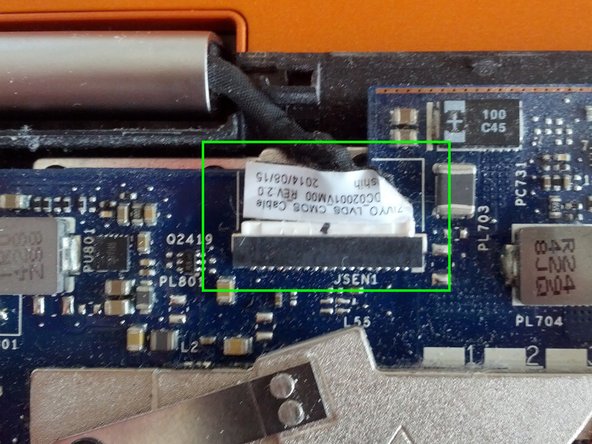
The other connector can be pushed out on the sides with the help of a screwdriver.
-
-
-
-
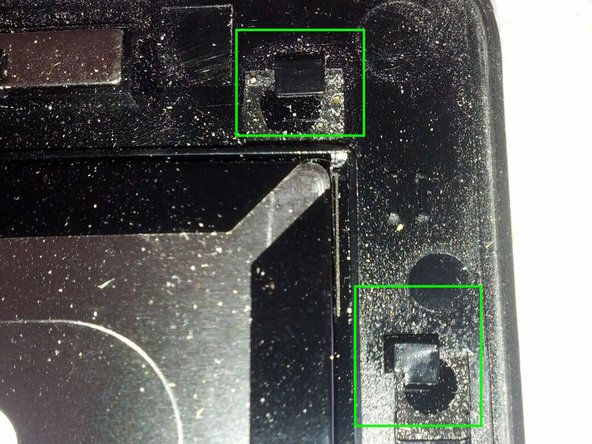
Peel out a small plastic cover, pull out center cover and unscrew left and right cover below the display.
-
-
-
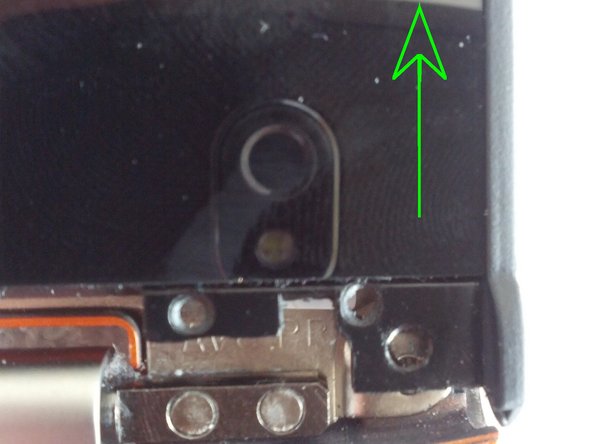
Once the two screws are loosened, the whole display can be shifted up - don't just pull it away.
-
On reassembly, put the display and cover together slightly shifted, and then gently slide the display back into position.
-
-
-
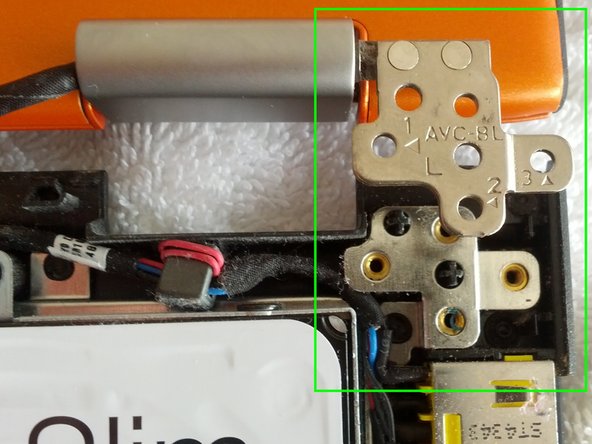
The hinge is attached to the lid with four screws.
-
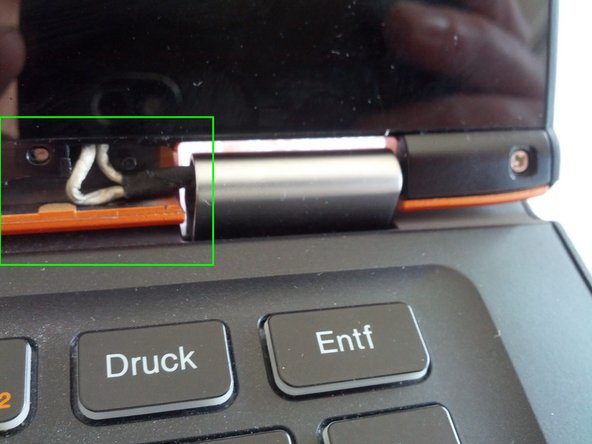
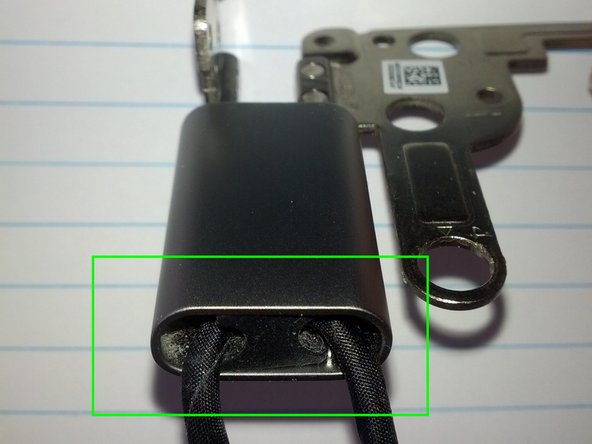
A cable runs through each hinge, you can just pull out the small rubbery holder.
-
Loosen the screw below it to open the hinge.
-
-
-
The stiffness of the hinge can be adjusted by loosening the small nuts. One eighth of a turn might be enough - you will have to repeat adjusting them until the hinge has the right stiffness.
I wish I knew this before letting the hinge breaking the case! I can't seem to be able to publish a photo here, but here's how it looks like if your hinge is so stiff that it breaks part of the keyboard: https://ibb.co/M6LpQpS
I had to add some PTFE lubricant on the hinges in addition to loosening the hinge nuts, or I wasn't even able to move the hinges with my bare hands.
Stéphane L - 返信
-


To reassemble your device, follow these instructions in reverse order.
To reassemble your device, follow these instructions in reverse order.
9 の人々がこのガイドを完成させました。

16 件のコメント
Hi,
Thanks you for your guide. It is amazing but i worry that remove Display guide is not too clear and user may broken the LCD before he stiffness the hinges.
Kim Son
Kim Son Vu - 返信
Can you post the fix for how to tighten hinges for Lenovo IdeaPad Yoga 13 ?
Just followed this howto on my Yoga 2 13: the size of the bolts is 4.5. I know because I only have 4 and 5 sized tools, and they didn't fit. I used pliers too, it works.
Sorry I don’t rember the size of the nuts. IIRC I used pliers to adjust them.
Sven Meier - 返信
That’s a lot of aspect to deal with just because they used a poorly designed hinge.
Unfortunately many people would make their problem worst while trying to resolve it.
Sven, I know this is an old post but I am using your guide to repair the hinge on the same unit. I have the hinge off but I can't get that silver cover off to adjust the nuts. It's completely frozen. Any remedy for that? Do I need to lubricate it somehow? Or is there a trick?
After loosening the screw behind the black rubber part, the cover should just fall off.
Sven Meier - 返信
It was really stuck on there. I managed to get it off with a lot of yanking. But the nuts on the hinge won't budge. Can't loosen, can't tighten. Any thoughts?
Really strange, they were easy to adjust here. Maybe apply some WD-40 or similar, your hinge is special :)
I saw that it was easy on some videos and in your article. Yes, mine are completely stuck even after soaking in WD-40 overnight. I tried all kinds of oil. After a while I wasn't even careful and I just slapped it on there. No amount of cranking worked so I'm going to order a new set of hinges. Thank you so much for responding to me!
Reporting back. Ordered new hinges. so stiff I can't move them. I could barely get the cover off. Can't turn the nuts. Is it just me?
Well. As I'm doing my best in putting it back together, I see the difference. I have a Yoga 2 Pro and the hinges are different. Thank you so much for a terrific tutorial though.
megageil, danke!