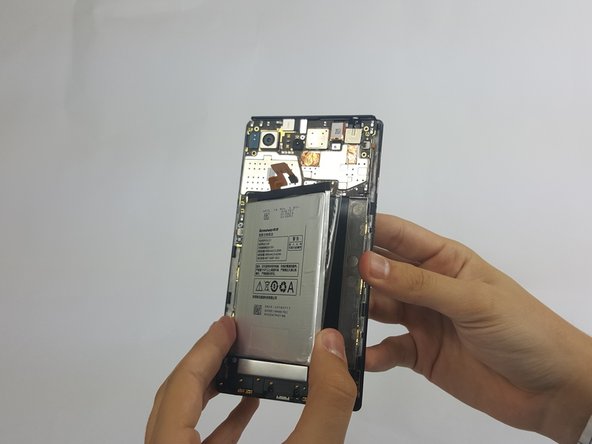
メインコンテンツにスキップ

Lenovo Vibe Z2 Pro Charging Assembly Replacement

必要な工具と部品

  1. Lenovo Vibe Z2 Pro Charging Assembly Replacement, Lenovo Vibe Z2 Pro Backplate Disassembly: 手順 1、 2の画像 1 Lenovo Vibe Z2 Pro Charging Assembly Replacement, Lenovo Vibe Z2 Pro Backplate Disassembly: 手順 1、 2の画像 2
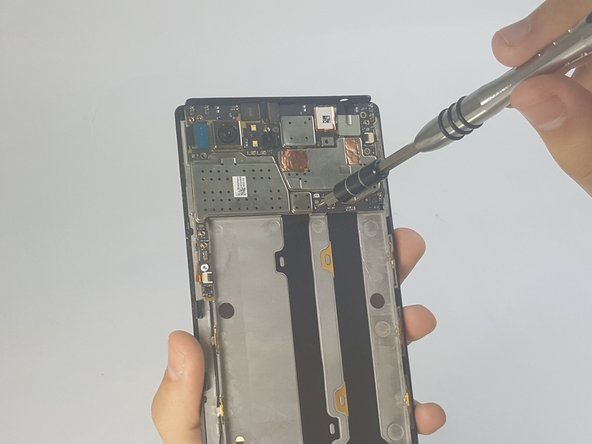
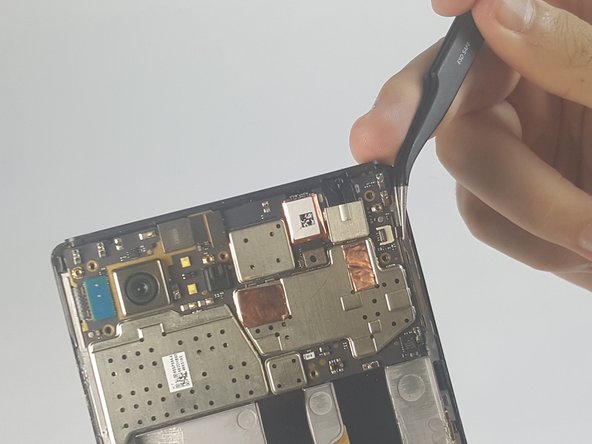
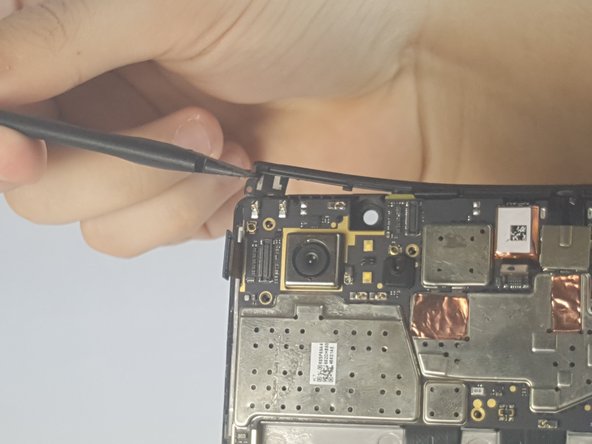
    • Remove the 4.9 mm torx head screws located on the camera plate on the back of the phone

  2. Lenovo Vibe Z2 Pro Charging Assembly Replacement: 手順 2、 1の画像 1
    • Remove the 3.65 mm Torx head screws at the bottom of the phone.

  3. Lenovo Vibe Z2 Pro Charging Assembly Replacement: 手順 3、 2の画像 1 Lenovo Vibe Z2 Pro Charging Assembly Replacement: 手順 3、 2の画像 2
    • Remove the SIM card tray by pushing a pin into the hole on the side of the phone.

  4. Lenovo Vibe Z2 Pro Charging Assembly Replacement: 手順 4、 2の画像 1 Lenovo Vibe Z2 Pro Charging Assembly Replacement: 手順 4、 2の画像 2
    • Push the Spudger along the gap between the phone and the backplate to separate them.

  5. Lenovo Vibe Z2 Pro Charging Assembly Replacement: 手順 5、 1の画像 1
    • Carefully pull the backplate away from the phone.

  6. Lenovo Vibe Z2 Pro Charging Assembly Replacement, Battery: 手順 6、 2の画像 1 Lenovo Vibe Z2 Pro Charging Assembly Replacement, Battery: 手順 6、 2の画像 2
    • Peel away protective the film using your hands.

  7. Lenovo Vibe Z2 Pro Charging Assembly Replacement: 手順 7、 2の画像 1 Lenovo Vibe Z2 Pro Charging Assembly Replacement: 手順 7、 2の画像 2
    • Remove any adhesive strips holding the battery in place gently using a fingernail or spudger.

    • The regular black nylon spudger should be used whenever possible, especially around batteries.

  8. Lenovo Vibe Z2 Pro Charging Assembly Replacement: 手順 8、 1の画像 1
    • Disconnect the orange battery ribbon cable by gently lifting with a spudger.

  9. Lenovo Vibe Z2 Pro Charging Assembly Replacement: 手順 9、 3の画像 1 Lenovo Vibe Z2 Pro Charging Assembly Replacement: 手順 9、 3の画像 2 Lenovo Vibe Z2 Pro Charging Assembly Replacement: 手順 9、 3の画像 3
    • Insert a fingernail or spudger into either side of the battery and lift upward.

    • Remove the battery from phone.

  10. Lenovo Vibe Z2 Pro Charging Assembly Replacement, Motherboard: 手順 10、 3の画像 1 Lenovo Vibe Z2 Pro Charging Assembly Replacement, Motherboard: 手順 10、 3の画像 2 Lenovo Vibe Z2 Pro Charging Assembly Replacement, Motherboard: 手順 10、 3の画像 3
    • Remove the 3.15mm Phillips Head #000 screws from motherboard.

  11. Lenovo Vibe Z2 Pro Charging Assembly Replacement: 手順 11、 3の画像 1 Lenovo Vibe Z2 Pro Charging Assembly Replacement: 手順 11、 3の画像 2 Lenovo Vibe Z2 Pro Charging Assembly Replacement: 手順 11、 3の画像 3
    • Disconnect the two ribbon cables by gently lifting on the black hinges and pulling away with tweezers

  12. Lenovo Vibe Z2 Pro Charging Assembly Replacement: 手順 12、 2の画像 1 Lenovo Vibe Z2 Pro Charging Assembly Replacement: 手順 12、 2の画像 2
    • Gently disconnect the rear-camera connector

  13. Lenovo Vibe Z2 Pro Charging Assembly Replacement: 手順 13、 2の画像 1 Lenovo Vibe Z2 Pro Charging Assembly Replacement: 手順 13、 2の画像 2
    • Gently remove the front-facing camera by gently lifting on the connector tab.

    • Remove the other connector by gently lifting with a spudger.

  14. Lenovo Vibe Z2 Pro Charging Assembly Replacement: 手順 14、 2の画像 1 Lenovo Vibe Z2 Pro Charging Assembly Replacement: 手順 14、 2の画像 2
    • Pry off the plastic brace along the top edge of the phone

  15. Lenovo Vibe Z2 Pro Charging Assembly Replacement: 手順 15、 2の画像 1 Lenovo Vibe Z2 Pro Charging Assembly Replacement: 手順 15、 2の画像 2
    • Remove the antenna connected to the bottom piece of the screen plate

  16. Lenovo Vibe Z2 Pro Charging Assembly Replacement: 手順 16、 1の画像 1
    • Gently lift the motherboard off the frame

    • Pull the camera out from behind the motherboard

  17. Lenovo Vibe Z2 Pro Charging Assembly Replacement: 手順 17、 3の画像 1 Lenovo Vibe Z2 Pro Charging Assembly Replacement: 手順 17、 3の画像 2 Lenovo Vibe Z2 Pro Charging Assembly Replacement: 手順 17、 3の画像 3
    • Using a spudger, disconnect the charging port assembly cable and the screen connection cable.

    • Remove the motherboard completely.

  18. Lenovo Vibe Z2 Pro Charging Assembly Replacement, Charging Assembly & Headphone Jack: 手順 18、 1の画像 1
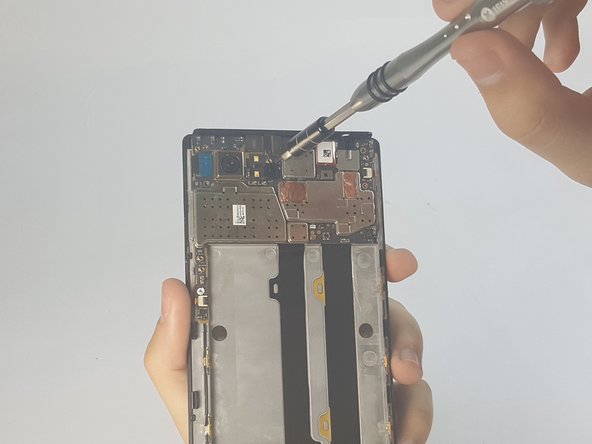
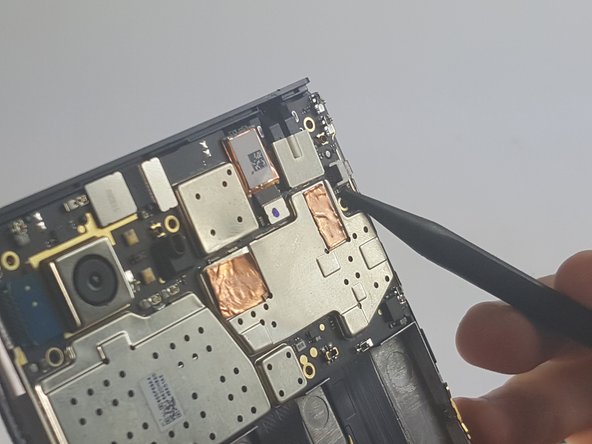
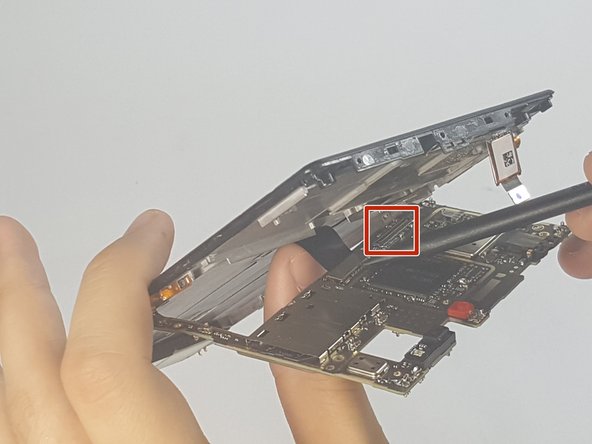
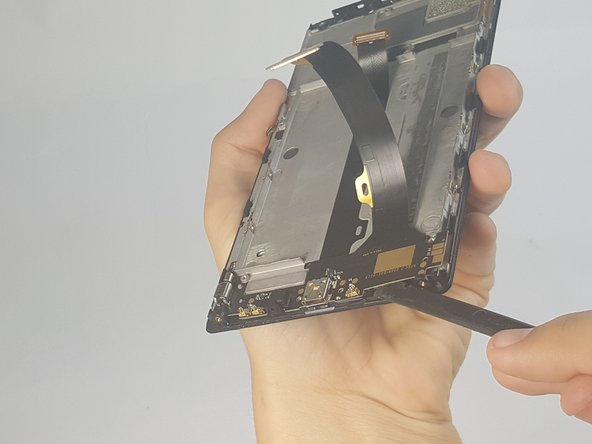
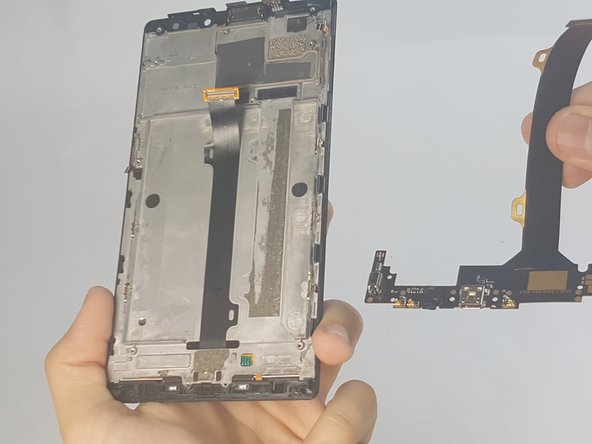
    • Remove the 3.6 mm Phillips head screws from the charging assembly

  19. Lenovo Vibe Z2 Pro Charging Assembly Replacement: 手順 19、 3の画像 1 Lenovo Vibe Z2 Pro Charging Assembly Replacement: 手順 19、 3の画像 2 Lenovo Vibe Z2 Pro Charging Assembly Replacement: 手順 19、 3の画像 3
    • Gently peel the flat cable away from the screen

    • Gently lift the charging assembly using a spudger

終わりに

To reassemble your device, follow these instructions in reverse order.

2 の人々がこのガイドを完成させました。

作成者

2人の作成者と共同で作成されました。

Bryan Sepulveda

メンバー登録日: 09/15/16

547 ポイント

3のガイドは作成済み

チーム

USF Tampa, Team 18-3, Blackwell Fall 2016 USF Tampa, Team 18-3, Blackwell Fall 2016人のメンバー

USFT-BLACKWELL-F16S18G3

4 メンバー

12のガイドは作成済み

0 件のコメント

コメントを追加

統計データ:

過去 24時間: 0

過去 7 日: 3

過去 30 日: 4

今までの合計 1,010