メインコンテンツにスキップ

Lenovo ThinkPad X270 Back Cover Replacement

必要な工具と部品

  1. Lenovo ThinkPad X270 Back Cover Replacement, Remove the micro SIM card tray: 手順 1、 3の画像 1 Lenovo ThinkPad X270 Back Cover Replacement, Remove the micro SIM card tray: 手順 1、 3の画像 2 Lenovo ThinkPad X270 Back Cover Replacement, Remove the micro SIM card tray: 手順 1、 3の画像 3
    • A SIM eject tool or bit isn't long enough to eject the tray.

    • Insert a straightened paper clip into the micro SIM card tray hole on the right edge of the laptop.

    • Press the paper clip firmly into the hole to eject the tray.

    • Remove the tray.

    • When reinserting the tray, slide the arms of the tray into the rectangular metal slot.

  2. Lenovo ThinkPad X270 Back Cover Replacement, Battery information: 手順 2、 2の画像 1 Lenovo ThinkPad X270 Back Cover Replacement, Battery information: 手順 2、 2の画像 2
    • Lay your laptop upside down to access the external battery.

    • Two sliding tabs secure the battery.

  3. Lenovo ThinkPad X270 Back Cover Replacement, Release the left tab: 手順 3、 2の画像 1 Lenovo ThinkPad X270 Back Cover Replacement, Release the left tab: 手順 3、 2の画像 2
    • Slide the left tab, labeled 1, to the unlocked position—it'll click into place and release the left side of the battery.

  4. Lenovo ThinkPad X270 Back Cover Replacement, Remove the battery: 手順 4、 3の画像 1 Lenovo ThinkPad X270 Back Cover Replacement, Remove the battery: 手順 4、 3の画像 2 Lenovo ThinkPad X270 Back Cover Replacement, Remove the battery: 手順 4、 3の画像 3
    • Hold the right tab, labeled 2, in the unlocked position and slide the battery out of its recess.

    • During reassembly, slide the battery into its recess until both tabs engage.

    • Never reuse a deformed or damaged battery—it's a fire hazard. Replace it with a new battery.

  5. Lenovo ThinkPad X270 Back Cover Replacement, Unfasten the back cover: 手順 5、 2の画像 1 Lenovo ThinkPad X270 Back Cover Replacement, Unfasten the back cover: 手順 5、 2の画像 2
    • Use a Phillips screwdriver to loosen the eight captive screws securing the back cover.

    • Don't try to completely remove the screws—they're secured to the back cover with delicate, plastic clips.

  6. Lenovo ThinkPad X270 Back Cover Replacement, Insert an opening pick: 手順 6、 3の画像 1 Lenovo ThinkPad X270 Back Cover Replacement, Insert an opening pick: 手順 6、 3の画像 2 Lenovo ThinkPad X270 Back Cover Replacement, Insert an opening pick: 手順 6、 3の画像 3
    • Plastic clips secure the back cover to the frame. You'll hear and feel the clips release.

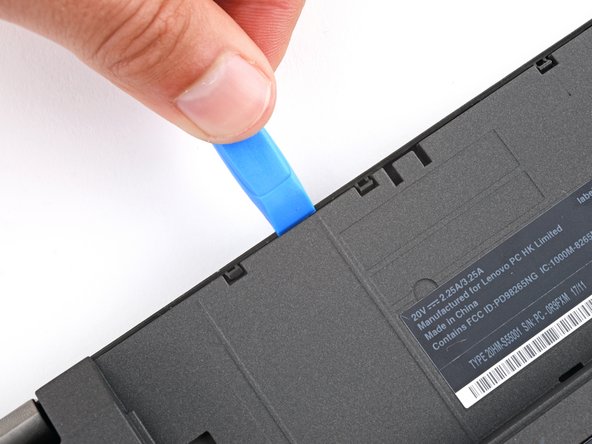
    • Insert the flat side of an opening pick between the bottom right edge of the back cover and frame.

    • Pry up the back cover to release the bottom right clips.

    • Leave the pick inserted in the bottom right corner.

  7. Lenovo ThinkPad X270 Back Cover Replacement, Release the bottom edge clips: 手順 7、 3の画像 1 Lenovo ThinkPad X270 Back Cover Replacement, Release the bottom edge clips: 手順 7、 3の画像 2 Lenovo ThinkPad X270 Back Cover Replacement, Release the bottom edge clips: 手順 7、 3の画像 3
    • During the next two steps, position your pick downward at a 45-degree angle to help release the clips.

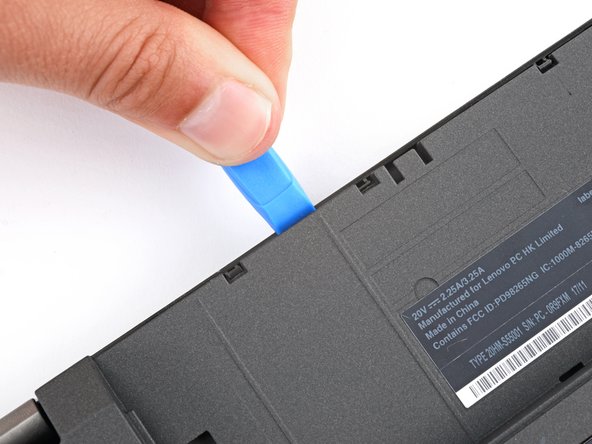
    • Slide the pick to the bottom left corner to release the bottom clips.

  8. Lenovo ThinkPad X270 Back Cover Replacement, Release the left edge clips: 手順 8、 2の画像 1 Lenovo ThinkPad X270 Back Cover Replacement, Release the left edge clips: 手順 8、 2の画像 2
    • Insert your pick in the bottom left corner and slide the pick to the first USB port to release the left clips.

  9. Lenovo ThinkPad X270 Back Cover Replacement, Release the top corner clips: 手順 9、 3の画像 1 Lenovo ThinkPad X270 Back Cover Replacement, Release the top corner clips: 手順 9、 3の画像 2 Lenovo ThinkPad X270 Back Cover Replacement, Release the top corner clips: 手順 9、 3の画像 3
    • Insert an opening tool between the top left corner of the back cover and frame.

    • Pry the back cover up to release the clips securing its top left corner.

    • Repeat the process on the top right corner.

  10. Lenovo ThinkPad X270 Back Cover Replacement, Release the top edge clips: 手順 10、 3の画像 1 Lenovo ThinkPad X270 Back Cover Replacement, Release the top edge clips: 手順 10、 3の画像 2 Lenovo ThinkPad X270 Back Cover Replacement, Release the top edge clips: 手順 10、 3の画像 3
    • Five clips secure the top edge of the back cover.

    • Insert an opening tool in the gap between the back cover and frame, next to one of the clips.

    • Push the opening tool into the gap until the clip releases.

  11. Lenovo ThinkPad X270 Back Cover Replacement: 手順 11、 3の画像 1 Lenovo ThinkPad X270 Back Cover Replacement: 手順 11、 3の画像 2 Lenovo ThinkPad X270 Back Cover Replacement: 手順 11、 3の画像 3
    • Push the opening tool between the back cover and frame at different points along the top edge to release the remaining clips.

  12. Lenovo ThinkPad X270 Back Cover Replacement, Remove the back cover: 手順 12、 3の画像 1 Lenovo ThinkPad X270 Back Cover Replacement, Remove the back cover: 手順 12、 3の画像 2 Lenovo ThinkPad X270 Back Cover Replacement, Remove the back cover: 手順 12、 3の画像 3
    • Remove the back cover.

    • During reassembly, lay the back cover on the frame and press firmly around the perimeter to engage all the clips.

終わりに

To reassemble your device, follow these instructions in reverse order.

ある他の人がこのガイドを完成しました。

作成者

2人の作成者と共同で作成されました。

Spencer Day

メンバー登録日: 09/14/22

53,748 ポイント

394のガイドは作成済み

チーム

iFixit iFixit人のメンバー

Staff

135 メンバー

17,198のガイドは作成済み

コメント 1 件

Świetny poradnik. Polecam

Adam Wiśniewski - 返信

コメントを追加

統計データ:

過去 24時間: 0

過去 7 日: 6

過去 30 日: 44

今までの合計 379