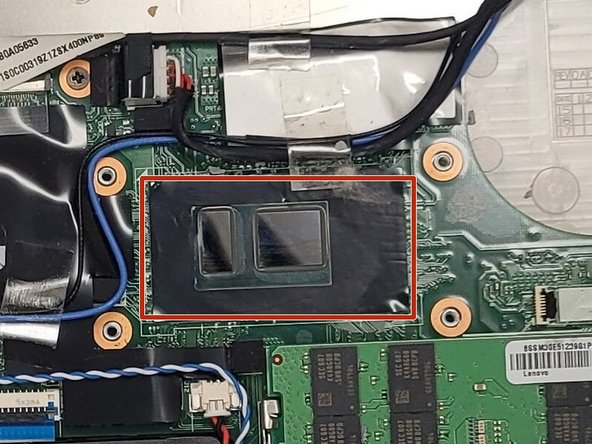
メインコンテンツにスキップ

Lenovo ThinkPad X260 Cooling Fan Replacement

必要な工具と部品

  1. Lenovo ThinkPad X260 Cooling Fan Replacement, External Battery: 手順 1、 2の画像 1 Lenovo ThinkPad X260 Cooling Fan Replacement, External Battery: 手順 1、 2の画像 2
    • Make sure that the device is unplugged and turned off.

    • Flip the laptop from the front to the back.

  2. Lenovo ThinkPad X260 Cooling Fan Replacement: 手順 2、 3の画像 1 Lenovo ThinkPad X260 Cooling Fan Replacement: 手順 2、 3の画像 2 Lenovo ThinkPad X260 Cooling Fan Replacement: 手順 2、 3の画像 3
    • Start by pinching the switches on either side of the battery outwards.

    • At the same time push the external battery, located in the back, upwards.

    • Remove the external battery from the laptop.

  3. Lenovo ThinkPad X260 Cooling Fan Replacement, Back Cover: 手順 3、 3の画像 1 Lenovo ThinkPad X260 Cooling Fan Replacement, Back Cover: 手順 3、 3の画像 2 Lenovo ThinkPad X260 Cooling Fan Replacement, Back Cover: 手順 3、 3の画像 3
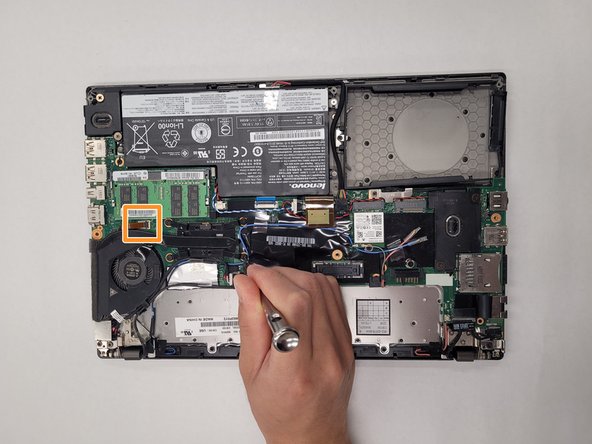
    • Loosen the eight 4.2 mm screws holding the back cover on using a Phillips #1 screwdriver.

    • These screws should be held in place by a small plastic washer which secures them to the cover and should not be loosened. This is illustrated in the third image.

  4. Lenovo ThinkPad X260 Cooling Fan Replacement: 手順 4、 3の画像 1 Lenovo ThinkPad X260 Cooling Fan Replacement: 手順 4、 3の画像 2 Lenovo ThinkPad X260 Cooling Fan Replacement: 手順 4、 3の画像 3
    • Gently pull the cover off and set aside.

    • An iFixit opening tool may make it easier to gently remove the cover.

  5. Lenovo ThinkPad X260 Cooling Fan Replacement, Cooling Fan: 手順 5、 2の画像 1 Lenovo ThinkPad X260 Cooling Fan Replacement, Cooling Fan: 手順 5、 2の画像 2
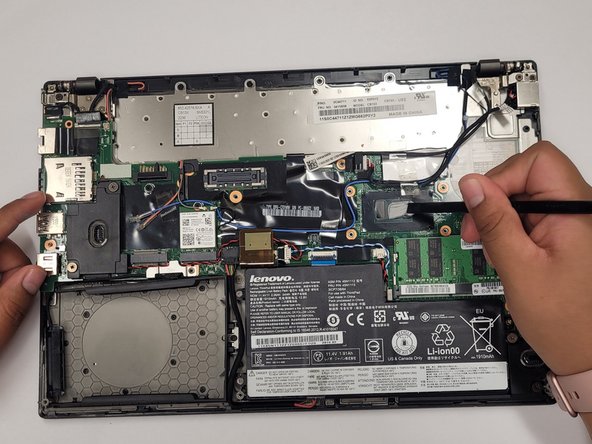
    • Remove the four 2.9 mm screws that hold the cooling fan in order of 4, 3, 2, 1 using a Phillips #1 screwdriver.

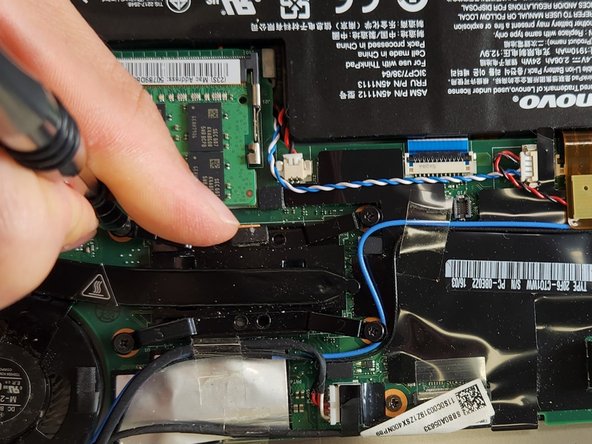
    • Gently lift the plastic retaining flap to disconnect the ribbon cable.

    • The plastic that holds the ribbon wire in place is a black lever on a tan block.

  6. Lenovo ThinkPad X260 Cooling Fan Replacement: 手順 6、 2の画像 1 Lenovo ThinkPad X260 Cooling Fan Replacement: 手順 6、 2の画像 2
    • Gently remove the wires which run along the fan.

    • Remove the old cooling fan.

  7. Lenovo ThinkPad X260 Cooling Fan Replacement: 手順 7、 2の画像 1 Lenovo ThinkPad X260 Cooling Fan Replacement: 手順 7、 2の画像 2
    • Clean the old thermal paste off of the CPU.

    • The CPU, when clean, should have a glossy black finish.

  8. Lenovo ThinkPad X260 Cooling Fan Replacement: 手順 8、 3の画像 1 Lenovo ThinkPad X260 Cooling Fan Replacement: 手順 8、 3の画像 2 Lenovo ThinkPad X260 Cooling Fan Replacement: 手順 8、 3の画像 3
    • Apply new thermal paste to the CPU.

    • Place the new fan in position and secure by reatching the screws in the order of 1, 2, 3, 4.

終わりに

To reassemble your device, follow these instructions in reverse order.

作成者

3人の作成者と共同で作成されました。

Alexander Webb

メンバー登録日: 12/06/21

193 ポイント

2のガイドは作成済み

チーム

IUPUI, Team 1-3, Harley Summer 2023 IUPUI, Team 1-3, Harley Summer 2023人のメンバー

IUPUI-HARLEY-SU23S1G3

3 メンバー

4のガイドは作成済み

0 件のコメント

コメントを追加

統計データ:

過去 24時間: 1

過去 7 日: 14

過去 30 日: 41

今までの合計 384