メインコンテンツにスキップ

Lenovo ThinkPad X140e Hard Drive Replacement

必要な工具と部品

  1. Lenovo ThinkPad X140e Hard Drive Replacement, Back Panel: 手順 1、 1の画像 1
    • Flip the laptop upside down so that the battery is facing away from you.

    • Battery removal is not necessary to complete this guide.

  2. Lenovo ThinkPad X140e Hard Drive Replacement: 手順 2、 2の画像 1 Lenovo ThinkPad X140e Hard Drive Replacement: 手順 2、 2の画像 2
    • Locate the three 3 mm Phillips #0 screws on the back panel.

    • Remove each screw using a small Phillips #0 screwdriver.

  3. Lenovo ThinkPad X140e Hard Drive Replacement: 手順 3、 1の画像 1
    • Using a small plastic opening tool, pry off the back casing starting at a point closest to you and working around the perimeter of the case.

  4. Lenovo ThinkPad X140e Hard Drive Replacement, Hard Drive: 手順 4、 1の画像 1
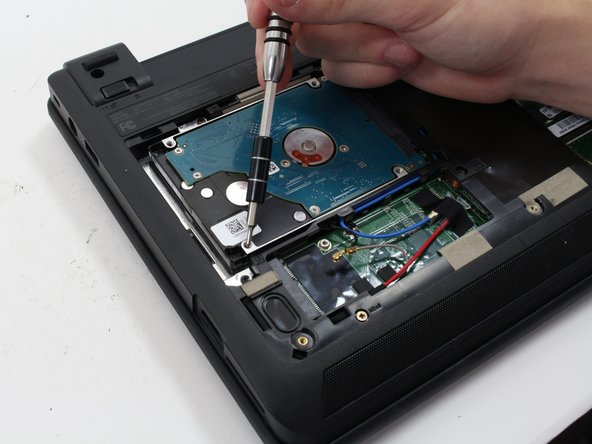
    • After removing the back panel, locate the hard drive located to the far left. It is distinguishable from other parts based on it's rectangular shape.

  5. Lenovo ThinkPad X140e Hard Drive Replacement: 手順 5、 2の画像 1 Lenovo ThinkPad X140e Hard Drive Replacement: 手順 5、 2の画像 2
    • Remove the four 3.5 mm Phillips #0 screws attached on the four corners of the hard drive.

  6. Lenovo ThinkPad X140e Hard Drive Replacement: 手順 6、 2の画像 1 Lenovo ThinkPad X140e Hard Drive Replacement: 手順 6、 2の画像 2
    • Slide the hard drive to the left.

    • Grip the hard drive on both sides and proceed to lift up to remove the hard drive.

終わりに

To reassemble your device, follow these instructions in reverse order.

ある他の人がこのガイドを完成しました。

作成者

3人の作成者と共同で作成されました。

kevin hull

メンバー登録日: 10/05/16

213 ポイント

2のガイドは作成済み

チーム

Cal Poly, Team 20-5, Livingston Fall 2016 Cal Poly, Team 20-5, Livingston Fall 2016人のメンバー

CPSU-LIVINGSTON-F16S20G5

4 メンバー

5のガイドは作成済み

コメント 1 件

How do you reformat the hard-drive? I understand physically replacing the equipment, but how do I reformat it with a windows operating system? My email is amwindham@aol.com.

amwindham - 返信

コメントを追加

統計データ:

過去 24時間: 0

過去 7 日: 2

過去 30 日: 7

今までの合計 1,639