メインコンテンツにスキップ

Lenovo ThinkPad W540 Hard Drive Replacement

必要な工具と部品

  1. Lenovo ThinkPad W540 Hard Drive Replacement, Hard Drive: 手順 1、 2の画像 1 Lenovo ThinkPad W540 Hard Drive Replacement, Hard Drive: 手順 1、 2の画像 2
    • Flip the laptop to the bottom so the backplate is shown.

    • Use a Phillips #0 screwdriver to unscrew the 2 captive screws that secure the backplate.

    • These screws should hold on to the backplate even after removal. So, you shouldn't worry about losing them.

  2. Lenovo ThinkPad W540 Hard Drive Replacement: 手順 2、 2の画像 1 Lenovo ThinkPad W540 Hard Drive Replacement: 手順 2、 2の画像 2
    • Use a Phillips #00 screwdriver to unscrew the single 3 mm screw that secures the hard drive.

  3. Lenovo ThinkPad W540 Hard Drive Replacement: 手順 3、 1の画像 1
    • Lift up the bottom half of the hard drive at a 25 degree angle.

    • Simply pull out the hard drive.

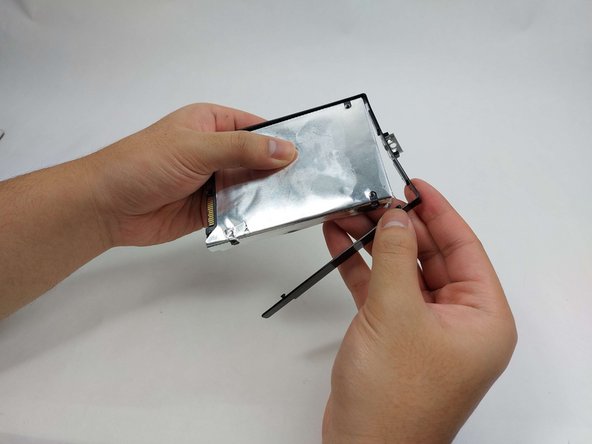
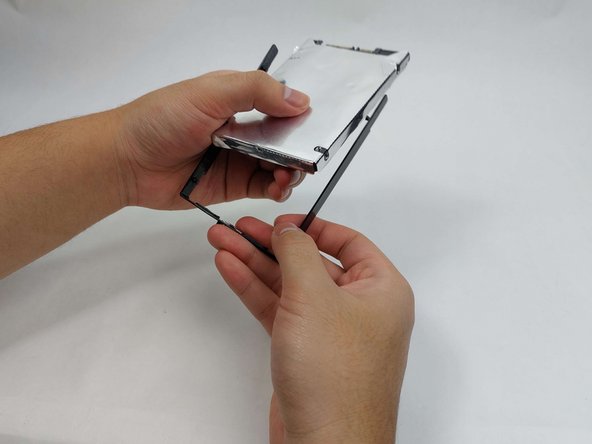
  4. Lenovo ThinkPad W540 Hard Drive Replacement: 手順 4、 3の画像 1 Lenovo ThinkPad W540 Hard Drive Replacement: 手順 4、 3の画像 2 Lenovo ThinkPad W540 Hard Drive Replacement: 手順 4、 3の画像 3
    • Safely remove the plastic guard surrounding both the hard drive and ESD shielding.

  5. Lenovo ThinkPad W540 Hard Drive Replacement: 手順 5、 2の画像 1 Lenovo ThinkPad W540 Hard Drive Replacement: 手順 5、 2の画像 2
    • Carefully removing the ESD shielding surrounding the hard drive.

    • Do not disregard the ESD shielding unless your new hard drive or SSD comes with its own shielding. Failure to do so will lead to severe damage to your device.

終わりに

To reassemble your device, follow these instructions in reverse order.

ある他の人がこのガイドを完成しました。

作成者

2人の作成者と共同で作成されました。

Kevin Dang

メンバー登録日: 10/30/23

333 ポイント

2のガイドは作成済み

チーム

UMass Dartmouth, Team 3-2, Konn Fall 2023 UMass Dartmouth, Team 3-2, Konn Fall 2023人のメンバー

UMASSD-KONN-F23S3G2

3 メンバー

4のガイドは作成済み

0 件のコメント

コメントを追加

統計データ:

過去 24時間: 0

過去 7 日: 5

過去 30 日: 20

今までの合計 115