メインコンテンツにスキップ

このバージョンは誤った内容を含んでいる可能性があります。最新の承認済みスナップショットに切り替えてください。

必要な工具と部品

  1. この手順は未翻訳です。 翻訳を手伝う。

    : 手順 1、 1の画像 1
    • The first step is to remove the track pad left and right click covers. I used a plastic spudger tool to carefully pry and remove.

  2. この手順は未翻訳です。 翻訳を手伝う。

    : 手順 2、 1の画像 1
    • Once you have removed the covers you will see two screws (one on each cover). Using a PH0 screw driver, loosen the screws (they are attached so will not come out).

  3. この手順は未翻訳です。 翻訳を手伝う。

    : 手順 3、 2の画像 1 : 手順 3、 2の画像 2
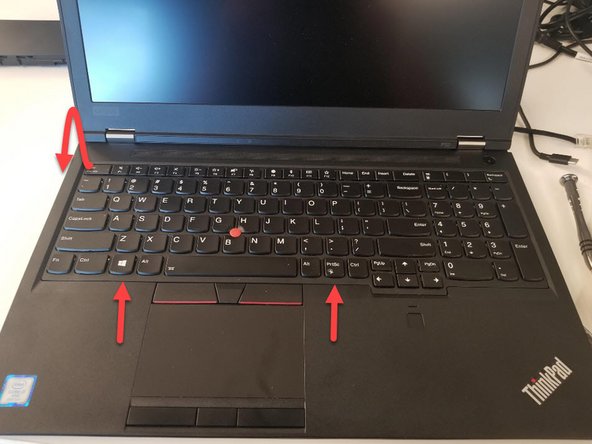
    • Once the screws are loose, you can push the keyboard up to release the tabs holding it on on the bottom. I use a spudger to assist with this.

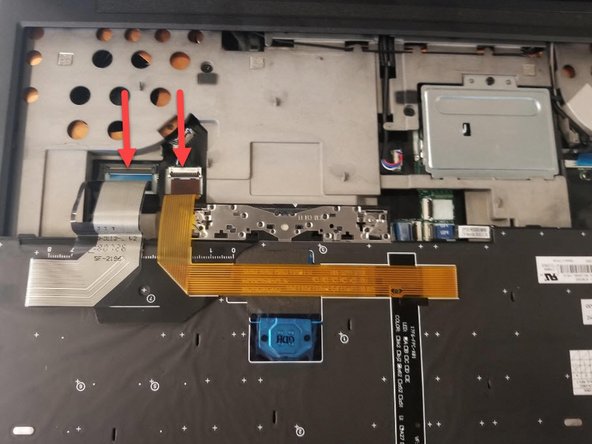
    • Once the tabs are released, you can carefully pull the keyboard down and flip it towards you. Exposing the two cables connecting it to the motherboard.

  4. この手順は未翻訳です。 翻訳を手伝う。

    : 手順 4、 1の画像 1
    • Using a plastic spudger, release the clips holding the cable ribbons on.

    • Remove cable ribbons and keyboard has now been removed.

  5. この手順は未翻訳です。 翻訳を手伝う。

    : 手順 5、 3の画像 1 : 手順 5、 3の画像 2 : 手順 5、 3の画像 3
    • The new keyboard can be attached by running these steps in reverse.

    • First attach ribbon cable

    • The fold keyboard into laptop starting at top and then clip in towards bottom by pulling it down.

    • Then tighten the screws under the left and right click covers

    • Then attach the covers

ゴール

作成者

2人の作成者と共同で作成されました。

Bill

メンバー登録日: 09/17/14

818 ポイント

5のガイドは作成済み

2 件のコメント

This isn’t for the P52s….

James Liu - 返信

Thank you. It is for the P52 model. I don’t know if the P52s is the same as the P52 as far as replacing the keyboard but when I was making the article it auto-populated the P52s and I didn’t change it back. I have made the appropriate change.

Bill -

コメントを追加

統計データ:

過去 24時間: 6

過去 7 日: 30

過去 30 日: 104

今までの合計 5,750