メインコンテンツにスキップ

Lenovo ThinkPad Edge E470 Hard Drive Replacement

必要な工具と部品

  1. Lenovo ThinkPad Edge E470 Hard Drive Replacement, Hard Drive: 手順 1、 1の画像 1
    • Disconnect the power cord from your computer.

  2. Lenovo ThinkPad Edge E470 Hard Drive Replacement: 手順 2、 3の画像 1 Lenovo ThinkPad Edge E470 Hard Drive Replacement: 手順 2、 3の画像 2 Lenovo ThinkPad Edge E470 Hard Drive Replacement: 手順 2、 3の画像 3
    • Restart the computer and press F1 button rapidly to enter BIOS.

    • Select “Config,” then select “Power,” and press Enter.

    • Select “Disable Build-in Battery” and press "Enter."

  3. Lenovo ThinkPad Edge E470 Hard Drive Replacement: 手順 3、 2の画像 1 Lenovo ThinkPad Edge E470 Hard Drive Replacement: 手順 3、 2の画像 2
    • Place the laptop upside down to access the back panel.

    • Loosen the three screws on the back panel using a Phillips #00 screwdriver.

    • Remove the back panel.

  4. Lenovo ThinkPad Edge E470 Hard Drive Replacement: 手順 4、 2の画像 1 Lenovo ThinkPad Edge E470 Hard Drive Replacement: 手順 4、 2の画像 2
    • Disconnect the battery plug.

  5. Lenovo ThinkPad Edge E470 Hard Drive Replacement: 手順 5、 1の画像 1
    • Disconnect the SATA cable for the storage drive from the computer.

  6. Lenovo ThinkPad Edge E470 Hard Drive Replacement: 手順 6、 1の画像 1
    • Loosen the screw on the storage drive using a Phillips #00 screwdriver.

  7. Lenovo ThinkPad Edge E470 Hard Drive Replacement: 手順 7、 1の画像 1
    • Remove the storage drive.

  8. Lenovo ThinkPad Edge E470 Hard Drive Replacement: 手順 8、 2の画像 1 Lenovo ThinkPad Edge E470 Hard Drive Replacement: 手順 8、 2の画像 2
    • Take the storage drive out of the storage drive bracket.

  9. Lenovo ThinkPad Edge E470 Hard Drive Replacement: 手順 9、 1の画像 1
    • Disconnect the SATA cable from the storage drive.

  10. Lenovo ThinkPad Edge E470 Hard Drive Replacement: 手順 10、 2の画像 1 Lenovo ThinkPad Edge E470 Hard Drive Replacement: 手順 10、 2の画像 2
    • Connect the SATA cable to the computer. Remember to push the lip down.

終わりに

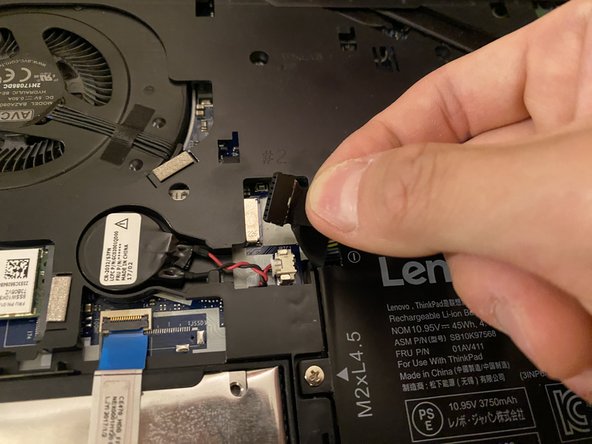
To reassemble your device, follow these instructions in reverse order. Remember to push back the lid on the SATA connector.

2 の人々がこのガイドを完成させました。

作成者

2人の作成者と共同で作成されました。

Jinxiao Zhou

メンバー登録日: 05/29/23

208 ポイント

1ガイドが承認済み

チーム

York University, Team A-10, Allen Summer 2023 York University, Team A-10, Allen Summer 2023人のメンバー

YORK-ALLEN-SU23SAG10

1 メンバー

1のガイドは作成済み

0 件のコメント

コメントを追加

統計データ:

過去 24時間: 2

過去 7 日: 9

過去 30 日: 27

今までの合計 221