メインコンテンツにスキップ

Lenovo Tab S8 Speakers Replacement

必要な工具と部品

  1. Lenovo Tab S8 Speakers Replacement, Battery: 手順 1、 2の画像 1 Lenovo Tab S8 Speakers Replacement, Battery: 手順 1、 2の画像 2
    • Make sure the device is powered off.

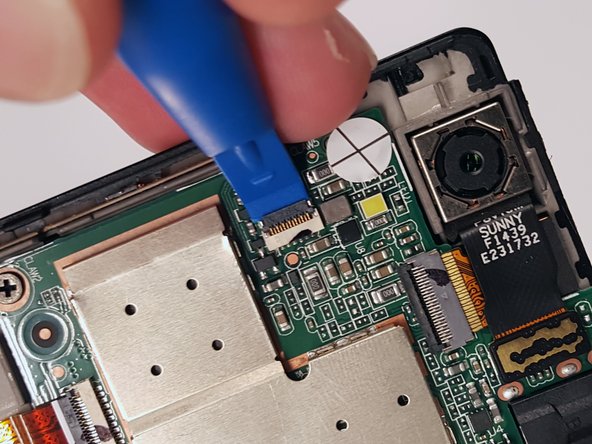
    • Gently insert a spudger into one of the bottom corners between the screen and body case.

    • Slide the spudger along the inside of the crack in order to pry the case open.

    • Be careful of the small volume and power buttons when prying the case with the spudger. They are connected with small pieces of plastic that break easily.

  2. Lenovo Tab S8 Speakers Replacement: 手順 2、 3の画像 1 Lenovo Tab S8 Speakers Replacement: 手順 2、 3の画像 2 Lenovo Tab S8 Speakers Replacement: 手順 2、 3の画像 3
    • After removing the cover, remove the M1.6 x 2 mm screw from the battery cable with the JIS J000 screwdriver.

    • Using screwdriver bits that do not fit in the screw head might strip the screw and render it unusable.

    • Remove the tape by gently scraping the edges up with the spudger.

  3. Lenovo Tab S8 Speakers Replacement: 手順 3、 3の画像 1 Lenovo Tab S8 Speakers Replacement: 手順 3、 3の画像 2 Lenovo Tab S8 Speakers Replacement: 手順 3、 3の画像 3
    この手順で使用する道具:
    Plastic Cards
    $2.99
    購入する
    • Before removing the battery, be sure to disconnect the ribbon cables underneath it. The cables might stick to the battery during removal and cause damage.

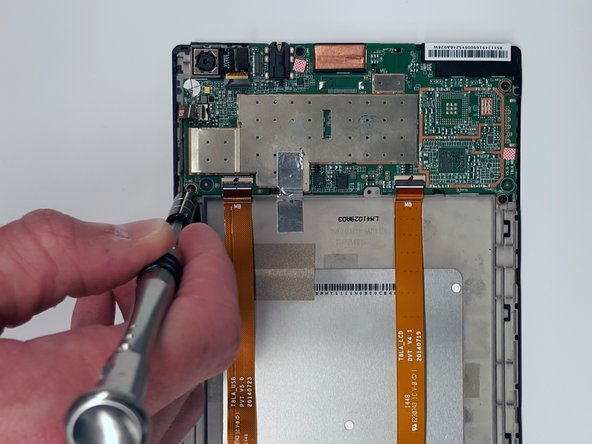
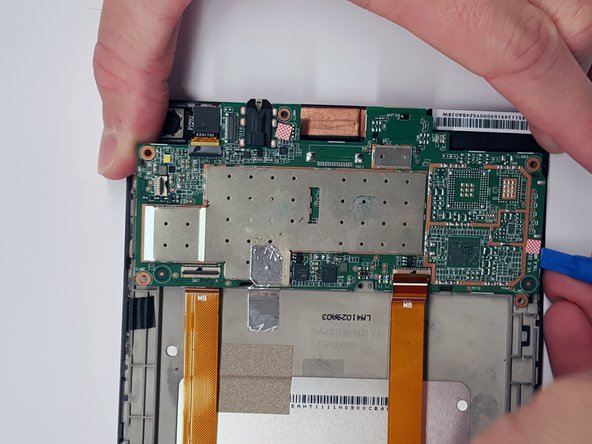
    • Gently lift the flaps on the four ZIF connectors to disconnect the cables.

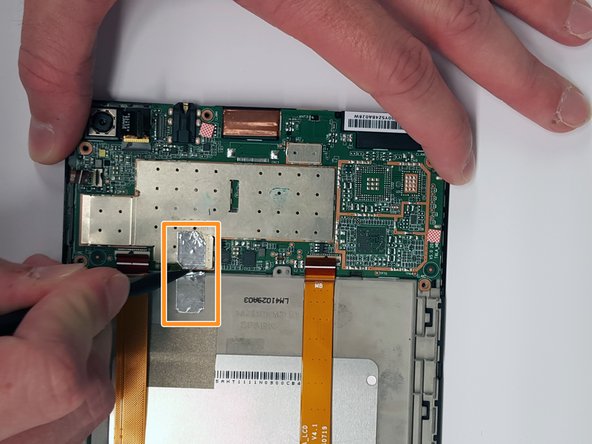
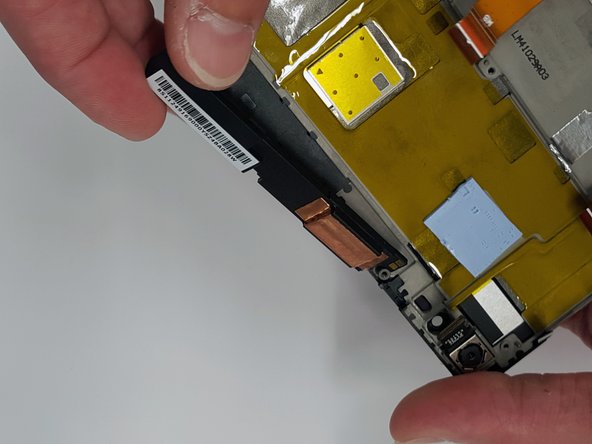
    • Use the plastic card to gently pry the battery from the device.

    • There may be glue holding the battery to the device. Use the spudger to detach any glue while the battery is partially raised by the card.

  4. Lenovo Tab S8 Speakers Replacement, Motherboard: 手順 4、 2の画像 1 Lenovo Tab S8 Speakers Replacement, Motherboard: 手順 4、 2の画像 2
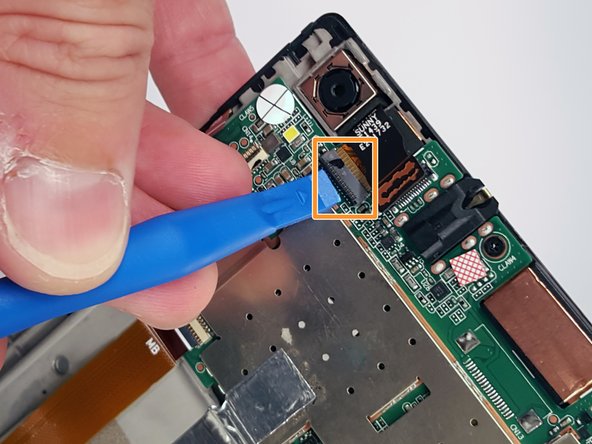
    • Use the tip of a spudger or your fingernail to flip up the small locking flap. Then, you can safely pull the cable out from under the camera.

  5. Lenovo Tab S8 Speakers Replacement: 手順 5、 2の画像 1 Lenovo Tab S8 Speakers Replacement: 手順 5、 2の画像 2
    • Remove the press-fit cable located next to the camera by using opening tool to gently pry it up.

    • Unlock the ZIF connector by lifting the black bar and sliding the ribbon cable out.

  6. Lenovo Tab S8 Speakers Replacement: 手順 6、 3の画像 1 Lenovo Tab S8 Speakers Replacement: 手順 6、 3の画像 2 Lenovo Tab S8 Speakers Replacement: 手順 6、 3の画像 3
    • Remove the five M1.6 x 2 mm screws from the motherboard with the JIS J000 screwdriver.

    • There is one screw hidden under a circular white sticker directly below the camera. Remove the sticker to take out the screw that is underneath it.

    • Cut or remove the piece of silver tape from the motherboard.

  7. Lenovo Tab S8 Speakers Replacement: 手順 7、 3の画像 1 Lenovo Tab S8 Speakers Replacement: 手順 7、 3の画像 2 Lenovo Tab S8 Speakers Replacement: 手順 7、 3の画像 3
    • Use the spudger to gently pry the motherboard out of the frame from each side.

  8. Lenovo Tab S8 Speakers Replacement, Speakers: 手順 8、 3の画像 1 Lenovo Tab S8 Speakers Replacement, Speakers: 手順 8、 3の画像 2 Lenovo Tab S8 Speakers Replacement, Speakers: 手順 8、 3の画像 3
    • Once you have removed the motherboard and the battery, locate both the upper and lower speakers.

    • The lower speaker wire is glued to the back casing of the device, so be gentle when removing the wire.

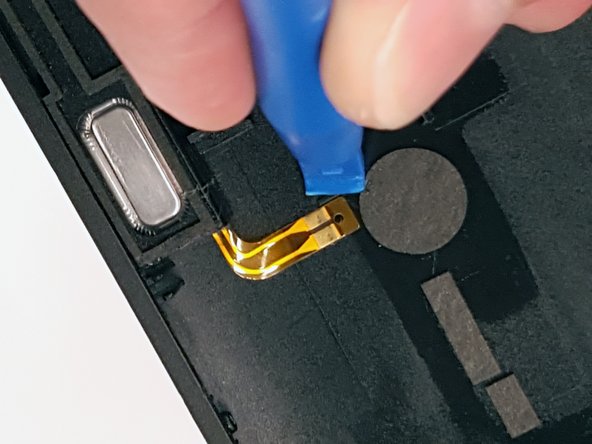
    • Lift up the wire with a plastic opening tool. Make sure this tool has a sharp edge.

終わりに

To reassemble your device, follow these instructions in reverse order.

作成者

3人の作成者と共同で作成されました。

Thomas Rill

メンバー登録日: 08/26/15

338 ポイント

2のガイドは作成済み

チーム

USF Tampa, Team 3-6, Eyestone Fall 2015 USF Tampa, Team 3-6, Eyestone Fall 2015人のメンバー

USFT-EYESTONE-F15S3G6

3 メンバー

11のガイドは作成済み

0 件のコメント

コメントを追加

統計データ:

過去 24時間: 3

過去 7 日: 7

過去 30 日: 11

今までの合計 1,115