メインコンテンツにスキップ

Lenovo Tab 4 8 MicroSD Card Reader Replacement

必要な工具と部品

  1. Lenovo Tab 4 8 MicroSD Card Reader Replacement, Battery: 手順 1、 3の画像 1 Lenovo Tab 4 8 MicroSD Card Reader Replacement, Battery: 手順 1、 3の画像 2 Lenovo Tab 4 8 MicroSD Card Reader Replacement, Battery: 手順 1、 3の画像 3
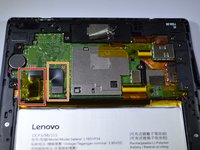
    • Start at the microSD slot.

    • Use the opening pick to slide underneath the back cover of the tablet.

    • Slide the opening pick around the tablet until the back cover is off.

  2. Lenovo Tab 4 8 MicroSD Card Reader Replacement: 手順 2、 3の画像 1 Lenovo Tab 4 8 MicroSD Card Reader Replacement: 手順 2、 3の画像 2 Lenovo Tab 4 8 MicroSD Card Reader Replacement: 手順 2、 3の画像 3
    • Remove the 8 screws with a Phillips #000 screwdriver [bit].

    • There is a screw under the blue "s" sticker.

    • Remove tape holding plate down.

    • Use precision tweezers or your fingers to remove plate.

  3. Lenovo Tab 4 8 MicroSD Card Reader Replacement: 手順 3、 2の画像 1 Lenovo Tab 4 8 MicroSD Card Reader Replacement: 手順 3、 2の画像 2
    • Remove yellow tape.

    • Use a spudger or plastic opening tool to remove the battery's ribbon cable from the motherboard.

  4. Lenovo Tab 4 8 MicroSD Card Reader Replacement: 手順 4、 3の画像 1 Lenovo Tab 4 8 MicroSD Card Reader Replacement: 手順 4、 3の画像 2 Lenovo Tab 4 8 MicroSD Card Reader Replacement: 手順 4、 3の画像 3
    • Gently pull on the two stretch release adhesive strips. Do not pull up, pull away from battery.

    • Once the tabs are off, lift the battery up from the frame.

    • Do not bend or puncture the battery.

  5. Lenovo Tab 4 8 MicroSD Card Reader Replacement, MicroSD Card Reader: 手順 5、 2の画像 1 Lenovo Tab 4 8 MicroSD Card Reader Replacement, MicroSD Card Reader: 手順 5、 2の画像 2
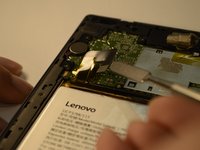
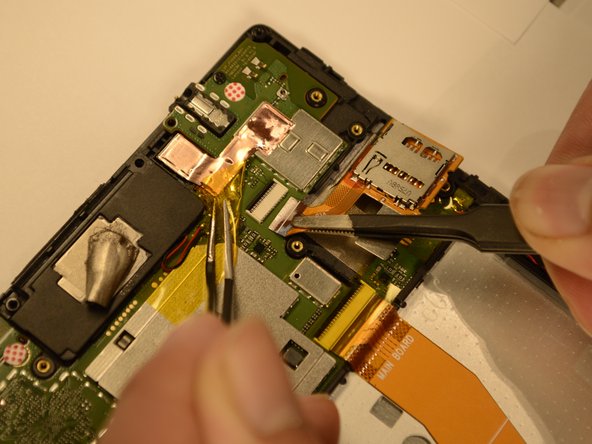
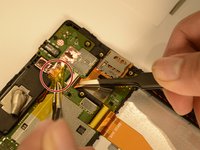
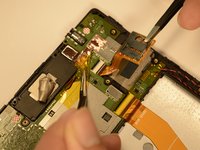
    • There is a yellow tape holding the microSD card reader connector. Use tweezers to hold down the tape.

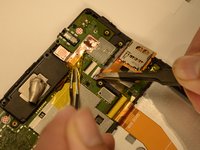
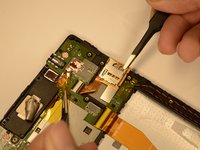
    • Gently lift the tab on the microSD card reader's ZIF connector, and gently pull the ribbon cable free.

  6. Lenovo Tab 4 8 MicroSD Card Reader Replacement: 手順 6、 2の画像 1 Lenovo Tab 4 8 MicroSD Card Reader Replacement: 手順 6、 2の画像 2
    • Lift the microSD card reader with tweezers or your fingers.

終わりに

To reassemble your device, follow these instructions in reverse order.

作成者

1人の作成者と共同作成されました。

Ivan Chavez

メンバー登録日: 02/06/19

776 ポイント

6のガイドは作成済み

チーム

Purdue University Northwest, Team S2-G4, Hingst Spring 2019 Purdue University Northwest, Team S2-G4, Hingst Spring 2019人のメンバー

PNW-HINGST-S19S2G4

5 メンバー

6のガイドは作成済み

0 件のコメント

コメントを追加

統計データ:

過去 24時間: 1

過去 7 日: 2

過去 30 日: 7

今までの合計 800