メインコンテンツにスキップ

Lenovo N22 Chromebook Wireless Card Replacement

必要な工具と部品

  1. Lenovo N22 Chromebook Wireless Card Replacement, Keyboard: 手順 1、 3の画像 1 Lenovo N22 Chromebook Wireless Card Replacement, Keyboard: 手順 1、 3の画像 2 Lenovo N22 Chromebook Wireless Card Replacement, Keyboard: 手順 1、 3の画像 3
    • Power down the Chromebook before starting the repair.

    • Opening the Chromebook voids the manufacturer warranty.

    • Flip the Chromebook so that the bottom is facing up.

    • Use a Phillips #1 screwdriver to remove the six 6.6 mm screws on the bottom.

    • Use a spudger to remove each of the 4 rubber feet.

    • Use a Phillips #1 screwdriver to remove the four additional screws under the rubber feet.

  2. Lenovo N22 Chromebook Wireless Card Replacement: 手順 2、 3の画像 1 Lenovo N22 Chromebook Wireless Card Replacement: 手順 2、 3の画像 2 Lenovo N22 Chromebook Wireless Card Replacement: 手順 2、 3の画像 3
    • Flip the Chromebook back over and open the screen.

    • Wedge the plastic opening tool between the keyboard and the bottom of the Chromebook.

    • Run the plastic opening tool along the seam between the keyboard and the bottom of the Chromebook until the keyboard moves freely. Several tabs will pop out.

    • It is normal for the tabs to make a loud click when released. The corner tabs will be harder to release than the others and will make a louder click.

  3. Lenovo N22 Chromebook Wireless Card Replacement: 手順 3、 2の画像 1 Lenovo N22 Chromebook Wireless Card Replacement: 手順 3、 2の画像 2
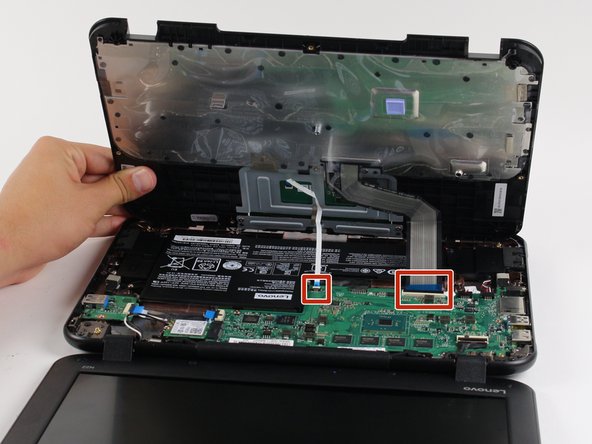
    • Once the keyboard is released, grab the two top corners closest to the screen and slowly lift the keyboard up.

    • Do not lift the keyboard quickly or you might break the two cables that connect the keyboard to the motherboard.

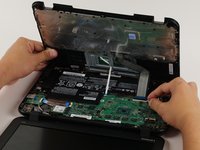
    • Disconnect the cables by lifting up the retaining flaps on the black ZIF connectors.

    • Slowly pull the cables up and out of the connectors.

  4. Lenovo N22 Chromebook Wireless Card Replacement: 手順 4、 1の画像 1
    • Lift the keyboard up and off the back panel, exposing the motherboard and battery.

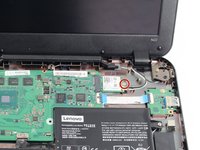
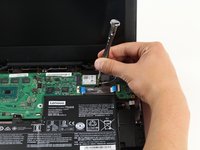
  5. Lenovo N22 Chromebook Wireless Card Replacement, Wireless Card: 手順 5、 2の画像 1 Lenovo N22 Chromebook Wireless Card Replacement, Wireless Card: 手順 5、 2の画像 2
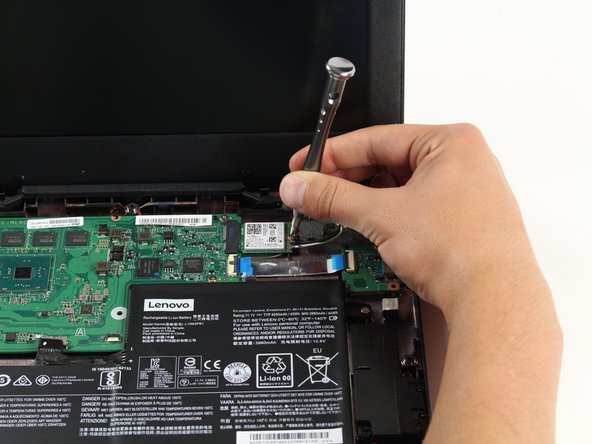
    • Use a Philips #1 screwdriver to remove the 3.6 mm screw from the back panel.

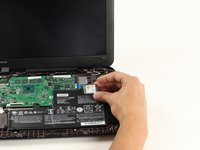
  6. Lenovo N22 Chromebook Wireless Card Replacement: 手順 6、 1の画像 1
    • Gently slide the wireless card to the right to remove it from the standard socket on the motherboard.

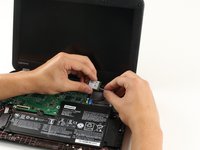
  7. Lenovo N22 Chromebook Wireless Card Replacement: 手順 7、 2の画像 1 Lenovo N22 Chromebook Wireless Card Replacement: 手順 7、 2の画像 2
    • Grab the black and white wires as close to the antenna cable connectors as possible.

    • Gently pull the black and white wires away from the antenna cable connectors on the wireless card.

    • When reinstalling, place the wires on the antenna cable connectors and gently press straight down. The wires should snap back into the connector.

    • When reinstalling, make sure that the white wire and the black wire are put back in their original connectors.

終わりに

To reassemble your device, follow these instructions in reverse order.

2 の人々がこのガイドを完成させました。

作成者

3人の作成者と共同で作成されました。

Megan Louie

メンバー登録日: 04/26/17

323 ポイント

1ガイドが承認済み

チーム

Cal Poly, Team S21-G1, Livingston Spring 2017 Cal Poly, Team S21-G1, Livingston Spring 2017人のメンバー

CPSU-LIVINGSTON-S17S21G1

4 メンバー

14のガイドは作成済み

コメント 1 件

Very well explained and photographed. My first attempt at a laptop repair and this guide made it possible.

Thanks!

Jeff Koskela - 返信

コメントを追加

統計データ:

過去 24時間: 0

過去 7 日: 7

過去 30 日: 62

今までの合計 3,882