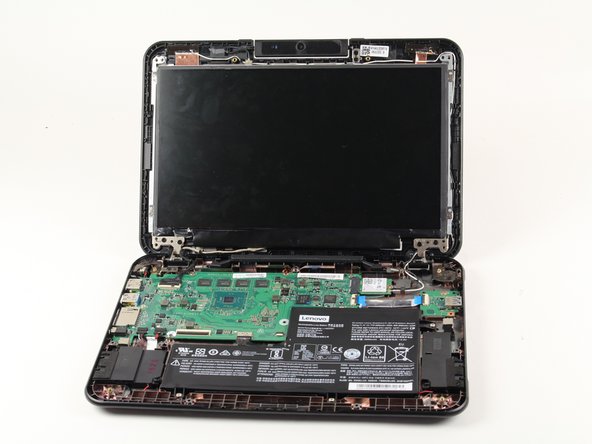
メインコンテンツにスキップ

Lenovo N22 Chromebook Screen Replacement

必要な工具と部品

  1. Lenovo N22 Chromebook Screen Replacement, Keyboard: 手順 1、 3の画像 1 Lenovo N22 Chromebook Screen Replacement, Keyboard: 手順 1、 3の画像 2 Lenovo N22 Chromebook Screen Replacement, Keyboard: 手順 1、 3の画像 3
    • Power down the Chromebook before starting the repair.

    • Opening the Chromebook voids the manufacturer warranty.

    • Flip the Chromebook so that the bottom is facing up.

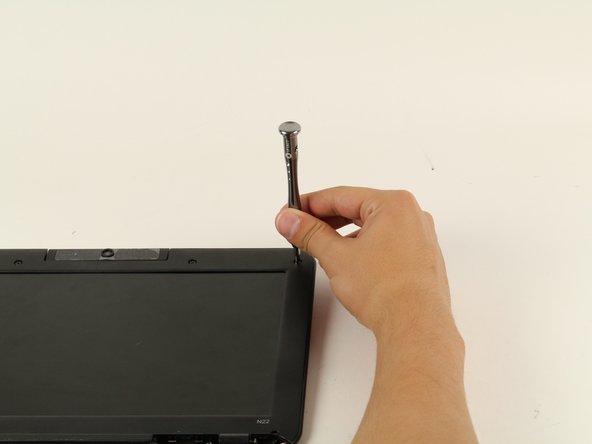
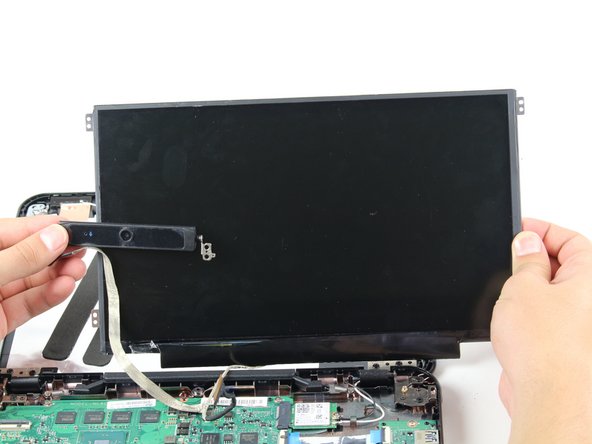
    • Use a Phillips #1 screwdriver to remove the six 6.6 mm screws on the bottom.

    • Use a spudger to remove each of the 4 rubber feet.

    • Use a Phillips #1 screwdriver to remove the four additional screws under the rubber feet.

  2. Lenovo N22 Chromebook Screen Replacement: 手順 2、 3の画像 1 Lenovo N22 Chromebook Screen Replacement: 手順 2、 3の画像 2 Lenovo N22 Chromebook Screen Replacement: 手順 2、 3の画像 3
    • Flip the Chromebook back over and open the screen.

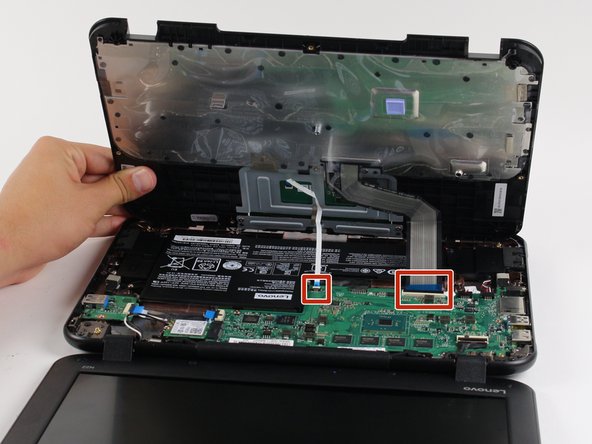
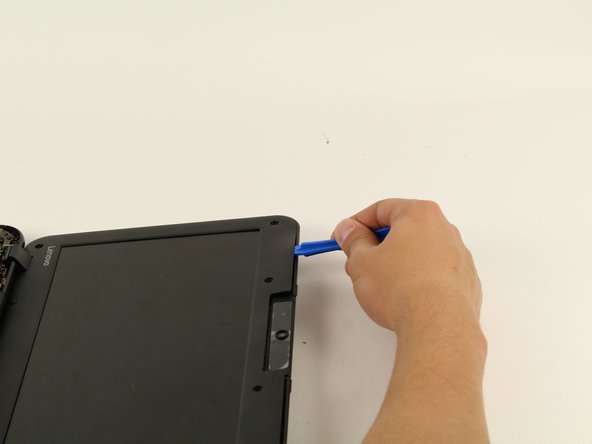
    • Wedge the plastic opening tool between the keyboard and the bottom of the Chromebook.

    • Run the plastic opening tool along the seam between the keyboard and the bottom of the Chromebook until the keyboard moves freely. Several tabs will pop out.

    • It is normal for the tabs to make a loud click when released. The corner tabs will be harder to release than the others and will make a louder click.

  3. Lenovo N22 Chromebook Screen Replacement: 手順 3、 2の画像 1 Lenovo N22 Chromebook Screen Replacement: 手順 3、 2の画像 2
    • Once the keyboard is released, grab the two top corners closest to the screen and slowly lift the keyboard up.

    • Do not lift the keyboard quickly or you might break the two cables that connect the keyboard to the motherboard.

    • Disconnect the cables by lifting up the retaining flaps on the black ZIF connectors.

    • Slowly pull the cables up and out of the connectors.

  4. Lenovo N22 Chromebook Screen Replacement: 手順 4、 1の画像 1
    • Lift the keyboard up and off the back panel, exposing the motherboard and battery.

  5. Lenovo N22 Chromebook Screen Replacement, Screen and Camera: 手順 5、 2の画像 1 Lenovo N22 Chromebook Screen Replacement, Screen and Camera: 手順 5、 2の画像 2
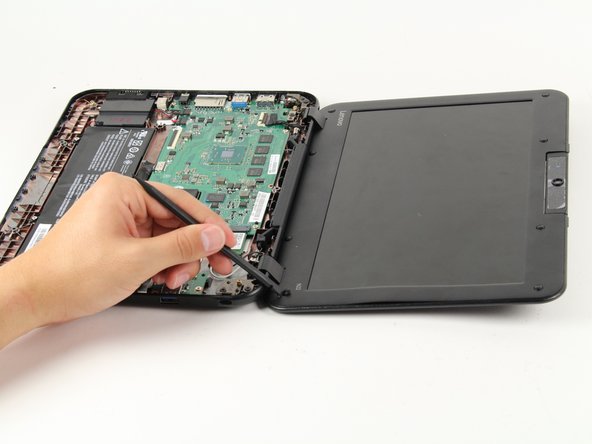
    • Open the Chromebook all the way so that the top and bottom both lay flat on the table.

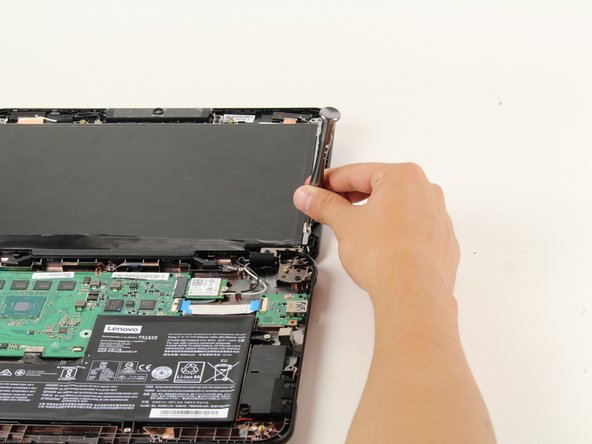
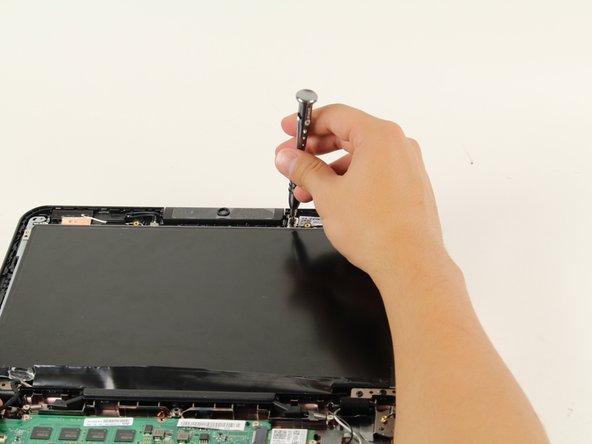
    • Use the flat end of the spudger to remove the six black raised rubber circles on the front of the screen. This reveals the screws.

    • The two raised rubber circles between the laptop hinges do not need to be removed.

  6. Lenovo N22 Chromebook Screen Replacement: 手順 6、 2の画像 1 Lenovo N22 Chromebook Screen Replacement: 手順 6、 2の画像 2
    • Use a Phillips #1 screwdriver to remove the six 4mm screws. Rotate the screws to the left with the screwdriver.

  7. Lenovo N22 Chromebook Screen Replacement: 手順 7、 2の画像 1 Lenovo N22 Chromebook Screen Replacement: 手順 7、 2の画像 2
    • Place the plastic opening tool in the seam between the outer casing and the screen.

    • Run the plastic opening tool along the seam to disconnect the tabs attaching the panel to the outer casing until the panel moves freely.

    • While you run the plastic opening tool along the edge, several tabs will pop out.

    • It is normal for the tabs to make a loud click when released. The corner tabs will be harder to release than the others and will make a louder click when released.

  8. Lenovo N22 Chromebook Screen Replacement: 手順 8、 2の画像 1 Lenovo N22 Chromebook Screen Replacement: 手順 8、 2の画像 2
    • Remove the panel from the front casing by lifting any two corners.

    • Remove the panel slowly to prevent damaging the screen connectors. An adhesive strip holds the bottom edge of the screen casing in place.

  9. Lenovo N22 Chromebook Screen Replacement: 手順 9、 1の画像 1
    • Disconnect the cable that connects the screen to the motherboard by flipping up the small black retaining flap on the ZIF connector.

    • Carefully pull the cable up towards the screen.

  10. Lenovo N22 Chromebook Screen Replacement: 手順 10、 2の画像 1 Lenovo N22 Chromebook Screen Replacement: 手順 10、 2の画像 2
    • Use a Phillips #1 screwdriver to remove the four 2.8 mm screws at each corner of the screen. Turn the screwdriver to the left to remove the screws.

  11. Lenovo N22 Chromebook Screen Replacement: 手順 11、 2の画像 1 Lenovo N22 Chromebook Screen Replacement: 手順 11、 2の画像 2
    • Use a Phillips #1 screwdriver to remove the two 2.8 mm screws to the right of the camera. Turn the screwdriver to the left to remove the screws.

  12. Lenovo N22 Chromebook Screen Replacement: 手順 12、 2の画像 1 Lenovo N22 Chromebook Screen Replacement: 手順 12、 2の画像 2
    • When you lift the screen and camera out of the back casing there will be an adhesive that keeps the screen and camera attached to the metal panel. Lift the screen slowly so you do not damage the metal panel or screen.

    • Slowly peel back the camera adhesive cable from the metal panel to fully remove the screen and camera.

終わりに

To reassemble your device, follow these instructions in reverse order.

8 の人々がこのガイドを完成させました。

作成者

5人の作成者と共同で作成されました。

Rothanak Prak-Austin

メンバー登録日: 04/26/17

279 ポイント

1ガイドが承認済み

チーム

Cal Poly, Team S21-G1, Livingston Spring 2017 Cal Poly, Team S21-G1, Livingston Spring 2017人のメンバー

CPSU-LIVINGSTON-S17S21G1

4 メンバー

14のガイドは作成済み

0 件のコメント

コメントを追加

統計データ:

過去 24時間: 1

過去 7 日: 2

過去 30 日: 14

今までの合計 7,410