メインコンテンツにスキップ

Lenovo Ideatab S6000 Motherboard Replacement

必要な工具と部品

  1. Lenovo Ideatab S6000 Motherboard Replacement, Battery: 手順 1、 1の画像 1
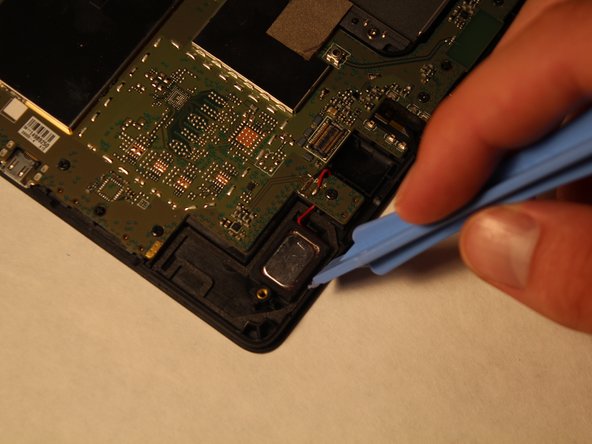
    • Remove the speaker screens by working them loose with a plastic opening tool. You may need to first loosen them with tweezers or a craft knife.

    • These screens are held in place by glue that is hard to remove. Please take your time to ensure that that this step is done correctly.

    I little bit of heat goes a long way when taking off the speaker screens.

    iHelpU.Tech - 返信

  2. Lenovo Ideatab S6000 Motherboard Replacement: 手順 2、 1の画像 1
    • Remove the screws from both of the spots that were covered.

  3. Lenovo Ideatab S6000 Motherboard Replacement: 手順 3、 1の画像 1
    • DO NOT USE A METAL TOOL FOR THIS.

    • Go all around the casing, prying the screen away from the backing with the spudger.

    • It will make a popping sound each time one of the lock tabs is disconnected.

    • Take your time as you move all around the device when prying the backing off.

  4. Lenovo Ideatab S6000 Motherboard Replacement: 手順 4、 1の画像 1
    • Pull off the plastic that is covering the battery cable.

  5. Lenovo Ideatab S6000 Motherboard Replacement: 手順 5、 2の画像 1 Lenovo Ideatab S6000 Motherboard Replacement: 手順 5、 2の画像 2
    • Using either the plastic opening tool or your fingers, gently pull on both sides of the plug to release it.

  6. Lenovo Ideatab S6000 Motherboard Replacement: 手順 6、 1の画像 1
    • Remove the battery by grabbing the tab shown and pulling up.

    • The battery is held to the device by adhesive. Pull the battery up from the tab and it will lift out with a bit of effort.

    MERCI POUR LE TUTORIEL, et courage pour vulgariser la technique!

    KISANTU - 返信

  7. Lenovo Ideatab S6000 Motherboard Replacement, Speakers: 手順 7、 3の画像 1 Lenovo Ideatab S6000 Motherboard Replacement, Speakers: 手順 7、 3の画像 2 Lenovo Ideatab S6000 Motherboard Replacement, Speakers: 手順 7、 3の画像 3
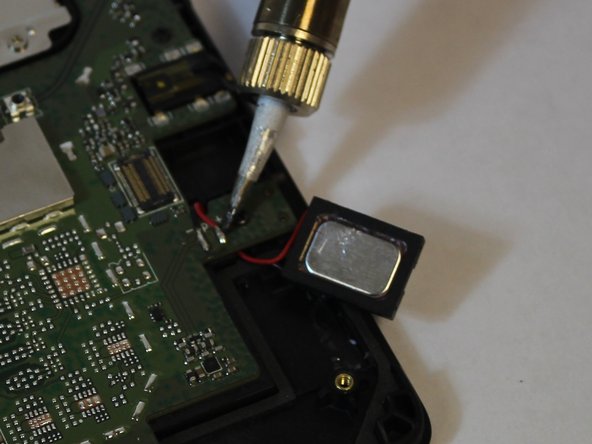
    • The speakers are connected to the tablet by glue and require a lot of prying to remove.

    • Make sure to get all the way under the speakers when prying.

  8. Lenovo Ideatab S6000 Motherboard Replacement: 手順 8、 2の画像 1 Lenovo Ideatab S6000 Motherboard Replacement: 手順 8、 2の画像 2
    • This step is not necessary if you aren't replacing the speakers.

    • To the remove the wires heat the solder connecting the wires to the board, and gently pull on the wires.

    • Remember the placement of the red and black wires.

    • Connect new speakers by soldering the wires onto the board.

  9. Lenovo Ideatab S6000 Motherboard Replacement, Vibration Motor: 手順 9、 1の画像 1
    • Use the spudger to pry up the vibration motor.

  10. Lenovo Ideatab S6000 Motherboard Replacement, Motherboard: 手順 10、 1の画像 1
    • Remove the 3.16mm screws highlighted in red

  11. Lenovo Ideatab S6000 Motherboard Replacement: 手順 11、 1の画像 1
    • Force the ribbon cables out by pulling up the cables through the use of the plastic opening tool.

  12. Lenovo Ideatab S6000 Motherboard Replacement: 手順 12、 1の画像 1
    • Flip the black tab up to unlock the cables by using the plastic opening tool.

  13. Lenovo Ideatab S6000 Motherboard Replacement: 手順 13、 1の画像 1
    • Remove the piece of tape by pulling it up through the use of your hand.

  14. Lenovo Ideatab S6000 Motherboard Replacement: 手順 14、 2の画像 1 Lenovo Ideatab S6000 Motherboard Replacement: 手順 14、 2の画像 2
    • Remove the tape by pulling it up through the use of the plastic opening tool.

  15. Lenovo Ideatab S6000 Motherboard Replacement: 手順 15、 2の画像 1 Lenovo Ideatab S6000 Motherboard Replacement: 手順 15、 2の画像 2
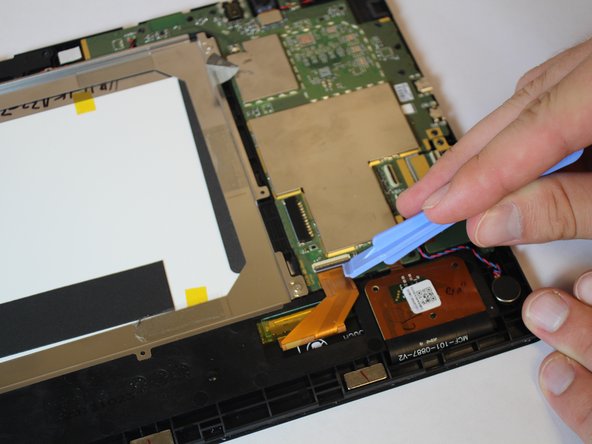
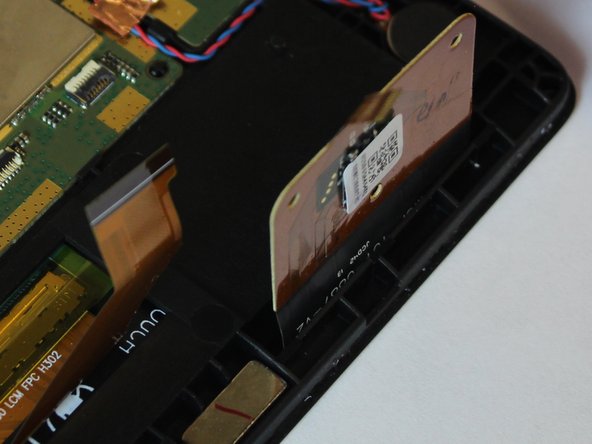
    • Unlike the other small connectors this one does not flip up. You need to pull the connector cable to release this

    • Lift the tab by pulling it up with your hand.

    On this connector, the white portion of the tab lifts up rather than the black portion.

    jpkennard - 返信

    Don't forget the Camera connector on the opposite side! :) Almost missed him.

    Mikel Farley - 返信

  16. Lenovo Ideatab S6000 Motherboard Replacement: 手順 16、 1の画像 1
    • Lift up the cables connected to the tab by using the spudger tool.

  17. Lenovo Ideatab S6000 Motherboard Replacement: 手順 17、 1の画像 1
    • Remove the tablet's Motherboard by lifting it up with your hands.

終わりに

To reassemble your device, follow these instructions in reverse order.

8 の人々がこのガイドを完成させました。

作成者

6人の作成者と共同で作成されました。

Josiah Speed

メンバー登録日: 09/22/14

965 ポイント

4のガイドは作成済み

チーム

USF Tampa, Team 10-4, Brown Fall 2014 USF Tampa, Team 10-4, Brown Fall 2014人のメンバー

USFT-BROWN-F14S10G4

4 メンバー

10のガイドは作成済み

3 件のコメント

Just followed this on my father's tablet, worked like a charm!

One step missing, there's a connector for the camera between steps 16 and 17 that needs pried up before taking the board off.

Other than that THANK YOU!!! :)

Mikel Farley - 返信

Any schematics or board view for this board out there?

DANIEL HOCH - 返信

Best purchase of mother board?

Terry Williams - 返信

コメントを追加

統計データ:

過去 24時間: 0

過去 7 日: 6

過去 30 日: 17

今までの合計 8,204