メインコンテンツにスキップ

Lenovo Ideapad Yoga 2 11 Trackpad Replacement

必要な工具と部品

  1. Lenovo Ideapad Yoga 2 11 Trackpad Replacement, Back Panel: 手順 1、 1の画像 1
    • Begin by turning your closed laptop so that you are looking at the bottom panel.

  2. Lenovo Ideapad Yoga 2 11 Trackpad Replacement: 手順 2、 2の画像 1 Lenovo Ideapad Yoga 2 11 Trackpad Replacement: 手順 2、 2の画像 2
    • Locate the 10 screws (6mm) around the border of the panel.

    • Using the Torx T5 Screwdriver, remove the screws.

  3. Lenovo Ideapad Yoga 2 11 Trackpad Replacement: 手順 3、 1の画像 1
    • Now that the screws are removed, gently lift the back panel upwards to detach it from the rest of your laptop.

  4. Lenovo Ideapad Yoga 2 11 Trackpad Replacement, Battery: 手順 4、 2の画像 1 Lenovo Ideapad Yoga 2 11 Trackpad Replacement, Battery: 手順 4、 2の画像 2
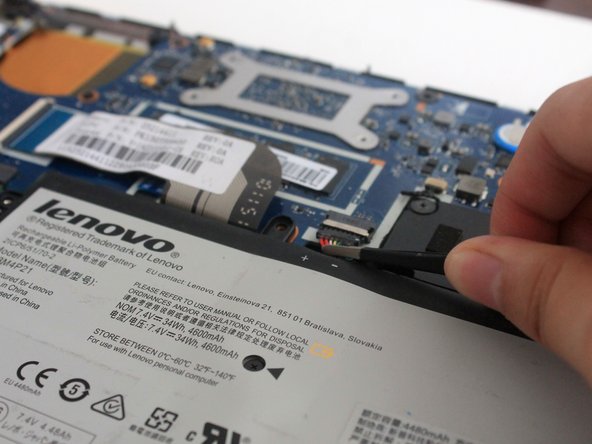
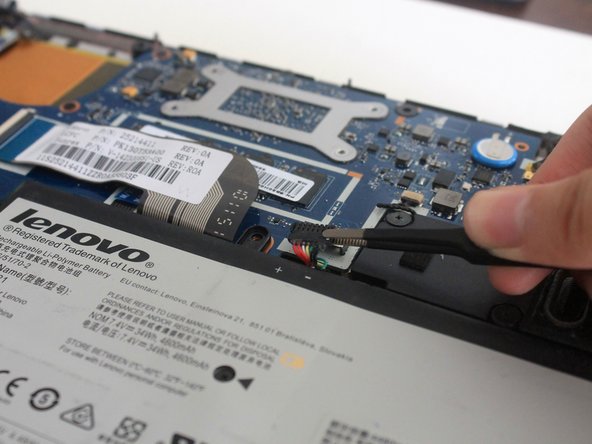
    • Locate the battery in the bottom right corner.

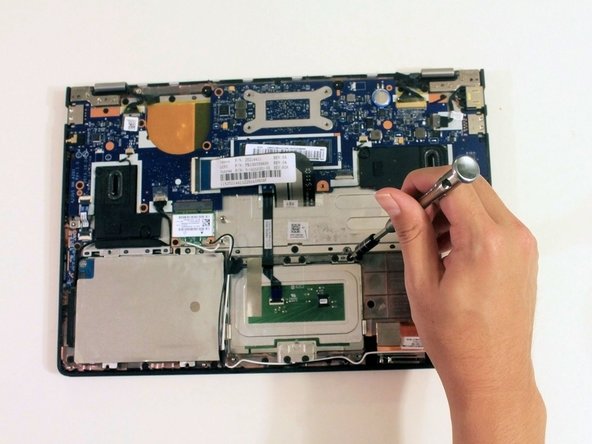
    • Using a Phillips #000, remove the 6 screws (3.5mm) on the border of the battery and the 7th screw (6.5mm) that is in the center of the battery.

  5. Lenovo Ideapad Yoga 2 11 Trackpad Replacement: 手順 5、 3の画像 1 Lenovo Ideapad Yoga 2 11 Trackpad Replacement: 手順 5、 3の画像 2 Lenovo Ideapad Yoga 2 11 Trackpad Replacement: 手順 5、 3の画像 3
    • Locate the cable connecting to the battery. It is located at the top-center of the battery.

    • Use a pair of tweezers and place it so that the tweezer is around the cables. Gently pull the cables towards the battery to disconnect the cable.

  6. Lenovo Ideapad Yoga 2 11 Trackpad Replacement: 手順 6、 2の画像 1 Lenovo Ideapad Yoga 2 11 Trackpad Replacement: 手順 6、 2の画像 2
    • There may be tape around the edge of the battery to secure some wires. Use a pair of tweezers to remove the tape so that the wires are no longer attached to the battery.

  7. Lenovo Ideapad Yoga 2 11 Trackpad Replacement: 手順 7、 2の画像 1 Lenovo Ideapad Yoga 2 11 Trackpad Replacement: 手順 7、 2の画像 2
    • After you have unscrewed the screws, unplugged the cable, and removed the tape and wires, you can remove the battery from your laptop.

  8. Lenovo Ideapad Yoga 2 11 Trackpad Replacement, Trackpad: 手順 8、 1の画像 1
    • After removing the battery, locate the trackpad of your laptop.

  9. Lenovo Ideapad Yoga 2 11 Trackpad Replacement: 手順 9、 2の画像 1 Lenovo Ideapad Yoga 2 11 Trackpad Replacement: 手順 9、 2の画像 2
    • Unscrew 7x 2mm screws holding touchpad in place.

  10. Lenovo Ideapad Yoga 2 11 Trackpad Replacement: 手順 10、 1の画像 1
    • Lift up the plastic cover over the ribbon cable.

  11. Lenovo Ideapad Yoga 2 11 Trackpad Replacement: 手順 11、 1の画像 1
    • Gently tug ribbon cable from its position.

  12. Lenovo Ideapad Yoga 2 11 Trackpad Replacement: 手順 12、 1の画像 1
    • Lift trackpad from the computer.

終わりに

To reassemble your device, follow these instructions in reverse order.

2 の人々がこのガイドを完成させました。

作成者

4人の作成者と共同で作成されました。

Andria Chen

メンバー登録日: 10/17/17

624 ポイント

5のガイドは作成済み

チーム

UC Santa Barbara, Team S1-G5, Weedon Fall 2017 UC Santa Barbara, Team S1-G5, Weedon Fall 2017人のメンバー

UCSB-WEEDON-F17S1G5

5 メンバー

5のガイドは作成済み

0 件のコメント

コメントを追加

統計データ:

過去 24時間: 0

過去 7 日: 3

過去 30 日: 7

今までの合計 790