メインコンテンツにスキップ

Lenovo Ideapad Flex 4-1570 Cooling Fan Replacement

必要な工具と部品

  1. Lenovo Ideapad Flex 4-1570 Cooling Fan Replacement, Back Panel: 手順 1、 1の画像 1
    • Shut down and unplug your laptop before you begin.

  2. Lenovo Ideapad Flex 4-1570 Cooling Fan Replacement: 手順 2、 1の画像 1
    • Remove the nine 6 mm screws using a T5 Torx Screwdriver.

    • Remove the two 10 mm screws using a T5 Torx Screwdriver.

  3. Lenovo Ideapad Flex 4-1570 Cooling Fan Replacement: 手順 3、 1の画像 1
    • Use a plastic opening tool to carefully pry off the back cover.

    • Remove the back cover.

  4. Lenovo Ideapad Flex 4-1570 Cooling Fan Replacement, Cooling Fan: 手順 4、 2の画像 1 Lenovo Ideapad Flex 4-1570 Cooling Fan Replacement, Cooling Fan: 手順 4、 2の画像 2
    • Remove the three 5mm screws using the T5 Torx Screwdriver.

  5. Lenovo Ideapad Flex 4-1570 Cooling Fan Replacement: 手順 5、 2の画像 1 Lenovo Ideapad Flex 4-1570 Cooling Fan Replacement: 手順 5、 2の画像 2
    この手順で使用する道具:
    Tweezers
    $4.99
    購入する
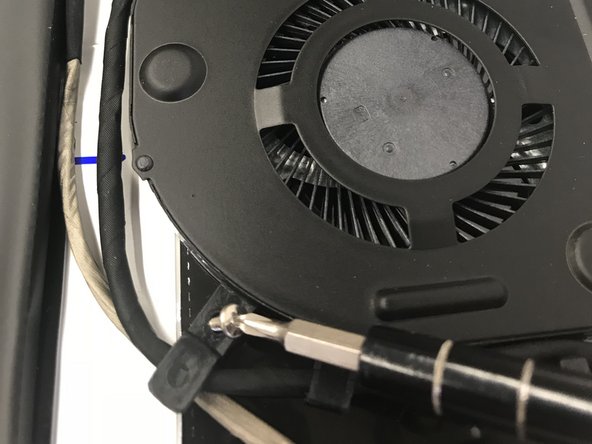
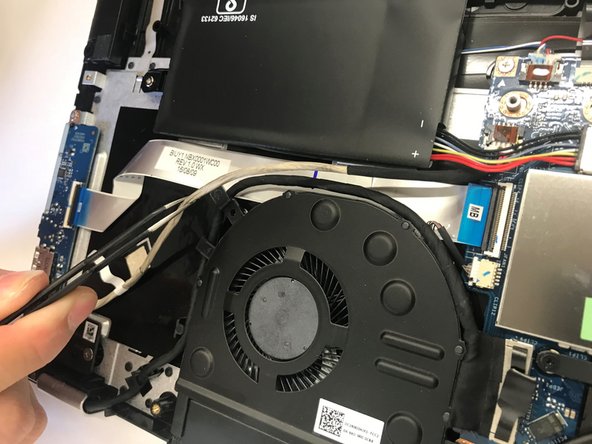
    • Pull black wire and gray wire away from cooling fan clips using the tweezers.

  6. Lenovo Ideapad Flex 4-1570 Cooling Fan Replacement: 手順 6、 3の画像 1 Lenovo Ideapad Flex 4-1570 Cooling Fan Replacement: 手順 6、 3の画像 2 Lenovo Ideapad Flex 4-1570 Cooling Fan Replacement: 手順 6、 3の画像 3
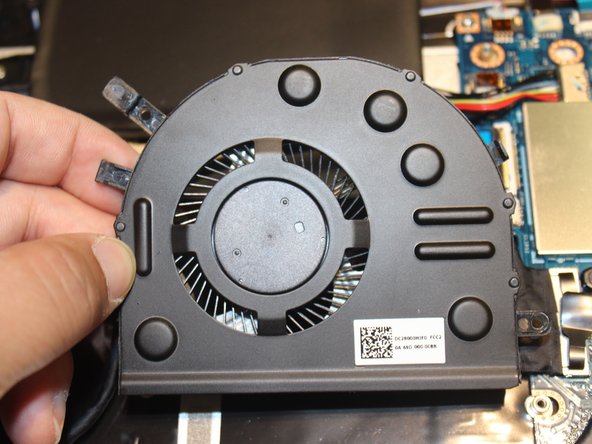
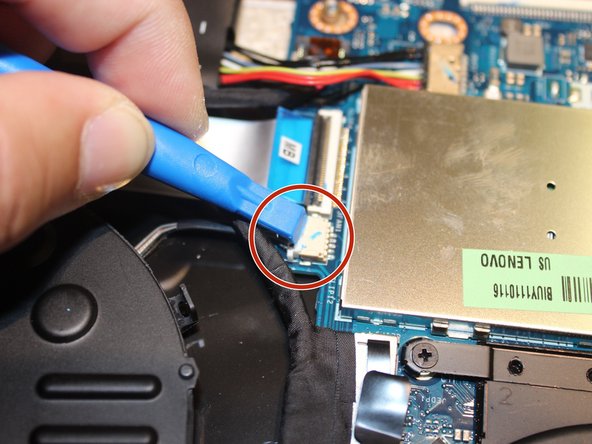
    • Pull out the cooling fan from where it is attached and pull it up until you see where the wire is attached to the motherboard. Using the iFixit Opening Tools, detach the connector.

終わりに

To reassemble your device, follow these instructions in reverse order.

ある他の人がこのガイドを完成しました。

作成者

4人の作成者と共同で作成されました。

Isaiah Vang

メンバー登録日: 10/04/18

669 ポイント

6のガイドは作成済み

チーム

UW Stout, Team S6-G6, Ogden Fall 2018 UW Stout, Team S6-G6, Ogden Fall 2018人のメンバー

UWSTOUT-OGDEN-F18S6G6

4 メンバー

16のガイドは作成済み

0 件のコメント

コメントを追加

統計データ:

過去 24時間: 0

過去 7 日: 3

過去 30 日: 12

今までの合計 364