メインコンテンツにスキップ

Lenovo Ideapad Flex 15 RAM Replacement

必要な工具と部品

  1. Lenovo Ideapad Flex 15 RAM Replacement, Bottom Panel: 手順 1、 2の画像 1 Lenovo Ideapad Flex 15 RAM Replacement, Bottom Panel: 手順 1、 2の画像 2
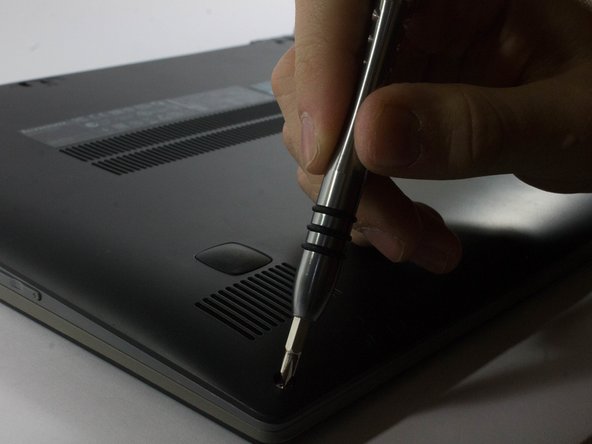
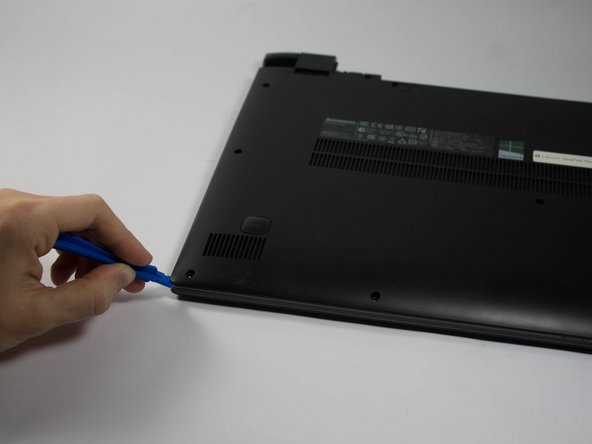
    • Start by removing the feet near the LCD hinge of the laptop to reveal two screws.

    • Using a Phillips #1 screwdriver, remove the top five (30 mm) screws underneath the battery.

  2. Lenovo Ideapad Flex 15 RAM Replacement: 手順 2、 2の画像 1 Lenovo Ideapad Flex 15 RAM Replacement: 手順 2、 2の画像 2
    • Once both feet are removed, two (40 mm) screws will reveal themselves. Unscrew these.

  3. Lenovo Ideapad Flex 15 RAM Replacement: 手順 3、 3の画像 1 Lenovo Ideapad Flex 15 RAM Replacement: 手順 3、 3の画像 2 Lenovo Ideapad Flex 15 RAM Replacement: 手順 3、 3の画像 3
    • Working your way around the outer edges of the Flex 15, remove the 8 (30 mm) outer screws.

  4. Lenovo Ideapad Flex 15 RAM Replacement: 手順 4、 1の画像 1
    • Remove the one (40 mm) screw in the middle of the Flex 15.

  5. Lenovo Ideapad Flex 15 RAM Replacement: 手順 5、 3の画像 1 Lenovo Ideapad Flex 15 RAM Replacement: 手順 5、 3の画像 2 Lenovo Ideapad Flex 15 RAM Replacement: 手順 5、 3の画像 3
    • Using a plastic opening tool, make your way around the edge of the laptop.

    • There is a visible line between the bottom shell of the laptop and the laptop body itself.

  6. Lenovo Ideapad Flex 15 RAM Replacement: 手順 6、 2の画像 1 Lenovo Ideapad Flex 15 RAM Replacement: 手順 6、 2の画像 2
    • Make sure to pry evenly around this edge and only remove the bottom of the laptop when it is fully loose.

    • Using excessive force may break the bottom plastic. There are plastic clips along the edge of the laptop.

  7. Lenovo Ideapad Flex 15 RAM Replacement, RAM: 手順 7、 2の画像 1 Lenovo Ideapad Flex 15 RAM Replacement, RAM: 手順 7、 2の画像 2
    • Once open, locate the RAM stick below the fan on the bottom right corner of the Flex 15.

    • At the same time, using two hands, pull both clips away from the RAM module.

  8. Lenovo Ideapad Flex 15 RAM Replacement: 手順 8、 2の画像 1 Lenovo Ideapad Flex 15 RAM Replacement: 手順 8、 2の画像 2
    • The RAM stick should start to tilt upwards. Once you see this, pull the stick diagonally towards the top of the laptop.

    • Be careful and do not apply extra pressure on the RAM.

    • If you feel that it will snap, pull the clips apart farther to loosen the RAM connection. Then try again.

終わりに

To reassemble your device, follow these instructions in reverse order.

3 の人々がこのガイドを完成させました。

作成者

4人の作成者と共同で作成されました。

Brent

メンバー登録日: 03/04/16

804 ポイント

6のガイドは作成済み

チーム

UMass Dartmouth, Team 6-6, Bhusal Spring 2016 UMass Dartmouth, Team 6-6, Bhusal Spring 2016人のメンバー

UMASSD-BHUSAL-S16S6G6

3 メンバー

6のガイドは作成済み

0 件のコメント

コメントを追加

統計データ:

過去 24時間: 0

過去 7 日: 2

過去 30 日: 7

今までの合計 3,037