メインコンテンツにスキップ

Lenovo IdeaPad Y410p Ram Replacement

必要な工具と部品

  1. Lenovo IdeaPad Y410p Ram Replacement, Battery: 手順 1、 1の画像 1
    • Turn off your laptop before starting.

    • Flip the laptop over so the model stickers are facing up.

  2. Lenovo IdeaPad Y410p Ram Replacement: 手順 2、 2の画像 1 Lenovo IdeaPad Y410p Ram Replacement: 手順 2、 2の画像 2
    • Slide the left battery lock to the unlock position and release.

    • Slide the right battery lock to the unlock positon and hold it in place.

  3. Lenovo IdeaPad Y410p Ram Replacement: 手順 3、 2の画像 1 Lenovo IdeaPad Y410p Ram Replacement: 手順 3、 2の画像 2
    • While holding the right battery lock in the unlock position, slide the battery carefully out of the laptop and set it aside.

  4. Lenovo IdeaPad Y410p Ram Replacement, Ram: 手順 4、 3の画像 1 Lenovo IdeaPad Y410p Ram Replacement, Ram: 手順 4、 3の画像 2 Lenovo IdeaPad Y410p Ram Replacement, Ram: 手順 4、 3の画像 3
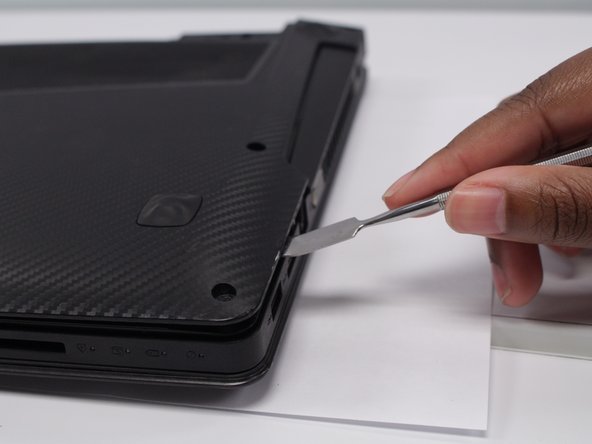
    • Using the Phillips #0 screwdriver remove the eight 8mm screws that fasten the bottom cover.

    • Lift the bottom cover off using a metal spudger and set it aside.

  5. Lenovo IdeaPad Y410p Ram Replacement: 手順 5、 2の画像 1 Lenovo IdeaPad Y410p Ram Replacement: 手順 5、 2の画像 2
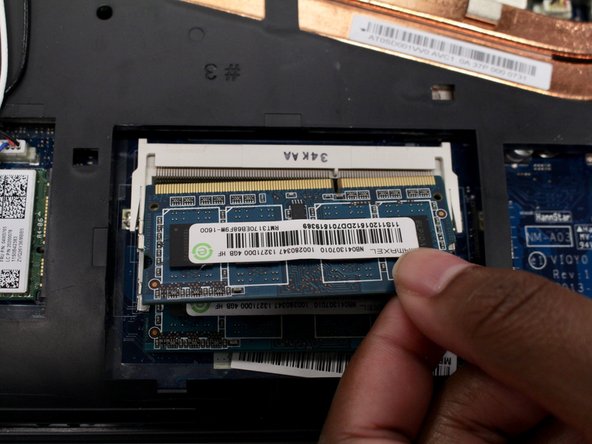
    • Simultaneously pull apart both clips that are holding the RAM module down.

    • When the RAM module is released carefully pull it out.

  6. Lenovo IdeaPad Y410p Ram Replacement: 手順 6、 2の画像 1 Lenovo IdeaPad Y410p Ram Replacement: 手順 6、 2の画像 2
    • There is a second ram module under the first one.

    • Repeat Step 5 with lower Ram module.

終わりに

To reassemble your device, follow these instructions in reverse order.

作成者

1人の作成者と共同作成されました。

Nick Torres

メンバー登録日: 09/18/18

580 ポイント

5のガイドは作成済み

チーム

University of North Texas, Team S3-G6, Raign Fall 2018 University of North Texas, Team S3-G6, Raign Fall 2018人のメンバー

UNT-RAIGN-F18S3G6

4 メンバー

5のガイドは作成済み

0 件のコメント

コメントを追加

統計データ:

過去 24時間: 0

過去 7 日: 6

過去 30 日: 9

今までの合計 831