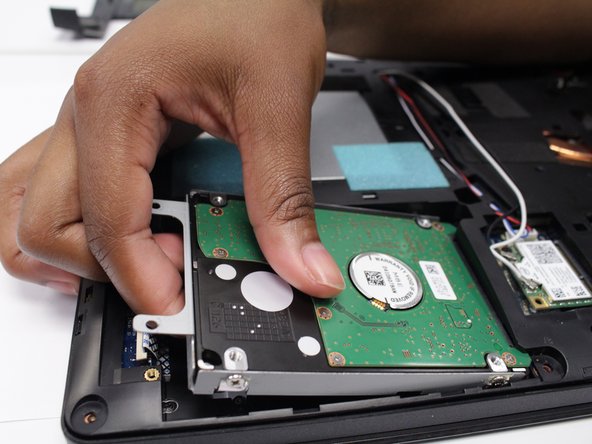
メインコンテンツにスキップ

Lenovo IdeaPad Y410p Hard Drive Replacement

必要な工具と部品

  1. Lenovo IdeaPad Y410p Hard Drive Replacement, Battery: 手順 1、 1の画像 1
    • Turn off your laptop before starting.

    • Flip the laptop over so the model stickers are facing up.

  2. Lenovo IdeaPad Y410p Hard Drive Replacement: 手順 2、 2の画像 1 Lenovo IdeaPad Y410p Hard Drive Replacement: 手順 2、 2の画像 2
    • Slide the left battery lock to the unlock position and release.

    • Slide the right battery lock to the unlock positon and hold it in place.

  3. Lenovo IdeaPad Y410p Hard Drive Replacement: 手順 3、 2の画像 1 Lenovo IdeaPad Y410p Hard Drive Replacement: 手順 3、 2の画像 2
    • While holding the right battery lock in the unlock position, slide the battery carefully out of the laptop and set it aside.

  4. Lenovo IdeaPad Y410p Hard Drive Replacement, Hard Drive: 手順 4、 3の画像 1 Lenovo IdeaPad Y410p Hard Drive Replacement, Hard Drive: 手順 4、 3の画像 2 Lenovo IdeaPad Y410p Hard Drive Replacement, Hard Drive: 手順 4、 3の画像 3
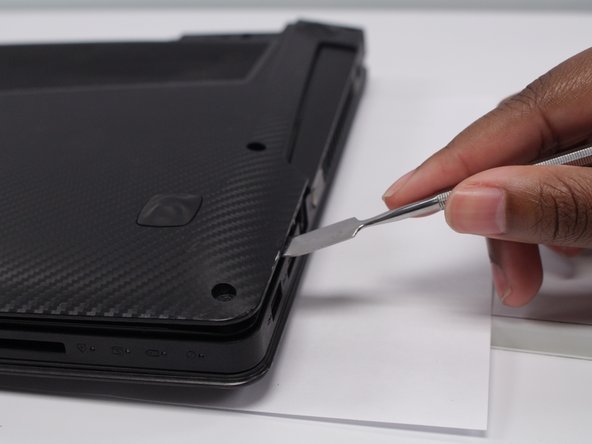
    • Using the Phillips #0 screwdriver, remove the eight 8mm screws that fasten the bottom cover.

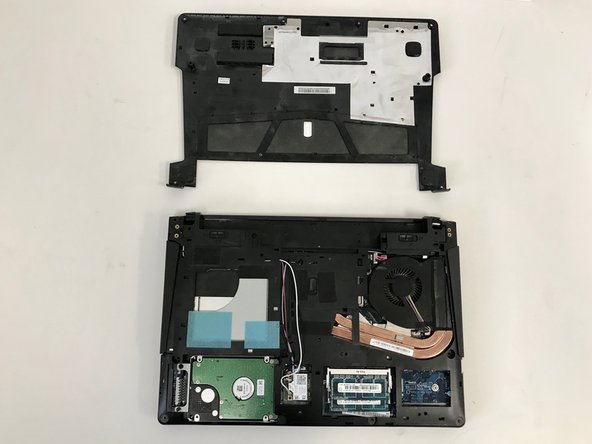
    • Lift bottom cover off using a metal spudger and set it aside.

  5. Lenovo IdeaPad Y410p Hard Drive Replacement: 手順 5、 3の画像 1 Lenovo IdeaPad Y410p Hard Drive Replacement: 手順 5、 3の画像 2 Lenovo IdeaPad Y410p Hard Drive Replacement: 手順 5、 3の画像 3
    • If you intend to reuse this hard drive, be careful removing it as hard impacts may damage the device.

    • Using the Phillips #0 screwdriver, remove the two 3mm screws at the end of the hard drive bracket.

    • Slide the hard drive out of its seat.

終わりに

To reassemble your device, follow these instructions in reverse order.

作成者

3人の作成者と共同で作成されました。

Nick Torres

メンバー登録日: 09/18/18

580 ポイント

5のガイドは作成済み

チーム

University of North Texas, Team S3-G6, Raign Fall 2018 University of North Texas, Team S3-G6, Raign Fall 2018人のメンバー

UNT-RAIGN-F18S3G6

4 メンバー

5のガイドは作成済み

0 件のコメント

コメントを追加

統計データ:

過去 24時間: 1

過去 7 日: 4

過去 30 日: 19

今までの合計 714