メインコンテンツにスキップ

Lenovo IdeaPad U430 Touch Motherboard Replacement

必要な工具と部品

  1. Lenovo IdeaPad U430 Touch Motherboard Replacement, Bottom Cover: 手順 1、 1の画像 1
    • Power off your computer before you begin.

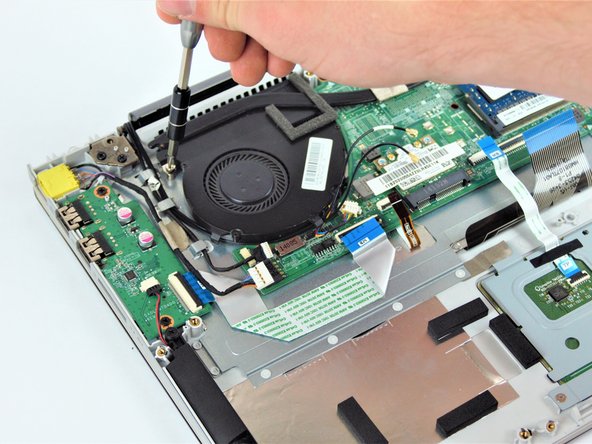
    • Find and remove the 10 Phillips style body screws on the bottom of the laptop case.

    • Remove 2 screws, 1 located on the left hinge cover and one located on the right hinge cover.

  2. Lenovo IdeaPad U430 Touch Motherboard Replacement: 手順 3、 2の画像 1 Lenovo IdeaPad U430 Touch Motherboard Replacement: 手順 3、 2の画像 2
    • Starting from the front, use a plastic opening tool to separate the bottom of the case from the body of the laptop.

  3. Lenovo IdeaPad U430 Touch Motherboard Replacement, Battery: 手順 4、 2の画像 1 Lenovo IdeaPad U430 Touch Motherboard Replacement, Battery: 手順 4、 2の画像 2
    • Remove the five 2.8 mm #1 Phillips head screws that hold down the battery pack.

  4. Lenovo IdeaPad U430 Touch Motherboard Replacement: 手順 5、 2の画像 1 Lenovo IdeaPad U430 Touch Motherboard Replacement: 手順 5、 2の画像 2
    この手順で使用する道具:
    Tweezers
    $4.99
    購入する
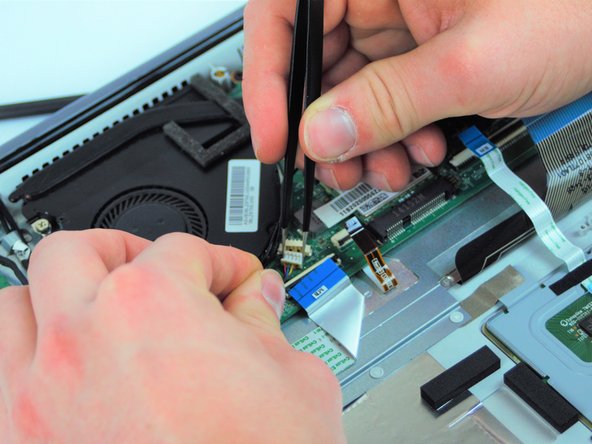
    • Using a combination of plastic opening tool and spudger, press in on the clips on the sides of the battery connector and push the connector out

    • When you get the connector out far enough, grab behind the connector tabs with tweezers and wiggle the connector the rest of the way out.

    • The battery connector is very tight fitting, you may need to use a metal spudger in order to get the connector out far enough.

  5. Lenovo IdeaPad U430 Touch Motherboard Replacement: 手順 6、 2の画像 1 Lenovo IdeaPad U430 Touch Motherboard Replacement: 手順 6、 2の画像 2
    • Once the battery is disconnected, lift up on the front of the battery and remove it from the laptop body.

  6. Lenovo IdeaPad U430 Touch Motherboard Replacement, Motherboard: 手順 7、 2の画像 1 Lenovo IdeaPad U430 Touch Motherboard Replacement, Motherboard: 手順 7、 2の画像 2
    • Disconnect all 5 ZIF ribbon connectors from the motherboard.

    • To disconnect a ZIF connector, use your fingernail or a plastic spudger to flip the retainer up, and gently pull the ribbon cable out.

  7. Lenovo IdeaPad U430 Touch Motherboard Replacement: 手順 8、 3の画像 1 Lenovo IdeaPad U430 Touch Motherboard Replacement: 手順 8、 3の画像 2 Lenovo IdeaPad U430 Touch Motherboard Replacement: 手順 8、 3の画像 3
    この手順で使用する道具:
    Tweezers
    $4.99
    購入する
    • Using a plastic spudger, liift up and remove the hard drive and screen flat-topped connectors

    • Use the spudger and metal tweezers to remove the two cable connectors and two bundled cable connectors.

    • Use the plastic spudger to lift up and remove the two antenna connectors.

  8. Lenovo IdeaPad U430 Touch Motherboard Replacement: 手順 9、 3の画像 1 Lenovo IdeaPad U430 Touch Motherboard Replacement: 手順 9、 3の画像 2 Lenovo IdeaPad U430 Touch Motherboard Replacement: 手順 9、 3の画像 3
    • Unscrew the three 3mm #1 Phillips head screws holding down the cooling assembly and fan.

    • These screws remain secured with the assembly.

    • Remove the cooling assembly from the motherboard.

  9. Lenovo IdeaPad U430 Touch Motherboard Replacement: 手順 10、 1の画像 1
    • Unscrew all seven 2.8mm #1 Phillips head screws that secure the motherboard to the laptop.

  10. Lenovo IdeaPad U430 Touch Motherboard Replacement: 手順 11、 1の画像 1
    • Lift the motherboard out of the laptop case.

終わりに

To reassemble your device, follow these instructions in reverse order.

3 の人々がこのガイドを完成させました。

作成者

4人の作成者と共同で作成されました。

Babar Ali

メンバー登録日: 02/28/17

152 ポイント

1ガイドが承認済み

チーム

USF Tampa, Team S2-G6, Nance Spring 2017 USF Tampa, Team S2-G6, Nance Spring 2017人のメンバー

USFT-NANCE-S17S2G6

3 メンバー

15のガイドは作成済み

0 件のコメント

コメントを追加

統計データ:

過去 24時間: 0

過去 7 日: 0

過去 30 日: 19

今までの合計 2,477