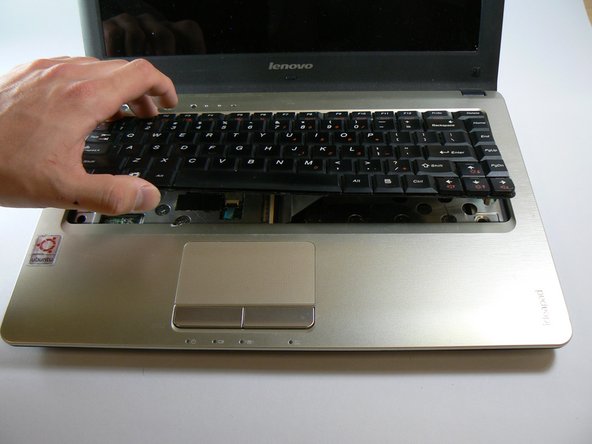
メインコンテンツにスキップ

Lenovo IdeaPad U350 Keyboard Replacement

必要な工具と部品

  1. Lenovo IdeaPad U350 Keyboard Replacement, Battery: 手順 1、 1の画像 1
    • Locate the battery by turning the laptop over.

  2. Lenovo IdeaPad U350 Keyboard Replacement: 手順 2、 3の画像 1 Lenovo IdeaPad U350 Keyboard Replacement: 手順 2、 3の画像 2 Lenovo IdeaPad U350 Keyboard Replacement: 手順 2、 3の画像 3
    • Locate the lock switch and slide toward the outside edge of the laptop until it clicks into place and the battery unit pops up.

    • Remove the battery unit from the laptop and set it aside.

  3. Lenovo IdeaPad U350 Keyboard Replacement, Keyboard: 手順 3、 1の画像 1
    • Unscrew the three screws on the bottom of the laptop that have small keyboard logos next to them using a PH1 screwdriver. These screws are 5.8mm long.

  4. Lenovo IdeaPad U350 Keyboard Replacement: 手順 4、 2の画像 1 Lenovo IdeaPad U350 Keyboard Replacement: 手順 4、 2の画像 2
    • Flip the computer over and open the screen.

    • Use a spudger to carefully press in the clip that is found here while prying the keyboard upward from the same side.

    • This clip is very stiff and also made of thin, brittle plastic. This means that it is easy to break off, which is what we did during our disassembly.

  5. Lenovo IdeaPad U350 Keyboard Replacement: 手順 5、 1の画像 1
    • Slightly lift the bottom of the keyboard towards the screen to locate the keyboard's ribbon cable.

    • Use the tip of the spudger to lift the black retaining flap on the ZIF connector.

    • You should now be able to lift out the keyboard easily.

終わりに

To reassemble your device, follow these instructions in reverse order.

ある他の人がこのガイドを完成しました。

作成者

2人の作成者と共同で作成されました。

Jason Sweeney

メンバー登録日: 09/22/14

825 ポイント

2のガイドは作成済み

チーム

USF Tampa, Team 1-4, Hickman Fall 2014 USF Tampa, Team 1-4, Hickman Fall 2014人のメンバー

USFT-HICKMAN-F14S1G4

3 メンバー

5のガイドは作成済み

0 件のコメント

コメントを追加

統計データ:

過去 24時間: 0

過去 7 日: 0

過去 30 日: 0

今までの合計 1,720