はじめに
このガイドを使用して、Lenovo IdeaPad S340-15 IWL ラップトップの充電ポートを交換します。
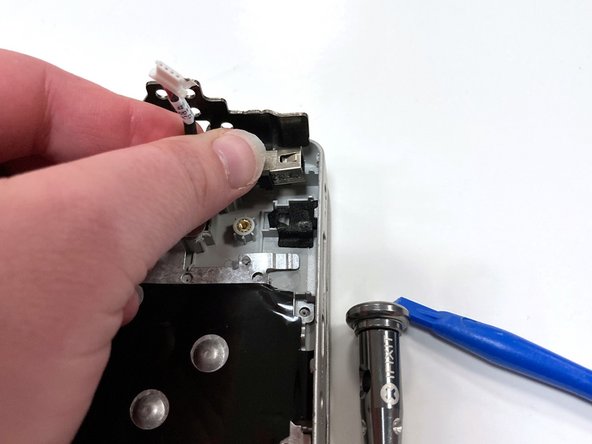
充電ができない場合は、充電ポートが故障しているか、見えなくなっている可能性があります。不適切な電源設定、充電ポートの破損や障害、または充電器の欠陥が原因である可能性があり、簡単で手頃な価格で修理できるため、交換作業を続ける前に トラブルシューティングガイド を必ずご覧ください。
交換作業中は、コンピュータの内部部品が露出するため、食べ物や液体をコンピュータに近づけないようにしてください。バッテリーが膨張しているように見える場合は、適切な手順 に従って適切に処理・廃棄してください。
必要な工具と部品


デバイスを再組み立てするには、これらのインストラクションを逆の順番に従って作業を進めてください。
デバイスを再組み立てするには、これらのインストラクションを逆の順番に従って作業を進めてください。
2 の人々がこのガイドを完成させました。
以下の翻訳者の皆さんにお礼を申し上げます:
100%

Midori Doiさんは世界中で修理する私たちを助けてくれています! あなたも貢献してみませんか?
翻訳を始める ›


2 件のコメント
Perhaps take this with a grain of salt since I’m not a laptop repair expert, I have only fixed my own laptop and phone when their screens have broken (but I was successful, if that makes a difference).
I just performed a charging port replacement on my Lenovo IdeaPad S340-15IWL today, and referred to these instructions a little. However, I believe these instructions can be greatly shortened, which saves time and eliminates unnecessary risk (assuming I’m actually correct about this). I found that the only steps I had to take to replace my charging port (and its cord) were to open up the back of the laptop (your steps 1 & 2), unplug the battery (rather than remove it entirely), flip up the hinge overtop of the charging port (step 21), unplug the charging port (step 23), and take out the charging port and its cord (step 25). I didn’t do any of the other steps, and so far my laptop is still alive and it charges! Knock on wood. I hid the extra cord underneath the motherboard w/o removing the motherboard. But, great photos!!!
I followed the latest version of the guide and was able to replace the charging cable without much trouble. As adonahoe pointed out, only 6 steps are needed to replace the cable, and the 6 steps in their comment / the updated guide seem to work just fine. The steps to replace the power cable in a Flex 4-1580 Laptop (Type 80VE) are very similar to those for the laptop listed in this guide.