メインコンテンツにスキップ

Lenovo IdeaPad P400 Touch Keyboard Replacement

必要な工具と部品

  1. Lenovo IdeaPad P400 Touch Keyboard Replacement, Keyboard: 手順 1、 2の画像 1 Lenovo IdeaPad P400 Touch Keyboard Replacement, Keyboard: 手順 1、 2の画像 2
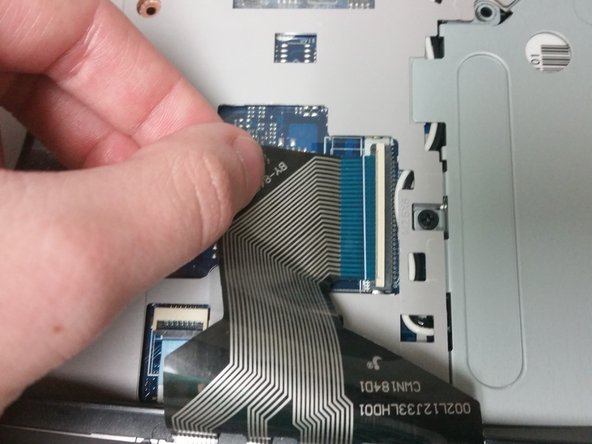
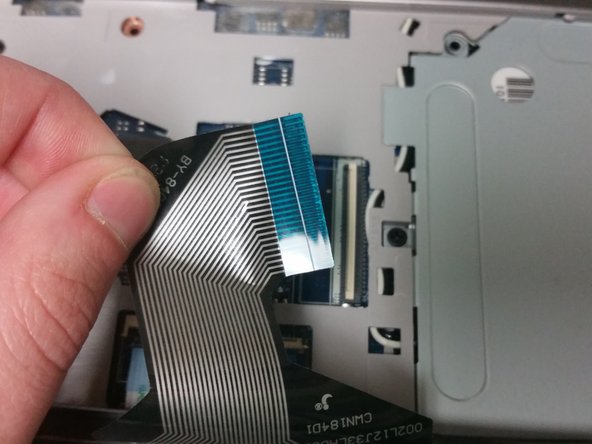
    • Remove the two 14mm Phillips #1 screws that attach the keyboard to the underside of the laptop.

    • Use a Phillips #1 screwdriver.

  2. Lenovo IdeaPad P400 Touch Keyboard Replacement: 手順 2、 2の画像 1 Lenovo IdeaPad P400 Touch Keyboard Replacement: 手順 2、 2の画像 2
    • Flip the laptop over and open it as you would to use it.

  3. Lenovo IdeaPad P400 Touch Keyboard Replacement: 手順 3、 2の画像 1 Lenovo IdeaPad P400 Touch Keyboard Replacement: 手順 3、 2の画像 2
    • Using your hands, lift the top corner of the keyboard, and keep lifting until the keyboard pops out. You will hear clicks as you do this.

    • If necessary, use the plastic spudger to pry up the corner and then lift the keyboard out with your hands.

    • Do not lift the keyboard out entirely. It will still be connected to the laptop. Only lift it enough so that it is unseated as shown in the second picture.

  4. Lenovo IdeaPad P400 Touch Keyboard Replacement: 手順 4、 3の画像 1 Lenovo IdeaPad P400 Touch Keyboard Replacement: 手順 4、 3の画像 2 Lenovo IdeaPad P400 Touch Keyboard Replacement: 手順 4、 3の画像 3
    • Lift the top of the keyboard and flip the keyboard face down so that you can access the connectors underneath it.

    • Using your fingers, unplug the large connector that connects the keyboard to the center of the laptop by sliding the end of the strip out of the socket.

    • You may need to flip the white plastic bar up with a fingernail to be able to remove the strip.

  5. Lenovo IdeaPad P400 Touch Keyboard Replacement: 手順 5、 3の画像 1 Lenovo IdeaPad P400 Touch Keyboard Replacement: 手順 5、 3の画像 2 Lenovo IdeaPad P400 Touch Keyboard Replacement: 手順 5、 3の画像 3
    • Using your fingers, unplug the second, smaller connector, located at the lower left hand side of the keyboard by sliding the strip out of the socket.

    • You may need to flip the white plastic bar up with your fingernail to remove the connector.

終わりに

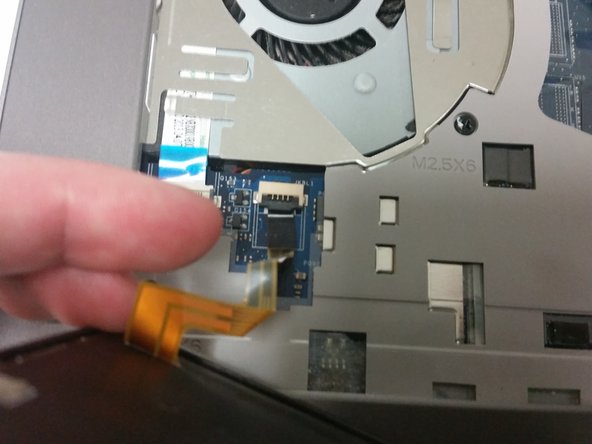
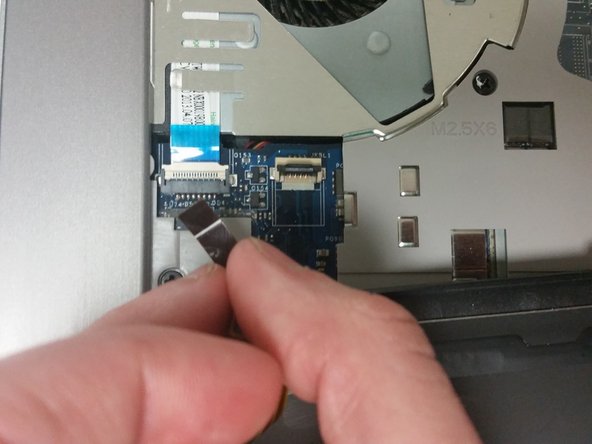
The keyboard can now be replaced if needed. To reassemble your device, follow these instructions in reverse order.

作成者

2人の作成者と共同で作成されました。

Stephanie Botica

メンバー登録日: 10/30/17

841 ポイント

4のガイドは作成済み

チーム

University of North Texas, Team S1-G1, Boettger Fall 2017 University of North Texas, Team S1-G1, Boettger Fall 2017人のメンバー

UNT-BOETTGER-F17S1G1

2 メンバー

5のガイドは作成済み

0 件のコメント

コメントを追加

統計データ:

過去 24時間: 1

過去 7 日: 5

過去 30 日: 8

今までの合計 1,335