メインコンテンツにスキップ

Lenovo IdeaPad FLEX 4-1580 Circuit Board Replacement

必要な工具と部品

  1. Lenovo IdeaPad FLEX 4-1580 Circuit Board Replacement, Battery: 手順 1、 1の画像 1
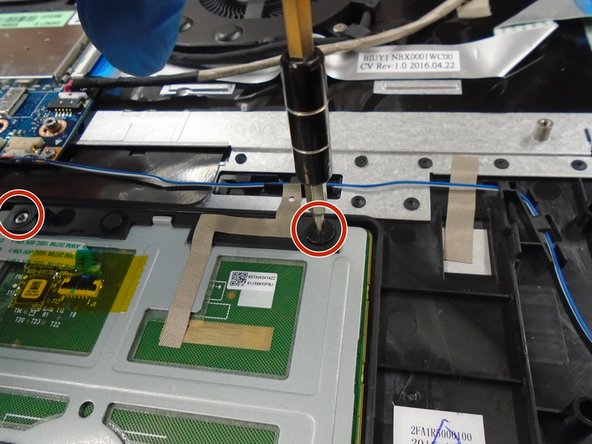
    • Flip laptop over so the model sticker is showing, and begin to unscrew all of the screws.

  2. Lenovo IdeaPad FLEX 4-1580 Circuit Board Replacement: 手順 2、 1の画像 1
    • Pop off the back panel using a plastic opening tool once all screws are removed.

  3. Lenovo IdeaPad FLEX 4-1580 Circuit Board Replacement: 手順 3、 1の画像 1
    • Once the panel is fully removed, begin to unscrew the battery.

  4. Lenovo IdeaPad FLEX 4-1580 Circuit Board Replacement: 手順 4、 2の画像 1 Lenovo IdeaPad FLEX 4-1580 Circuit Board Replacement: 手順 4、 2の画像 2
    • Use the iFixit Opening tool to disconnect the battery from the circuit board.

    • When all screws are removed from the battery, carefully lift the battery up.

  5. Lenovo IdeaPad FLEX 4-1580 Circuit Board Replacement: 手順 5、 1の画像 1
    • The battery is completely removed, and can be replaced with a new battery.

  6. Lenovo IdeaPad FLEX 4-1580 Circuit Board Replacement, Fan: 手順 6、 1の画像 1
    • Remove all screws securing the fan to the laptop.

  7. Lenovo IdeaPad FLEX 4-1580 Circuit Board Replacement: 手順 7、 1の画像 1
    • Unhook the wire from the fan component using a spudger.

  8. Lenovo IdeaPad FLEX 4-1580 Circuit Board Replacement: 手順 8、 1の画像 1
    • Now the fan is completely removed.

  9. Lenovo IdeaPad FLEX 4-1580 Circuit Board Replacement, Touchpad: 手順 9、 1の画像 1
    • After battery is removed, you will move to the touchpad.

  10. Lenovo IdeaPad FLEX 4-1580 Circuit Board Replacement: 手順 10、 1の画像 1
    • Before removing touchpad you will have to disconnect it from the circuit board using a nylon spudger.

  11. Lenovo IdeaPad FLEX 4-1580 Circuit Board Replacement: 手順 11、 2の画像 1 Lenovo IdeaPad FLEX 4-1580 Circuit Board Replacement: 手順 11、 2の画像 2
    • Remove all the screws holding the touchpad down.

  12. Lenovo IdeaPad FLEX 4-1580 Circuit Board Replacement, Circut Board: 手順 12、 1の画像 1
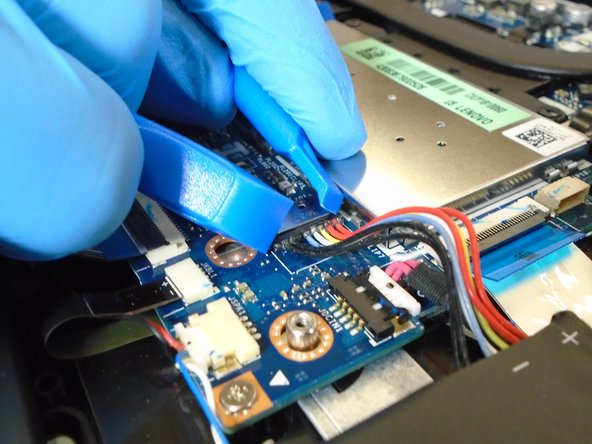
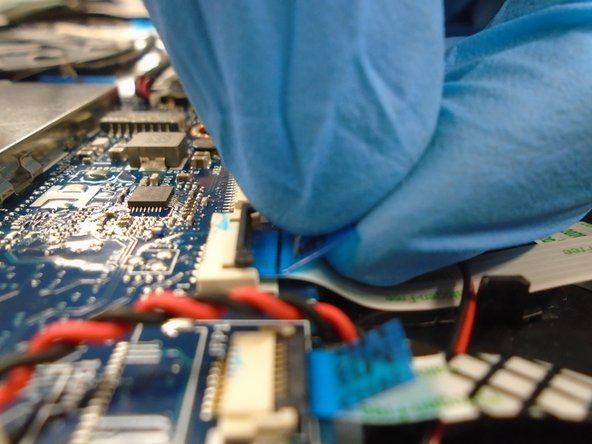
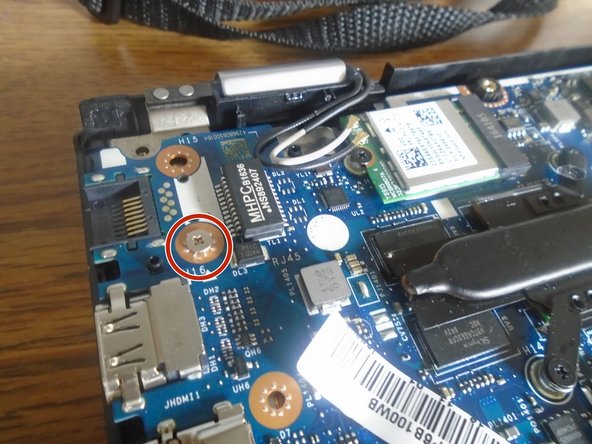
    • Once fan and battery are removed, you are finally able to fully access the circuit board.

  13. Lenovo IdeaPad FLEX 4-1580 Circuit Board Replacement: 手順 13、 2の画像 1 Lenovo IdeaPad FLEX 4-1580 Circuit Board Replacement: 手順 13、 2の画像 2
    • Disconnect the touchpad cord from the circuit board using a nylon spudger.

  14. Lenovo IdeaPad FLEX 4-1580 Circuit Board Replacement: 手順 14、 1の画像 1
    • Then you will lift up the flap that holds these wires down.

  15. Lenovo IdeaPad FLEX 4-1580 Circuit Board Replacement: 手順 15、 3の画像 1 Lenovo IdeaPad FLEX 4-1580 Circuit Board Replacement: 手順 15、 3の画像 2 Lenovo IdeaPad FLEX 4-1580 Circuit Board Replacement: 手順 15、 3の画像 3
    • After the flap is opened then you will have to go and remove all the screws holding the circuit board to the computer.

  16. Lenovo IdeaPad FLEX 4-1580 Circuit Board Replacement: 手順 16、 1の画像 1
    • After the screws are removed from the circuit board, you will have to remove these last screws to remove it completely.

  17. Lenovo IdeaPad FLEX 4-1580 Circuit Board Replacement: 手順 17、 1の画像 1
    • The circuit board is completely removed.

終わりに

To reassemble your device, follow these instructions in reverse order.

作成者

2人の作成者と共同で作成されました。

Matthew Hurtt

メンバー登録日: 09/24/18

746 ポイント

4のガイドは作成済み

0 件のコメント

コメントを追加

統計データ:

過去 24時間: 2

過去 7 日: 5

過去 30 日: 7

今までの合計 812