メインコンテンツにスキップ

Lenovo IdeaPad 530S-14IKB Screen Assembly Replacement

必要な工具と部品

  1. Lenovo IdeaPad 530S-14IKB  Screen Assembly Replacement, Remove the bottom cover: 手順 1、 2の画像 1 Lenovo IdeaPad 530S-14IKB  Screen Assembly Replacement, Remove the bottom cover: 手順 1、 2の画像 2
    • Unscrew all 10 T5 screws. The screws are all the same length.

    • Remove the bottom cover carefully. Maybe it is necessary to use a pick or spudger.

  2. Lenovo IdeaPad 530S-14IKB  Screen Assembly Replacement, Disconnect the battery: 手順 2、 3の画像 1 Lenovo IdeaPad 530S-14IKB  Screen Assembly Replacement, Disconnect the battery: 手順 2、 3の画像 2 Lenovo IdeaPad 530S-14IKB  Screen Assembly Replacement, Disconnect the battery: 手順 2、 3の画像 3
    • Disconnect the battery off the main board.

  3. Lenovo IdeaPad 530S-14IKB  Screen Assembly Replacement, Disconnect the antenna cables and mainboard: 手順 3、 2の画像 1 Lenovo IdeaPad 530S-14IKB  Screen Assembly Replacement, Disconnect the antenna cables and mainboard: 手順 3、 2の画像 2
    • Disconnect antenna cable 1 and 2 und pull them out of their holding.

  4. Lenovo IdeaPad 530S-14IKB  Screen Assembly Replacement, Disconnect the display and mainboard: 手順 4、 3の画像 1 Lenovo IdeaPad 530S-14IKB  Screen Assembly Replacement, Disconnect the display and mainboard: 手順 4、 3の画像 2 Lenovo IdeaPad 530S-14IKB  Screen Assembly Replacement, Disconnect the display and mainboard: 手順 4、 3の画像 3
    • Open the black lever on the display connection and carefully pull out the ribbon cable parallel to the mainboard. Do NOT pull upwards!

  5. Lenovo IdeaPad 530S-14IKB  Screen Assembly Replacement, Separate the display assembly: 手順 5、 1の画像 1
    • Open the laptop in a 90 degree angle. Unscrew the 4 PH0 screws (all the same length).

    • Carefully separate the display and chassis. Take special care with the antenna cables and display ribbon cable.

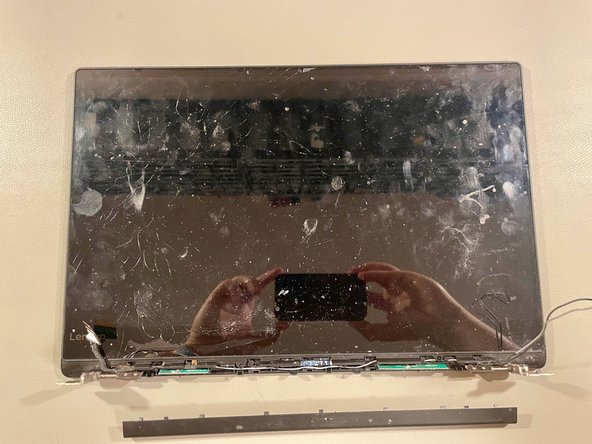
  6. Lenovo IdeaPad 530S-14IKB  Screen Assembly Replacement, Separate the covers on the display: 手順 6、 3の画像 1 Lenovo IdeaPad 530S-14IKB  Screen Assembly Replacement, Separate the covers on the display: 手順 6、 3の画像 2 Lenovo IdeaPad 530S-14IKB  Screen Assembly Replacement, Separate the covers on the display: 手順 6、 3の画像 3
    • Move the plastic cover from left to right. This might take a little bit of force.

    • It clicks and is easily removed afterwards.

    • The coverstrip underneath can be removed with a spudger.

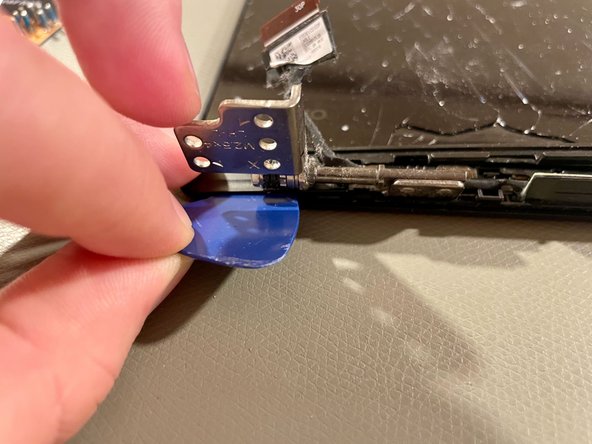
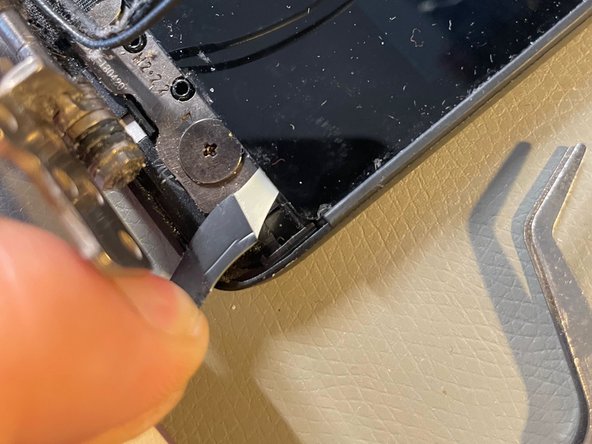
  7. Lenovo IdeaPad 530S-14IKB  Screen Assembly Replacement, Separate the display assembly of the enclosure: 手順 7、 2の画像 1 Lenovo IdeaPad 530S-14IKB  Screen Assembly Replacement, Separate the display assembly of the enclosure: 手順 7、 2の画像 2
    • Unscrew the highlighted two PH000 screws (same length).

    • Pull out the pull tabs from underneath the display assembly. Take your time and pull very carefully and even.

    • ATTENTION: Always grasp the pull tab as near to the display as possible. Like this you avoid tearing it.

  8. Lenovo IdeaPad 530S-14IKB  Screen Assembly Replacement, Lift the display assembly from the enclosure: 手順 8、 3の画像 1 Lenovo IdeaPad 530S-14IKB  Screen Assembly Replacement, Lift the display assembly from the enclosure: 手順 8、 3の画像 2 Lenovo IdeaPad 530S-14IKB  Screen Assembly Replacement, Lift the display assembly from the enclosure: 手順 8、 3の画像 3
    • Carfully push down on the display while pushing it in the direction of the arrows.

    • Lift up the display assembly just a few millimeters and then push it further in the direction oft the arrows to unclick the display assembly from the enclosure. Finally you can without force lift up the display in a 90 degree angle.

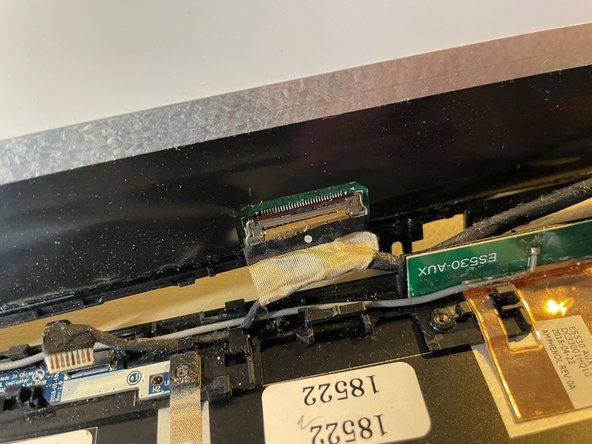
  9. Lenovo IdeaPad 530S-14IKB  Screen Assembly Replacement, Disconnect the display assembly and enclosure: 手順 9、 2の画像 1 Lenovo IdeaPad 530S-14IKB  Screen Assembly Replacement, Disconnect the display assembly and enclosure: 手順 9、 2の画像 2
    • Disconnect the 30 pole ribbon cable of the display assembly. To do that you have to open the connection with the small metal lever. After opening it you can pull the ribbon cable straight down.

  10. Lenovo IdeaPad 530S-14IKB  Screen Assembly Replacement, Put in the new display assembly: 手順 10、 1の画像 1
    • Apply the new pull tabs so that you can easily replace the screen again.

    • To reassemble your device, follow these instructions in reverse order.

終わりに

To reassemble your device, follow these instructions in reverse order.

ある他の人がこのガイドを完成しました。

以下の翻訳者の皆さんにお礼を申し上げます:

de en

100%

Leonard Pitt Diehlさんは世界中で修理する私たちを助けてくれています! あなたも貢献してみませんか?
翻訳を始める ›

作成者

1人の作成者と共同作成されました。

Leonard Pitt Diehl

メンバー登録日: 01/04/20

311 ポイント

1ガイドが承認済み

0 件のコメント

コメントを追加

統計データ:

過去 24時間: 7

過去 7 日: 41

過去 30 日: 112

今までの合計 3,354