メインコンテンツにスキップ

Lenovo IdeaPad 330S-14IKB Fan Replacement

必要な工具と部品

  1. Lenovo IdeaPad 330S-14IKB Fan Replacement, Fan: 手順 1、 1の画像 1
    • Place the laptop with its bottom facing up, so you can easily read the labels on the back.

  2. Lenovo IdeaPad 330S-14IKB Fan Replacement: 手順 2、 1の画像 1
    • Remove the 10 screws from the bottom of the laptop.

    • Keep these screws in a safe place, such as a magnetic pad, to prevent them from getting lost.

    • (Silver, 5.8mm Phillips #0)

  3. Lenovo IdeaPad 330S-14IKB Fan Replacement: 手順 3、 1の画像 1
    • Slowly and carefully remove the back panel from the laptop.

    • Use wedges if necessary to avoid damaging the panel.

  4. Lenovo IdeaPad 330S-14IKB Fan Replacement: 手順 4、 1の画像 1
    • Locate the fan in the top left corner of the laptop.

  5. Lenovo IdeaPad 330S-14IKB Fan Replacement: 手順 5、 2の画像 1 Lenovo IdeaPad 330S-14IKB Fan Replacement: 手順 5、 2の画像 2
    • Find the black panel in the top right and remove the three black screws.

    • Remove the black panel

    • Keep the black screws separate from the silver ones.

    • (Black, 5.83mm Philips #0)

  6. Lenovo IdeaPad 330S-14IKB Fan Replacement: 手順 6、 1の画像 1
    • Your fan will have one black screw connected to it on the left side. Remove this screw.

    • Keep the screw separate from the black screws in the previous step as it is a different size.

    • (Black, 3.47mm Phillips #0)

  7. Lenovo IdeaPad 330S-14IKB Fan Replacement: 手順 7、 1の画像 1
    • The fan is connected to a heat sink; leave the heat sink in place but remove the adhesive connecting the two pieces.

  8. Lenovo IdeaPad 330S-14IKB Fan Replacement: 手順 8、 2の画像 1 Lenovo IdeaPad 330S-14IKB Fan Replacement: 手順 8、 2の画像 2
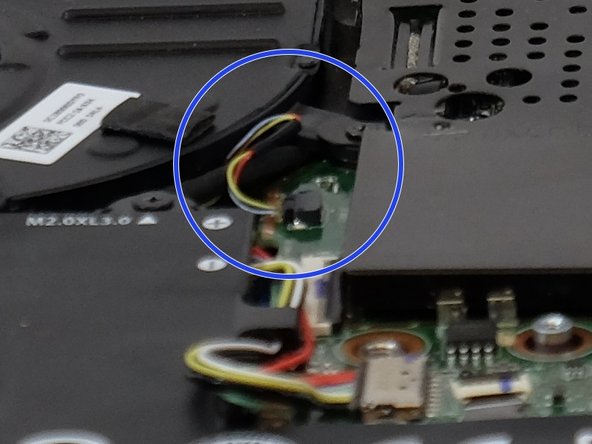
    • Before removing the fan, locate a small set of yellow, red, blue, and black wires on the right side of the fan.

    • Gently remove them from the connector without pulling on the wires.

    • You can use a screwdriver or a similar tool to assist in this step.

  9. Lenovo IdeaPad 330S-14IKB Fan Replacement: 手順 9、 2の画像 1 Lenovo IdeaPad 330S-14IKB Fan Replacement: 手順 9、 2の画像 2
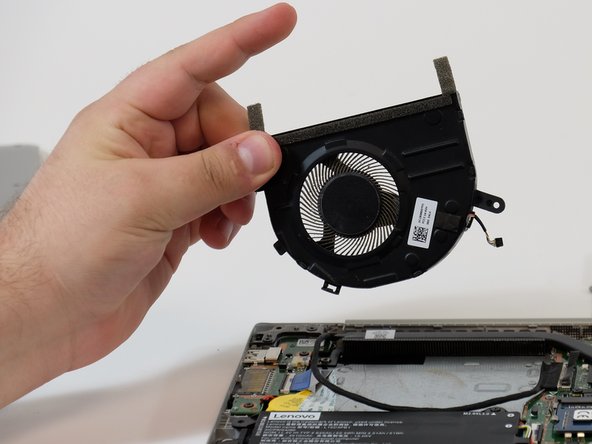
    • Disconnect the large black wire connected to the slot on the side of your fan.

    • Remove your fan.

終わりに

To reassemble your device, follow these instructions in reverse order.

3 の人々がこのガイドを完成させました。

作成者

5人の作成者と共同で作成されました。

sal

メンバー登録日: 10/02/23

459 ポイント

2のガイドは作成済み

チーム

Linn Benton Community College, Team 1-3, Karnes Fall 2023 Linn Benton Community College, Team 1-3, Karnes Fall 2023人のメンバー

LBCC-KARNES-F23S1G3

5 メンバー

4のガイドは作成済み

0 件のコメント

コメントを追加

統計データ:

過去 24時間: 0

過去 7 日: 1

過去 30 日: 12

今までの合計 133