メインコンテンツにスキップ

Lenovo IdeaPad 3-15ADA05 Heat Sink Replacement

必要な工具と部品

  1. Lenovo IdeaPad 3-15ADA05 Heat Sink Replacement, Heat Sink: 手順 1、 2の画像 1 Lenovo IdeaPad 3-15ADA05 Heat Sink Replacement, Heat Sink: 手順 1、 2の画像 2
    • Remove the six M2 x 5mm screws located at the top half of the laptop using a #0 Phillips head, then remove the four M2 x 2.5mm screws located at the bottom of the laptop using a #0 Phillips head.

  2. Lenovo IdeaPad 3-15ADA05 Heat Sink Replacement: 手順 2、 2の画像 1 Lenovo IdeaPad 3-15ADA05 Heat Sink Replacement: 手順 2、 2の画像 2
    • Insert the opening pick between the base plate and the bottom of the laptop, and pry the clips loose around the edge until the base pops off.

  3. Lenovo IdeaPad 3-15ADA05 Heat Sink Replacement: 手順 3、 3の画像 1 Lenovo IdeaPad 3-15ADA05 Heat Sink Replacement: 手順 3、 3の画像 2 Lenovo IdeaPad 3-15ADA05 Heat Sink Replacement: 手順 3、 3の画像 3
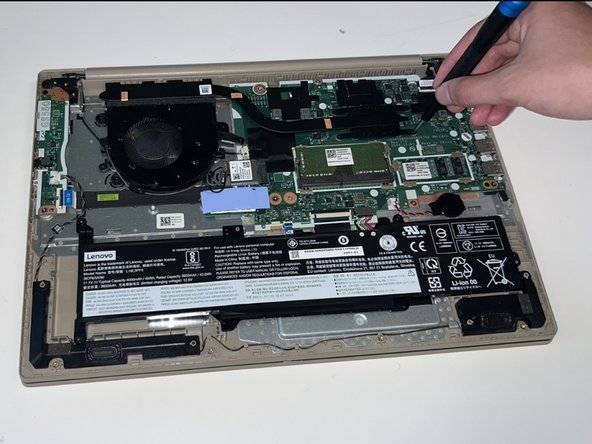
    • Locate the heat sink above the fan, then using a #0 Phillips head, remove the four M2 x 3mm screws holding the heat sink in place.

    • The screws are captive and should stay attached to the heat sink.

  4. Lenovo IdeaPad 3-15ADA05 Heat Sink Replacement: 手順 4、 2の画像 1 Lenovo IdeaPad 3-15ADA05 Heat Sink Replacement: 手順 4、 2の画像 2
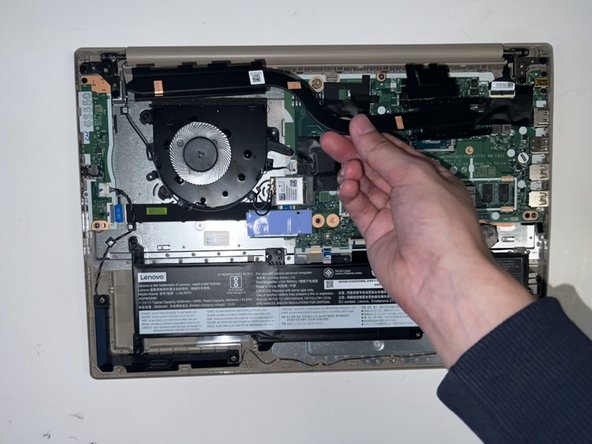
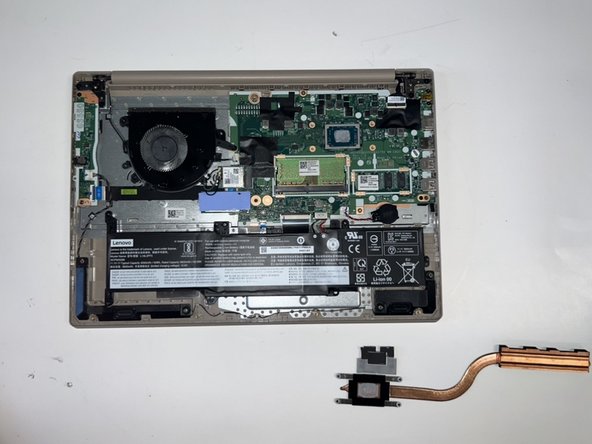
    • Remove the heat sink.

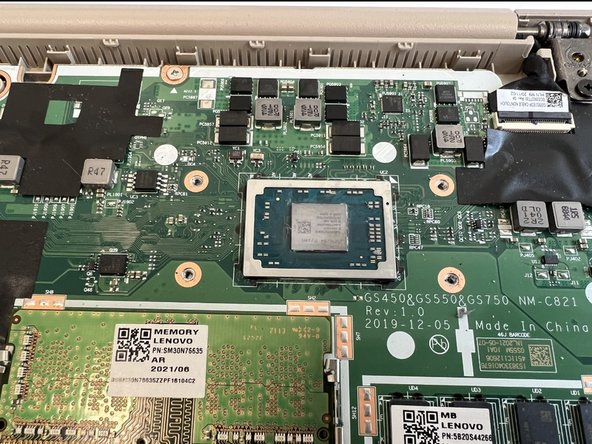
    • Be careful not to damage the processor.

  5. Lenovo IdeaPad 3-15ADA05 Heat Sink Replacement: 手順 5、 2の画像 1 Lenovo IdeaPad 3-15ADA05 Heat Sink Replacement: 手順 5、 2の画像 2
    • Using a paper towel and rubbing alcohol. Apply a small amount to the paper towel, then remove the remaining thermal paste until none is left.

  6. Lenovo IdeaPad 3-15ADA05 Heat Sink Replacement: 手順 6、 3の画像 1 Lenovo IdeaPad 3-15ADA05 Heat Sink Replacement: 手順 6、 3の画像 2 Lenovo IdeaPad 3-15ADA05 Heat Sink Replacement: 手順 6、 3の画像 3
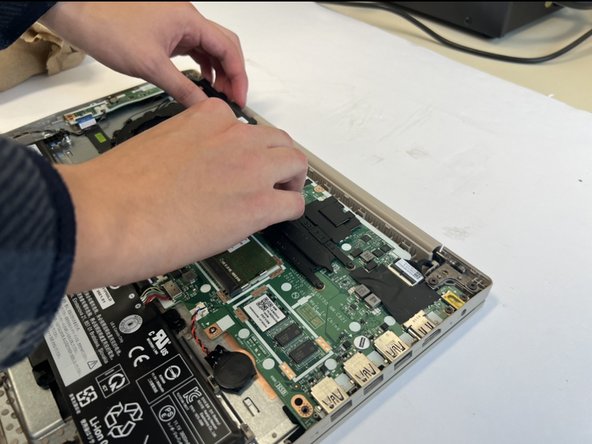
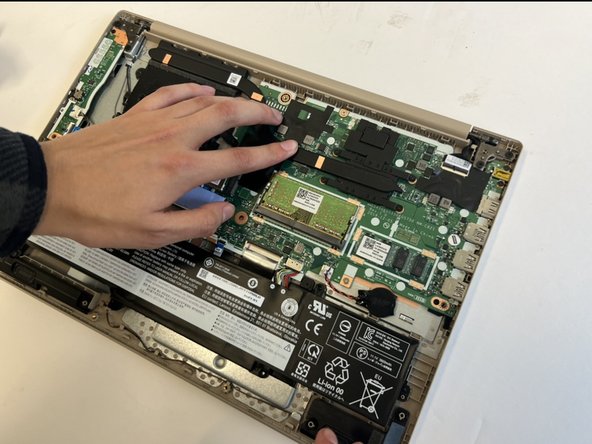
    • Evenly apply a very small amount of thermal paste to the processor (around the size of a grain of rice), then replace the new Heat sink and press down gently.

    • Be careful when reattaching the cooler so as not to damage the processor.

    • Tighten the screws in a diagonal pattern to ensure even pressure and spread of the thermal paste.

終わりに

To reassemble your device, follow these instructions in reverse order.

作成者

3人の作成者と共同で作成されました。

Dylan Torres

メンバー登録日: 02/08/24

133 ポイント

1ガイドが承認済み

チーム

Western Carolina University, Team 1-4, Virtue Spring 2024 Western Carolina University, Team 1-4, Virtue Spring 2024人のメンバー

WCU-VIRTUE-S24S1G4

3 メンバー

5のガイドは作成済み

0 件のコメント

コメントを追加

統計データ:

過去 24時間: 0

過去 7 日: 2

過去 30 日: 21

今までの合計 58