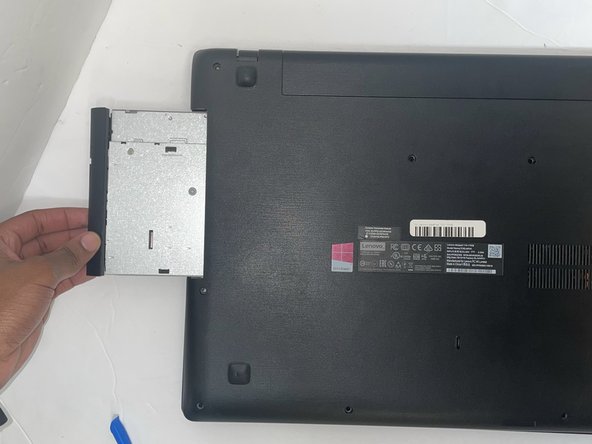
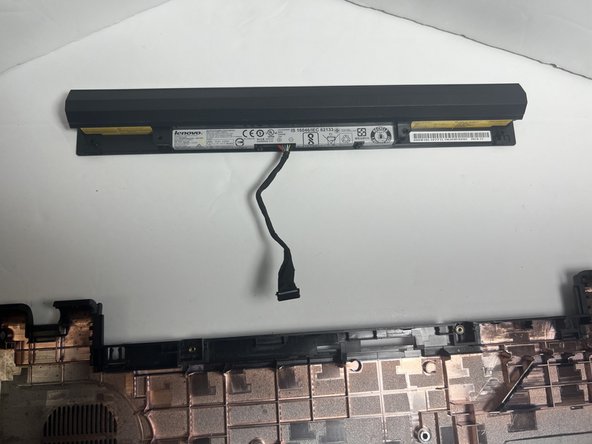
メインコンテンツにスキップ

Lenovo IdeaPad 110-171KB Battery Replacement

必要な工具と部品

  1. Lenovo IdeaPad 110-171KB Battery Replacement, Battery: 手順 1、 2の画像 1 Lenovo IdeaPad 110-171KB Battery Replacement, Battery: 手順 1、 2の画像 2
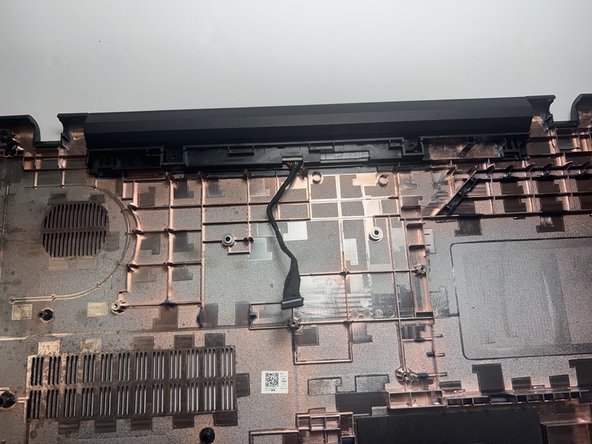
    • Insert an opening pick between the chassis and keyboard.

    • Gently slide the pick around the perimeter of the keyboard while prying until it releases completely.

    • Remove the keyboard.

  2. Lenovo IdeaPad 110-171KB Battery Replacement: 手順 2、 2の画像 1 Lenovo IdeaPad 110-171KB Battery Replacement: 手順 2、 2の画像 2
    • Disconnect the cable connector from the motherboard.

    • Slide the cable out of the case.

  3. Lenovo IdeaPad 110-171KB Battery Replacement: 手順 3、 1の画像 1
    • Place the the computer bottom facing up. Unscrew the eleven Phillips #0 6 mm screws.

  4. Lenovo IdeaPad 110-171KB Battery Replacement: 手順 4、 2の画像 1 Lenovo IdeaPad 110-171KB Battery Replacement: 手順 4、 2の画像 2
    • Pry the disk drive opposite of the laptop.

    • Since the screws has already been removed, you will not need to worry about any more screws on the optical drive.

  5. Lenovo IdeaPad 110-171KB Battery Replacement: 手順 5、 2の画像 1 Lenovo IdeaPad 110-171KB Battery Replacement: 手順 5、 2の画像 2
    • Release any of the remaining retaining clips and remove the lower case.

  6. Lenovo IdeaPad 110-171KB Battery Replacement: 手順 6、 3の画像 1 Lenovo IdeaPad 110-171KB Battery Replacement: 手順 6、 3の画像 2 Lenovo IdeaPad 110-171KB Battery Replacement: 手順 6、 3の画像 3
    • Remove the two 9 mm Phillips #0 screws that secure the battery.

    • Remove the battery from the device.

終わりに

To reassemble your device, follow these instructions in reverse order.

作成者

1人の作成者と共同作成されました。

Cameron Mounce

メンバー登録日: 09/05/23

668 ポイント

5のガイドは作成済み

チーム

Gateway, Team 1-3, Pee Fall 2023 Gateway, Team 1-3, Pee Fall 2023人のメンバー

GCC-PEE-F23S1G3

4 メンバー

7のガイドは作成済み

0 件のコメント

コメントを追加

統計データ:

過去 24時間: 0

過去 7 日: 3

過去 30 日: 7

今までの合計 76