メインコンテンツにスキップ

Lenovo IdeaCentre K410 Optical Drive Replacement

必要な工具と部品

  1. Lenovo IdeaCentre K410 Optical Drive Replacement, Side Panel: 手順 1、 1の画像 1
    • Lay the computer down on its side as shown.

    • Remove the two 14mm screws shown. The screws are loose enough to unscrew with your hands.

  2. Lenovo IdeaCentre K410 Optical Drive Replacement: 手順 2、 1の画像 1
    • Gently slide the side panel straight back and remove from the computer.

  3. Lenovo IdeaCentre K410 Optical Drive Replacement, Optical Drive: 手順 3、 2の画像 1 Lenovo IdeaCentre K410 Optical Drive Replacement, Optical Drive: 手順 3、 2の画像 2
    • Pull up on the three tabs shown

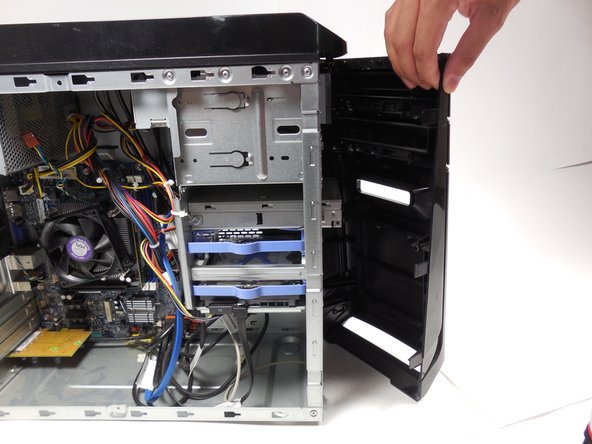
    • Swivel the front panel so the front is open, and gently pull the cover off

  4. Lenovo IdeaCentre K410 Optical Drive Replacement: 手順 4、 1の画像 1
    • Push down on the button that says "push" while pulling the optical drive outward.

終わりに

To reassemble your device, follow these instructions in reverse order.

2 の人々がこのガイドを完成させました。

作成者

3人の作成者と共同で作成されました。

Timothy Grebe

メンバー登録日: 10/19/14

1,634 ポイント

9のガイドは作成済み

チーム

Cal Poly, Team 10-39, Amido Fall 2014 Cal Poly, Team 10-39, Amido Fall 2014人のメンバー

CPSU-AMIDO-F14S10G39

4 メンバー

18のガイドは作成済み

0 件のコメント

コメントを追加

統計データ:

過去 24時間: 1

過去 7 日: 3

過去 30 日: 20

今までの合計 1,817