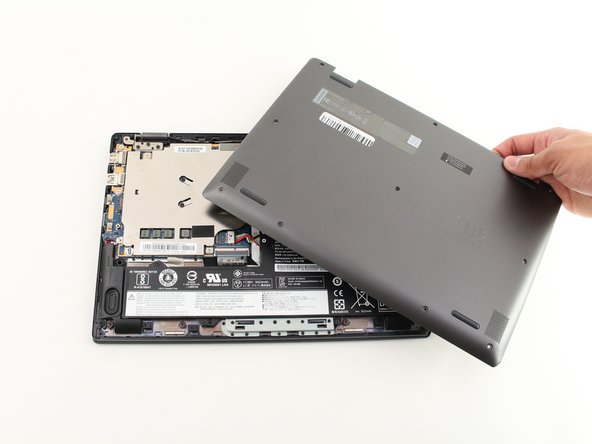
メインコンテンツにスキップ

Lenovo Flex 6-11IGM Motherboard Replacement

必要な工具と部品

  1. Lenovo Flex 6-11IGM Motherboard Replacement, Back Panel: 手順 1、 1の画像 1
    • Flip the device over and lay it down with the underside facing upwards.

  2. Lenovo Flex 6-11IGM Motherboard Replacement: 手順 2、 2の画像 1 Lenovo Flex 6-11IGM Motherboard Replacement: 手順 2、 2の画像 2
    • Remove the ten screws with a Phillips #00 screwdriver.

  3. Lenovo Flex 6-11IGM Motherboard Replacement: 手順 3、 1の画像 1
    • Using a plastic opening tool, make your way around the edge of the laptop.

  4. Lenovo Flex 6-11IGM Motherboard Replacement: 手順 4、 2の画像 1 Lenovo Flex 6-11IGM Motherboard Replacement: 手順 4、 2の画像 2
    • After making sure the back panel is completely free from the body, remove the back panel.

  5. 注意: 手順 5-7 は、作業進行中としてマークされている ガイド から引用されています。

    Lenovo Flex 6-11IGM Motherboard Replacement, RAM: 手順 5、 2の画像 1 Lenovo Flex 6-11IGM Motherboard Replacement, RAM: 手順 5、 2の画像 2
    • Insert a plastic opening pick in the ribbon cable housing, flip the black part up, and pull the cable out with your fingers.

  6. Lenovo Flex 6-11IGM Motherboard Replacement: 手順 6、 1の画像 1
    • Remove the four 3.5mm Phillips #0 screws that secure the heat sink.

    • Remove the four 3.5 mm Phillips #0 screws that secure the heat sink.

  7. Lenovo Flex 6-11IGM Motherboard Replacement: 手順 7、 1の画像 1
    • Ram chips are soldered onto motherboard and cannot be removed.

  8. Lenovo Flex 6-11IGM Motherboard Replacement, Motherboard: 手順 8、 1の画像 1
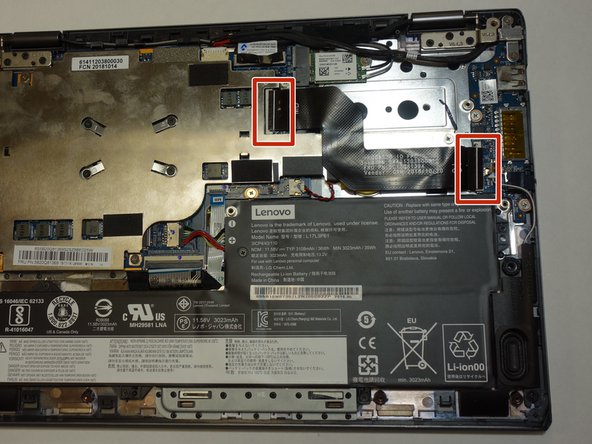
    • Disengage the cable located above the left speaker.

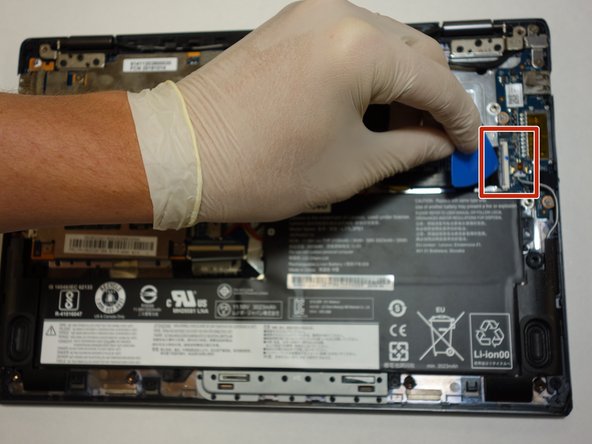
    • Disengage the ribbon cable located directly above the battery using the blue pick.

    • Disengage the battery cable directly above the ribbon cable housing.

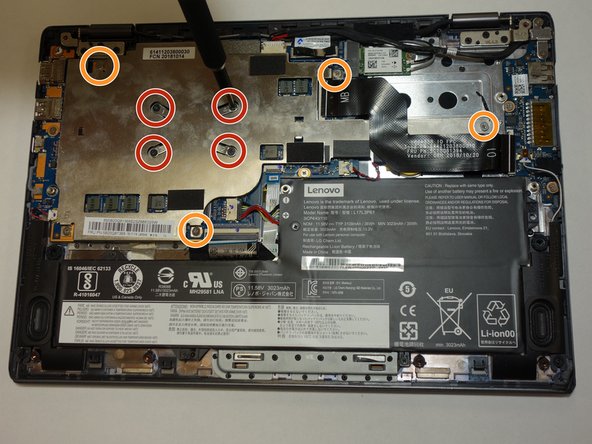
    • Disengage the CMOS battery cable located to the right of the battery cable.

    • Remove the display cable located directly above the button battery.

    • Disengage the secondary display cable located directly to the left of the display cable.

  9. Lenovo Flex 6-11IGM Motherboard Replacement: 手順 9、 1の画像 1
    • Using a Phillips #0 screwdriver, remove the five 3.5 mm screws that secure the motherboard.

    • Using a Phillips #0 screwdriver, remove the one 3.5 mm screw that secures the Wi-Fi chip, located above the button battery.

  10. Lenovo Flex 6-11IGM Motherboard Replacement: 手順 10、 1の画像 1
    • Remove the Wi-Fi chip located above the button battery from the motherboard.

    • Remove the motherboard from the case.

終わりに

To reassemble your device, follow these instructions in reverse order.

ある他の人がこのガイドを完成しました。

作成者

3人の作成者と共同で作成されました。

Jonathan Edens

メンバー登録日: 09/16/20

235 ポイント

2のガイドは作成済み

0 件のコメント

コメントを追加

統計データ:

過去 24時間: 0

過去 7 日: 2

過去 30 日: 11

今までの合計 1,020