メインコンテンツにスキップ

Lenovo Essential G570 RAM Replacement

必要な工具と部品

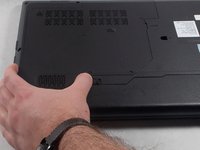
  1. Lenovo Essential G570 RAM Replacement, Battery: 手順 1、 1の画像 1
    • Turn off the laptop.

    • Disconnect the charging cable.

    • Failure to unplug the cable could result in electric shock.

    • Turn the computer upside down.

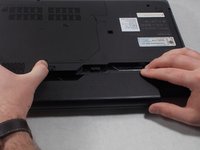
  2. Lenovo Essential G570 RAM Replacement: 手順 2、 2の画像 1 Lenovo Essential G570 RAM Replacement: 手順 2、 2の画像 2
    • Locate the two switches that lock the battery.

    • Push the right switch outwards to unlock the battery.

  3. Lenovo Essential G570 RAM Replacement: 手順 3、 2の画像 1 Lenovo Essential G570 RAM Replacement: 手順 3、 2の画像 2
    • Push and hold the left switch outwards to unlock the battery.

    • Pull the battery away from the computer.

  4. Lenovo Essential G570 RAM Replacement, Back Panel: 手順 4、 1の画像 1
    • Turn the laptop over so that the bottom side is facing up.

  5. Lenovo Essential G570 RAM Replacement: 手順 5、 1の画像 1
    • Unscrew the five 5mm Phillips #0 screws that hold the cover in place.

    • The screws do not come out fully from the back plate. They stay attached to the plate itself.

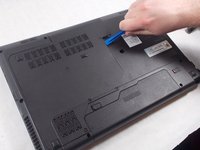
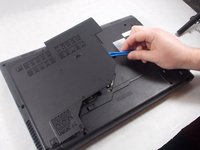
  6. Lenovo Essential G570 RAM Replacement: 手順 6、 3の画像 1 Lenovo Essential G570 RAM Replacement: 手順 6、 3の画像 2 Lenovo Essential G570 RAM Replacement: 手順 6、 3の画像 3
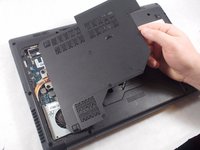
    • With the screws removed, insert the plastic opening tool into the groove located on the right side.

    • Begin to pry up, and the plate should lift up from the body of the laptop.

    • While lifting up, take the piece in one hand and pull up and to the right to fully remove the back plate.

  7. Lenovo Essential G570 RAM Replacement, RAM: 手順 7、 1の画像 1
    • Using your fingers, hold open the two clips holding the top RAM in place.

    • The two RAM chips are placed one on top of another. It is important to take the top one out first to easily access the bottom one.

    • With the clips held away from the RAM, slide the top stick out from it's connection.

  8. Lenovo Essential G570 RAM Replacement: 手順 8、 1の画像 1
    • With the top RAM stick removed, repeat the same process for the bottom piece. Begin by holding the two clips away from the RAM.

    • With the clips held out, slide the RAM out from the connection.

終わりに

To reassemble your device, follow these instructions in reverse order.

3 の人々がこのガイドを完成させました。

作成者

1人の作成者と共同作成されました。

Justin Bickford

メンバー登録日: 03/01/18

446 ポイント

2のガイドは作成済み

チーム

UMass Dartmouth, Team S1-G1, Simcock Spring 2018 UMass Dartmouth, Team S1-G1, Simcock Spring 2018人のメンバー

UMASSD-SIMCOCK-S18S1G1

3 メンバー

6のガイドは作成済み

0 件のコメント

コメントを追加

統計データ:

過去 24時間: 1

過去 7 日: 4

過去 30 日: 12

今までの合計 645