メインコンテンツにスキップ

このバージョンは誤った内容を含んでいる可能性があります。最新の承認済みスナップショットに切り替えてください。

必要な工具と部品

  1. , バッテリー: 手順 1、 1の画像 1
    • コンピュータの電源を切ります。

    • コンピュータからチャージャーの接続を外します。

    • コンピュータを裏返して、置きます。

  2. : 手順 2、 2の画像 1 : 手順 2、 2の画像 2
    • 右手スイッチを"ロック解除"ポジションに向かって押します。

  3. : 手順 3、 3の画像 1 : 手順 3、 3の画像 2 : 手順 3、 3の画像 3
    • バッテリーを片手で押さえながら、もう一方の手で、左クリップを左側にスライドさせ、バッテリーを引き出します。

  4. この手順は未翻訳です。 翻訳を手伝う。

    : 手順 4、 2の画像 1 : 手順 4、 2の画像 2
    • Remove both screw covers from the bottom of screen bezel using a plastic spudger. The screws underneath will now be exposed

  5. この手順は未翻訳です。 翻訳を手伝う。

    : 手順 5、 1の画像 1
    • Using the Phillips #0 Screwdriver, remove the two 4.3 mm screws holding the display to the front bezel.

  6. この手順は未翻訳です。 翻訳を手伝う。

    : 手順 6、 2の画像 1 : 手順 6、 2の画像 2
    • Separate the front bezel from the display panel using the plastic opening tool by gently prying around the edges and removing it.

  7. この手順は未翻訳です。 翻訳を手伝う。

    : 手順 7、 1の画像 1
    • Using the tweezers carefully disconnect the ZIF connector by pulling cable away from front facing camera that is attached to the back bezel.

  8. この手順は未翻訳です。 翻訳を手伝う。

    : 手順 8、 3の画像 1 : 手順 8、 3の画像 2 : 手順 8、 3の画像 3
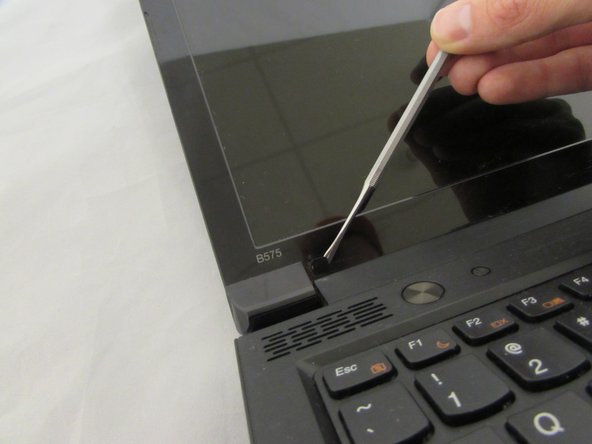
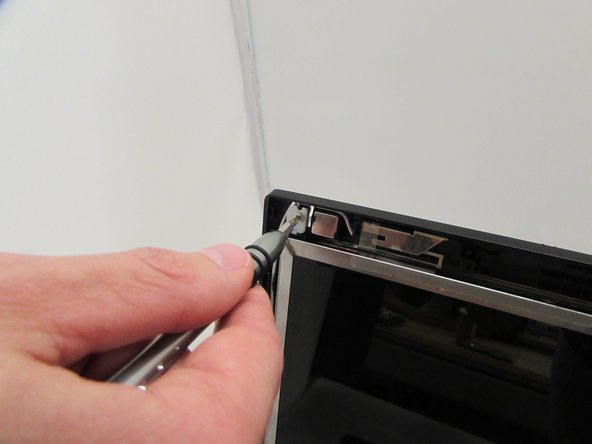
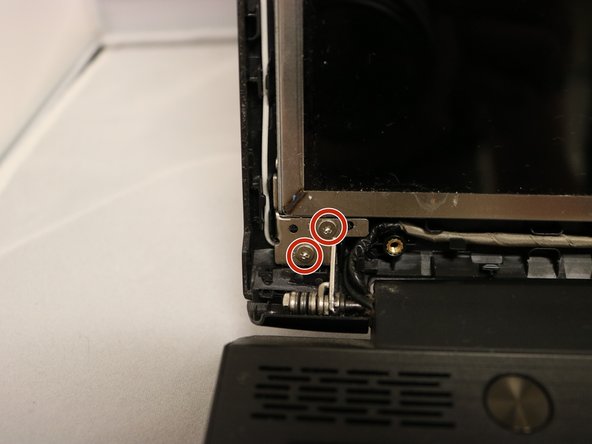
    • Using the Phillips #0 Screwdriver, remove the six 4.3 mm screws that connect display screen to the rear bezel.

    • There are two screws in the bottom left and right corners of the frame.

  9. この手順は未翻訳です。 翻訳を手伝う。

    : 手順 9、 2の画像 1 : 手順 9、 2の画像 2
    • Using the Phillips #0 Screwdriver, remove the four 2.9 mm screws from each side of the bracket that holds the display panel in place.

  10. この手順は未翻訳です。 翻訳を手伝う。

    : 手順 10、 2の画像 1 : 手順 10、 2の画像 2
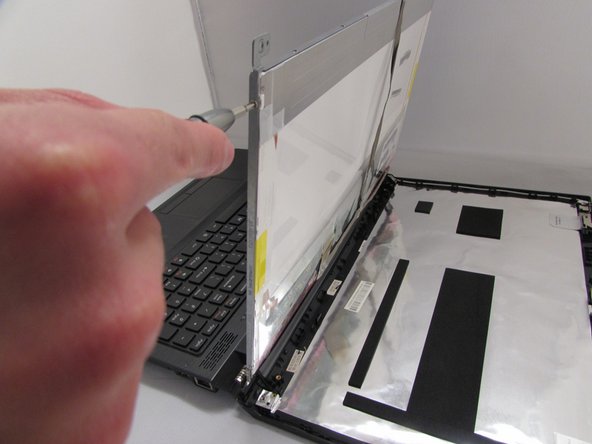
    • Lay display panel face down on the keyboard.

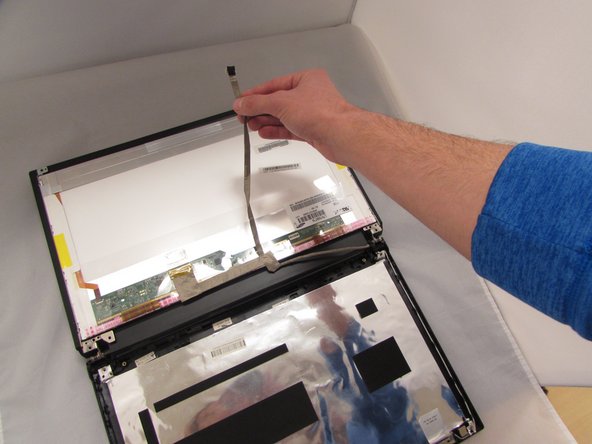
    • Peel back the flat wire that has the camera's ZIF connector until it is loose from the back of the display.

    • Carefully peel of the clear adhesive tape attached to the primary display ZIF connector using a plastic spudger.

  11. この手順は未翻訳です。 翻訳を手伝う。

    : 手順 11、 2の画像 1 : 手順 11、 2の画像 2
    • Place the metal tweezer tips between the ZIF connector and the wire-to-board connection.

    • Carefully separate ZIF wire-to-board connection by pulling metal tweezers in a downward motion.

    • Pull up on flat wire until display is completely disconnected.

    • Be very careful when separating ZIF connections . The ends of the ZIF wire connectors are delicate and can break easily.

ゴール

ある他の人がこのガイドを完成しました。

作成者

2人の作成者と共同で作成されました。

Carlo Calvillo

メンバー登録日: 09/26/16

763 ポイント

6のガイドは作成済み

チーム

Eastern Washington University, Team 1-4, Crane Fall 2016 Eastern Washington University, Team 1-4, Crane Fall 2016人のメンバー

EWU-CRANE-F16S1G4

4 メンバー

13のガイドは作成済み

0 件のコメント

コメントを追加

統計データ:

過去 24時間: 1

過去 7 日: 4

過去 30 日: 6

今までの合計 1,404