はじめに
If your Lenovo 300e Chromebook is not booting or the battery is not charging, then you could have a potential motherboard issue. If this is found to be true, follow these steps in order to properly replace the motherboard.
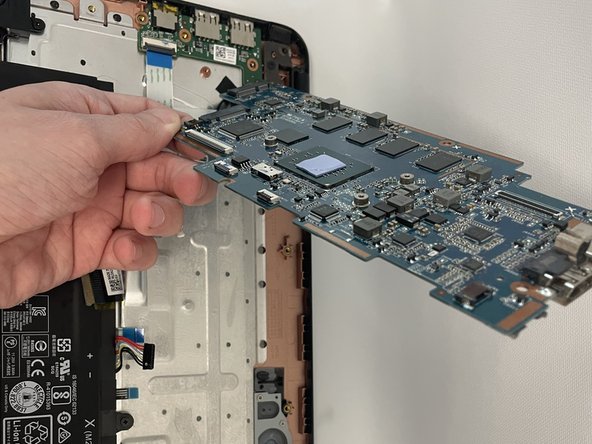
The motherboard is the backbone of a computer. It allows all of the components to communicate and interact with each other. A faulty motherboard will cause the computer to fail at startup.
Before using this guide, inspect the hardware connected to the motherboard to ensure connections. Be sure to check if the motherboard is actually faulty through frequent crashing and errors or constant beeps from the device.
Before beginning this repair, power off your Chromebook and disconnect from the charging cord.
This link directs you to a forum provided by Lenovo for users with similar problems.
必要な工具と部品
-
-
Remove eleven 5 mm screws from the back of the computer using a Phillips #2 screwdriver.
-
-
-
-
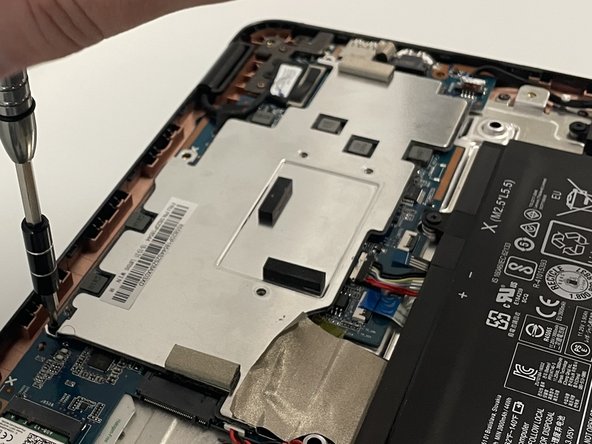
Remove the three silver 3 mm screws from the center of the metal cover using a Phillips #00 screwdriver.
-


To reassemble your device, follow these instructions in reverse order.
To reassemble your device, follow these instructions in reverse order.
チーム

Western Carolina University, Team 1-5, Virtue Fall 2021 Western Carolina University, Team 1-5, Virtue Fall 2021人のメンバー
WCU-VIRTUE-F21S1G5
4 メンバー
5のガイドは作成済み
コメント 1 件
where is the write protect screw located im trying to install windows on this model