メインコンテンツにスキップ

Leitz iLam Home Office A4 Disassembly

必要な工具と部品

  1. Leitz iLam Home Office A4 Disassembly, Removing housing part 1: 手順 1、 3の画像 1 Leitz iLam Home Office A4 Disassembly, Removing housing part 1: 手順 1、 3の画像 2 Leitz iLam Home Office A4 Disassembly, Removing housing part 1: 手順 1、 3の画像 3
    • Turn over the device and unmount 11 screws from the bottom.

    • Eight screws are well seen.

    • Two screws are hidden.

  2. Leitz iLam Home Office A4 Disassembly, Remove housing part 2: 手順 2、 3の画像 1 Leitz iLam Home Office A4 Disassembly, Remove housing part 2: 手順 2、 3の画像 2 Leitz iLam Home Office A4 Disassembly, Remove housing part 2: 手順 2、 3の画像 3
    • Carefully open the housing.

    • Disconnect the connectors.

  3. Leitz iLam Home Office A4 Disassembly, Remove the cylinder motor: 手順 3、 3の画像 1 Leitz iLam Home Office A4 Disassembly, Remove the cylinder motor: 手順 3、 3の画像 2 Leitz iLam Home Office A4 Disassembly, Remove the cylinder motor: 手順 3、 3の画像 3
    • Remove two screws.

    • Be careful on small parts that fall down one's you unscrew the screws.

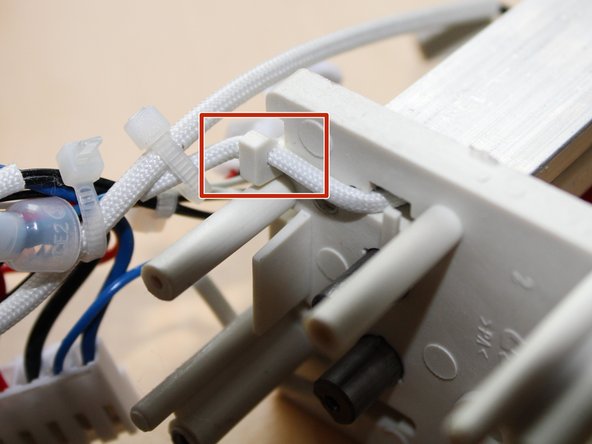
    • Carefully release cable from tiny holder.

  4. Leitz iLam Home Office A4 Disassembly, Put out the cylinder: 手順 4、 3の画像 1 Leitz iLam Home Office A4 Disassembly, Put out the cylinder: 手順 4、 3の画像 2 Leitz iLam Home Office A4 Disassembly, Put out the cylinder: 手順 4、 3の画像 3
    • Unscrew the elements from pictures and you'll be able to slide out the red cylinders.

終わりに

To reassemble your device, follow these instructions in reverse order.

作成者

1人の作成者と共同作成されました。

Klemen Hodžić

メンバー登録日: 11/01/20

610 ポイント

4のガイドは作成済み

0 件のコメント

コメントを追加

統計データ:

過去 24時間: 1

過去 7 日: 1

過去 30 日: 3

今までの合計 551