メインコンテンツにスキップ

LG VX5500 Audio Port Replacement

必要な工具と部品

  1. LG VX5500 Audio Port Replacement, Battery: 手順 1、 3の画像 1 LG VX5500 Audio Port Replacement, Battery: 手順 1、 3の画像 2 LG VX5500 Audio Port Replacement, Battery: 手順 1、 3の画像 3
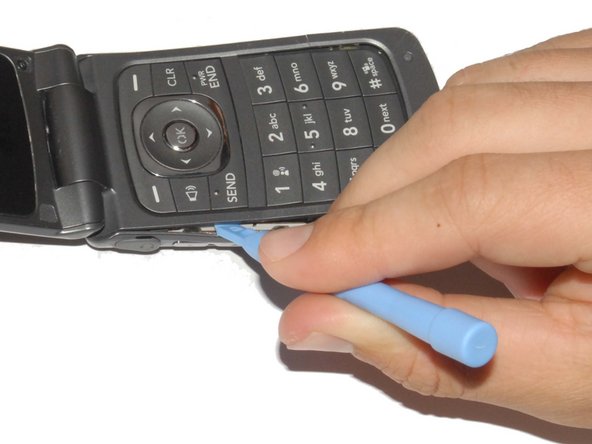
    • Remove the battery cover by placing your thumb on the small ridge near the top of the phone back and push downward, exposing the battery.

    • Our device did not come with a battery cover so it is not shown here.

    • Remove the battery using your finger to pry it out of the battery housing.

  2. LG VX5500 Audio Port Replacement, Audio Port: 手順 2、 2の画像 1 LG VX5500 Audio Port Replacement, Audio Port: 手順 2、 2の画像 2
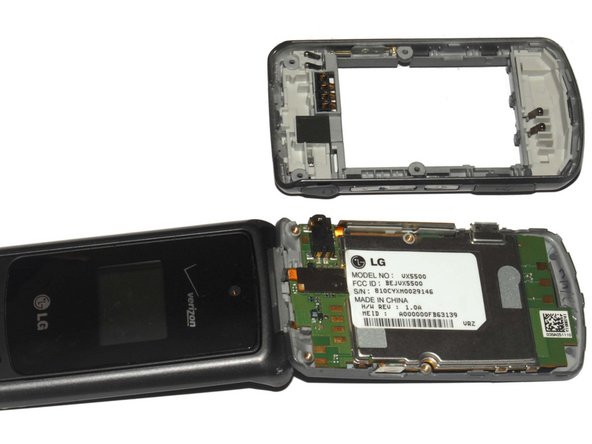
    • Remove the (2) rubber screw covers located near the hinge of the phone using tweezers or a thumb tack.

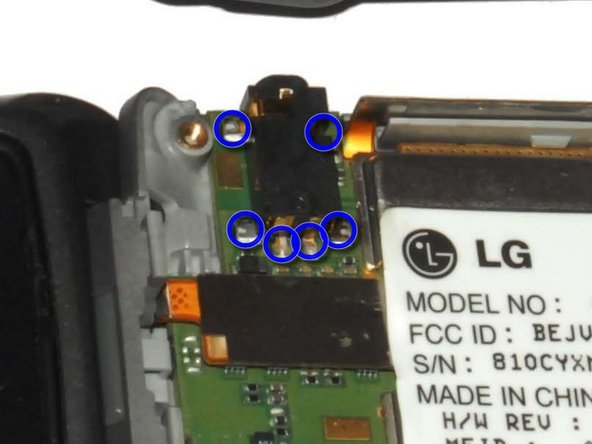
    • Unscrew the (4) 3.6mm screws using a #00 Phillip's head screw driver.

  3. LG VX5500 Audio Port Replacement: 手順 3、 3の画像 1 LG VX5500 Audio Port Replacement: 手順 3、 3の画像 2 LG VX5500 Audio Port Replacement: 手順 3、 3の画像 3
    • Carefully pry off the phone's backing using a plastic opening tool.

    • Slip the tool into the crack between the keypad (front panel) and the back panel.

    • Slide the tool along the sides of the phone to detach the tabs holding the backing on.

  4. LG VX5500 Audio Port Replacement: 手順 4、 2の画像 1 LG VX5500 Audio Port Replacement: 手順 4、 2の画像 2
    • Locate the audio port; this is what it should look like.

    • The audio port is mounted and connected at 6 points. Check the integrity of these connections.

    • If any of the connections are dislodged or the audio port is damaged, desolder the port and install a new one.

終わりに

To reassemble your device, follow these instructions in reverse order.

2 の人々がこのガイドを完成させました。

作成者

4人の作成者と共同で作成されました。

Kurt Beske

メンバー登録日: 05/07/12

70 ポイント

1ガイドが承認済み

チーム

Cal Poly, Team 7-33, Maness Spring 2012 Cal Poly, Team 7-33, Maness Spring 2012人のメンバー

CPSU-MANESS-S12S7G33

4 メンバー

10のガイドは作成済み

0 件のコメント

コメントを追加

統計データ:

過去 24時間: 0

過去 7 日: 0

過去 30 日: 1

今までの合計 431