メインコンテンツにスキップ

LG VX5200 LCD Screen Replacement

必要な工具と部品

  1. LG VX5200 LCD Screen Replacement, Battery: 手順 1、 2の画像 1 LG VX5200 LCD Screen Replacement, Battery: 手順 1、 2の画像 2
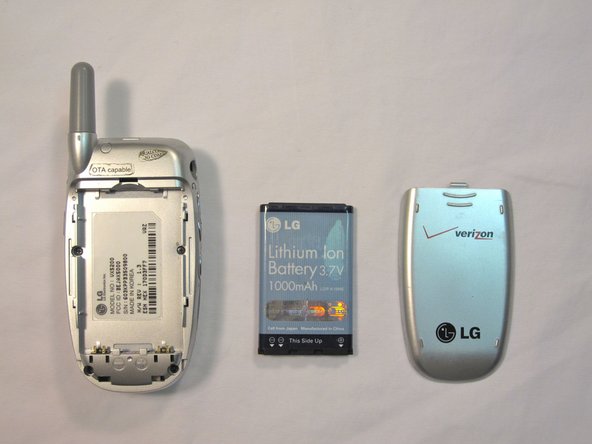
    • Turn the phone on its back.

  2. LG VX5200 LCD Screen Replacement: 手順 2、 2の画像 1 LG VX5200 LCD Screen Replacement: 手順 2、 2の画像 2
    • Orient the phone as shown.

    • Remove the battery cover by pushing upward with your thumb.

  3. LG VX5200 LCD Screen Replacement: 手順 3、 2の画像 1 LG VX5200 LCD Screen Replacement: 手順 3、 2の画像 2
    • Place your fingernail at the top of the battery and pry the battery out towards you.

  4. LG VX5200 LCD Screen Replacement, Face Plate: 手順 4、 3の画像 1 LG VX5200 LCD Screen Replacement, Face Plate: 手順 4、 3の画像 2 LG VX5200 LCD Screen Replacement, Face Plate: 手順 4、 3の画像 3
    • Flip the phone open.

    • Remove the four rubber plugs, located at the corners of the LCD screen, with a push-pin.

    • Use a Phillips #00 screwdriver to remove the four screws located underneath the rubber plugs.

  5. LG VX5200 LCD Screen Replacement: 手順 5、 3の画像 1 LG VX5200 LCD Screen Replacement: 手順 5、 3の画像 2 LG VX5200 LCD Screen Replacement: 手順 5、 3の画像 3
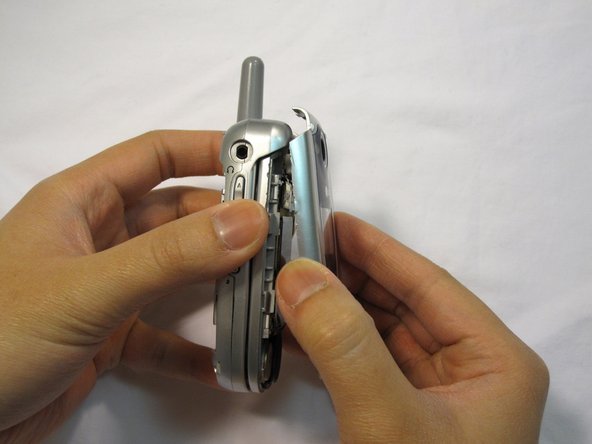
    • Insert the opening tool in the seam of the top portion of the flip phone.

    • Gently pry the seam open.

    • Move the opening tool around the perimeter of the seam and gently take the front LCD face plate out.

  6. LG VX5200 LCD Screen Replacement: 手順 6、 3の画像 1 LG VX5200 LCD Screen Replacement: 手順 6、 3の画像 2 LG VX5200 LCD Screen Replacement: 手順 6、 3の画像 3
    • Close the flip phone.

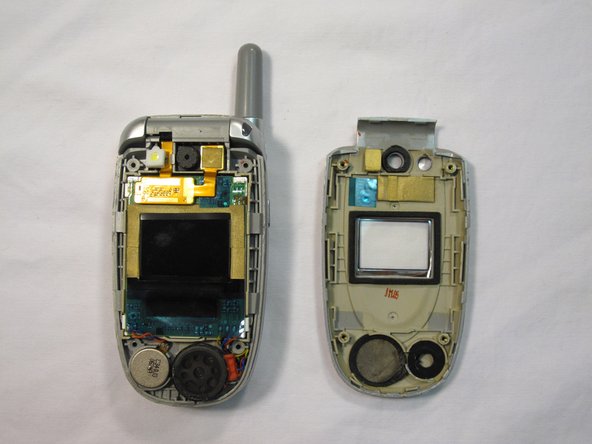
    • Hold the base of the phone and gently remove the faceplate.

    • Place the phone and the faceplate on a clean, flat surface.

  7. LG VX5200 LCD Screen Replacement, LCD Screen: 手順 7、 2の画像 1 LG VX5200 LCD Screen Replacement, LCD Screen: 手順 7、 2の画像 2
    • Try not to move the thin component wires as they will bend and break very easily.

  8. LG VX5200 LCD Screen Replacement: 手順 8、 3の画像 1 LG VX5200 LCD Screen Replacement: 手順 8、 3の画像 2 LG VX5200 LCD Screen Replacement: 手順 8、 3の画像 3
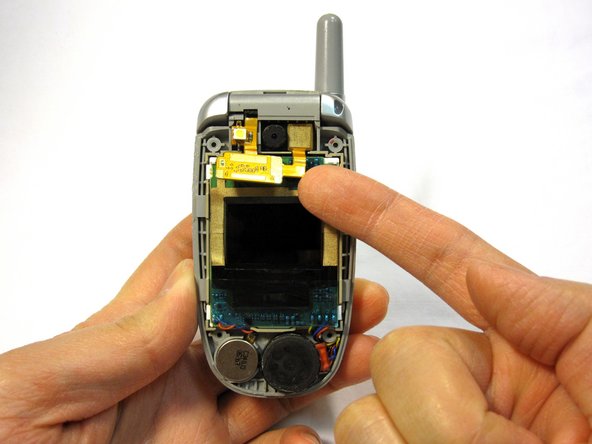
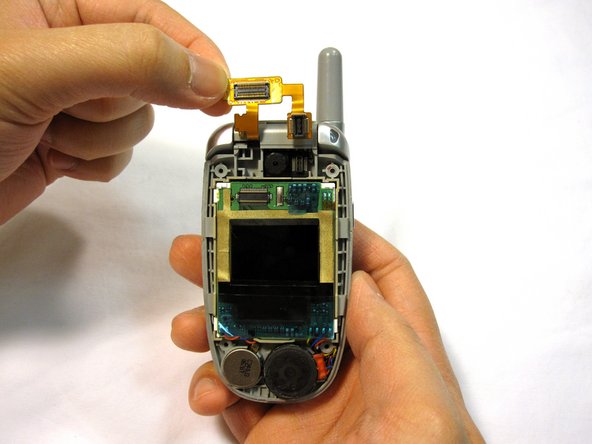
    • Remove the white stopper from the camera light located above the gold connector.

    • Lift the gold connector up with your finger to detach it.

  9. LG VX5200 LCD Screen Replacement: 手順 9、 1の画像 1
    • Gently lift out the speaker with your fingertip.

  10. LG VX5200 LCD Screen Replacement: 手順 10、 3の画像 1 LG VX5200 LCD Screen Replacement: 手順 10、 3の画像 2 LG VX5200 LCD Screen Replacement: 手順 10、 3の画像 3
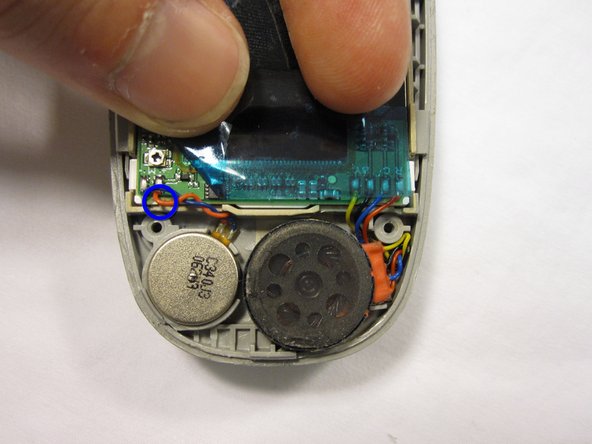
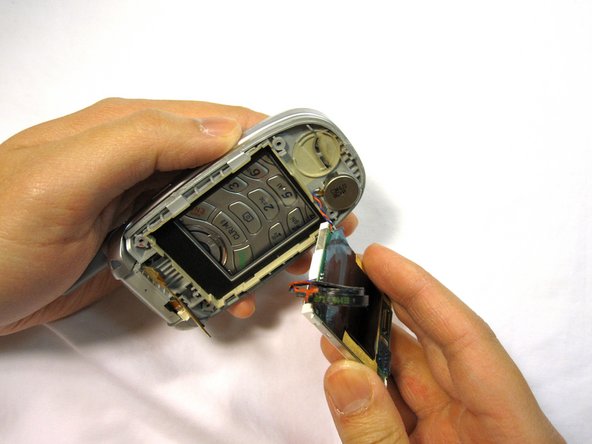
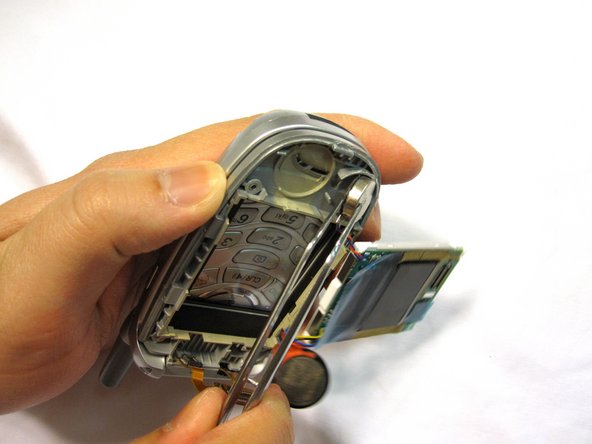
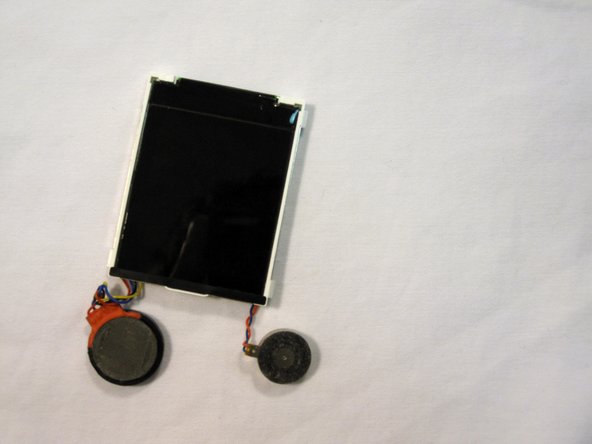
    • Gently lift out the square LCD assembly being careful with the attached vibrator wires.

    • Gently remove the vibrator with tweezers.

    • The LCD screen, speaker and vibrator will separate from the phone as a single unit.

  11. LG VX5200 LCD Screen Replacement: 手順 11、 2の画像 1 LG VX5200 LCD Screen Replacement: 手順 11、 2の画像 2
    • Place phone body and LCD screen on a clean, lint-free surface.

終わりに

To reassemble your device, follow these instructions in reverse order.

3 の人々がこのガイドを完成させました。

作成者

12人の作成者と共同で作成されました。

Douglas Blaalid

メンバー登録日: 01/13/10

282 ポイント

8のガイドは作成済み

チーム

Cal Poly, Team 4-13, Forte Winter 2010 Cal Poly, Team 4-13, Forte Winter 2010人のメンバー

CPSU-FORTE-W10S4G13

5 メンバー

15のガイドは作成済み

0 件のコメント

コメントを追加

統計データ:

過去 24時間: 1

過去 7 日: 1

過去 30 日: 3

今までの合計 3,841