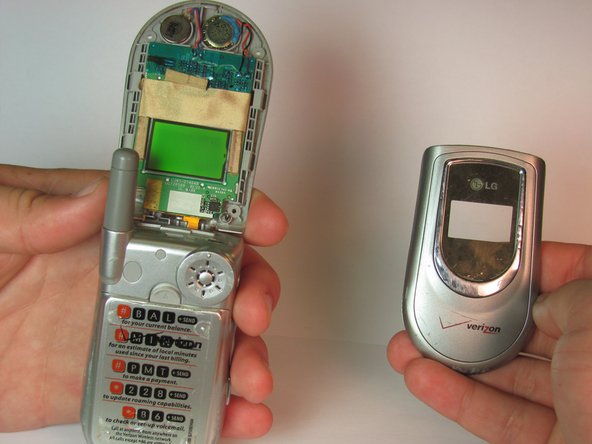
メインコンテンツにスキップ

LG VX4500 screen replacement (duplicate)

アーカイブされたガイド
このガイドは将来的な使用のためにのみ保存されてます。ご自身の修理作業には更新バージョンをご利用ください。

必要な工具と部品

  1. LG VX4500 screen replacement (duplicate), Speaker: 手順 1、 2の画像 1 LG VX4500 screen replacement (duplicate), Speaker: 手順 1、 2の画像 2
    • Remove grey rubber caps from the four corners of the internal screen.

    • Remove the four 1.3 mm screws, which are directly underneath the grey caps, with a Phillips head screwdriver.

  2. LG VX4500 screen replacement (duplicate): 手順 2、 3の画像 1 LG VX4500 screen replacement (duplicate): 手順 2、 3の画像 2 LG VX4500 screen replacement (duplicate): 手順 2、 3の画像 3
    • Run a pry bar along the seem of the edge of the phone to separate the top screen casing.

    • Work the bar around the edge until the entire top section with the LG logo is removed.

  3. LG VX4500 screen replacement (duplicate): 手順 3、 3の画像 1 LG VX4500 screen replacement (duplicate): 手順 3、 3の画像 2 LG VX4500 screen replacement (duplicate): 手順 3、 3の画像 3
    • With a flathead screwdriver, lift the speaker from the device.

  4. LG VX4500 screen replacement (duplicate), Internal and External Screen: 手順 4、 3の画像 1 LG VX4500 screen replacement (duplicate), Internal and External Screen: 手順 4、 3の画像 2 LG VX4500 screen replacement (duplicate), Internal and External Screen: 手順 4、 3の画像 3
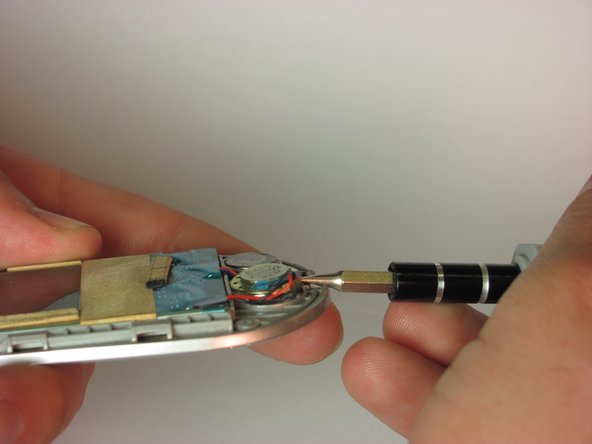
    • Ensure that the metal capacitor next to the speaker is removed in the same way that the speaker was removed.

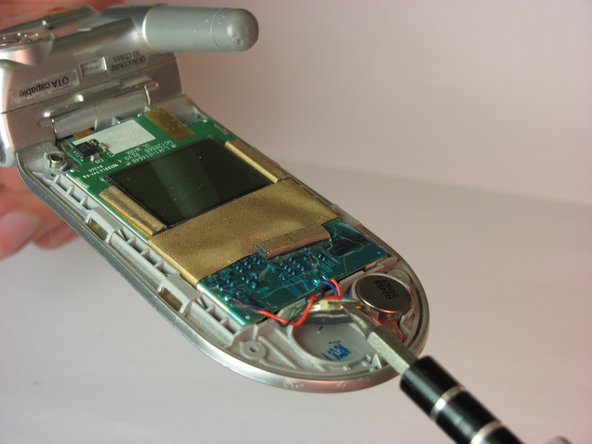
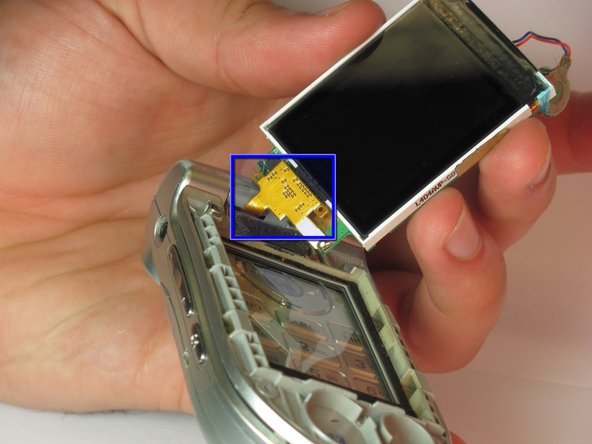
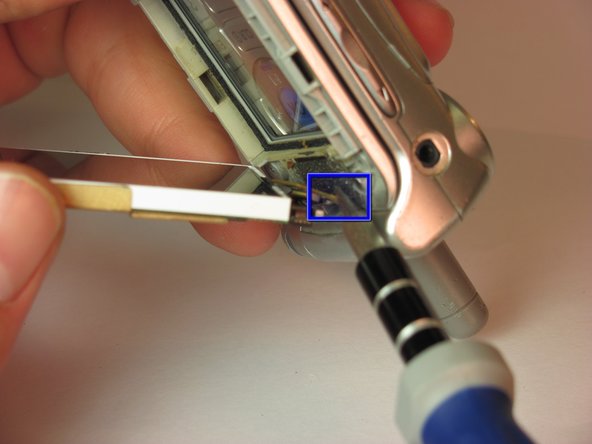
    • Gently lift the entire circuit board assembly up.

    • Note: the entire assembly is still connected to the phone.

  5. LG VX4500 screen replacement (duplicate): 手順 5、 2の画像 1 LG VX4500 screen replacement (duplicate): 手順 5、 2の画像 2
    • Desolder the contact point shown.

    • Gently pry the entire gold connector away from the screen with a spudger

終わりに

To reassemble your device, follow these instructions in reverse order.

作成者

7人の作成者と共同で作成されました。

iDeleted

メンバー登録日: 07/07/10

2,101 ポイント

39のガイドは作成済み

0 件のコメント

コメントを追加

統計データ:

過去 24時間: 0

過去 7 日: 0

過去 30 日: 0

今までの合計 198