メインコンテンツにスキップ

LG VX4500 keyboard replacement duplicate

アーカイブされたガイド
このガイドは将来的な使用のためにのみ保存されてます。ご自身の修理作業には更新バージョンをご利用ください。

必要な工具と部品

  1. LG VX4500 keyboard replacement duplicate, Battery: 手順 1、 1の画像 1
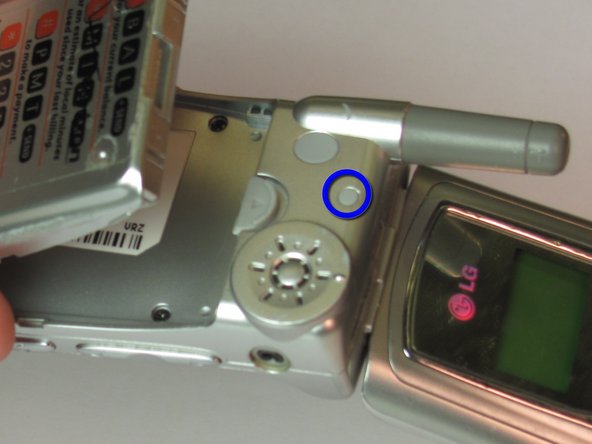
    • Before removing the battery, ensure that the phone is turned off.

    • To remove the battery from your LG VX4500, turn the phone so that the back panel is showing.

  2. LG VX4500 keyboard replacement duplicate: 手順 2、 1の画像 1
    • Pull back on the white release tab and lift up the the entire battery.

  3. LG VX4500 keyboard replacement duplicate: 手順 3、 1の画像 1
    • The back panel should now be fully accessible.

  4. LG VX4500 keyboard replacement duplicate, LG VX4500 Disassembly: 手順 4、 2の画像 1 LG VX4500 keyboard replacement duplicate, LG VX4500 Disassembly: 手順 4、 2の画像 2
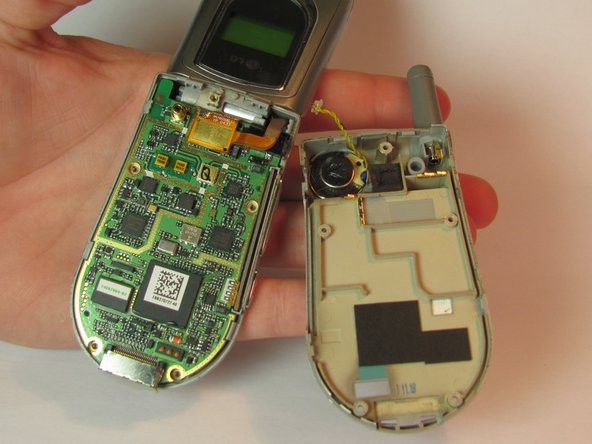
    • Using a paper clip, remove all 4 rubber screwcaps from the screw ports.

    • With a Phillips head screwdriver, remove all 4 screws from their ports.

    • Also remove the rubber screwcap in the upper part of the back panel along with the screw under it.

    • The fifth screw will be more difficult to get out because the plastic port has much higher sides.

  5. LG VX4500 keyboard replacement duplicate: 手順 5、 3の画像 1 LG VX4500 keyboard replacement duplicate: 手順 5、 3の画像 2 LG VX4500 keyboard replacement duplicate: 手順 5、 3の画像 3
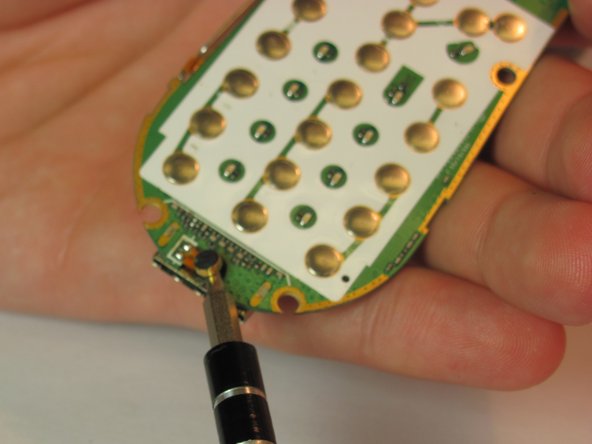
    • Run a plastic opening tool along the seam to seperate the keyboard cover and the back panel

    • Remove the back panel, now the logic board, keyboard and microphone are exposed.

  6. LG VX4500 keyboard replacement duplicate, Logic Board: 手順 6、 2の画像 1 LG VX4500 keyboard replacement duplicate, Logic Board: 手順 6、 2の画像 2
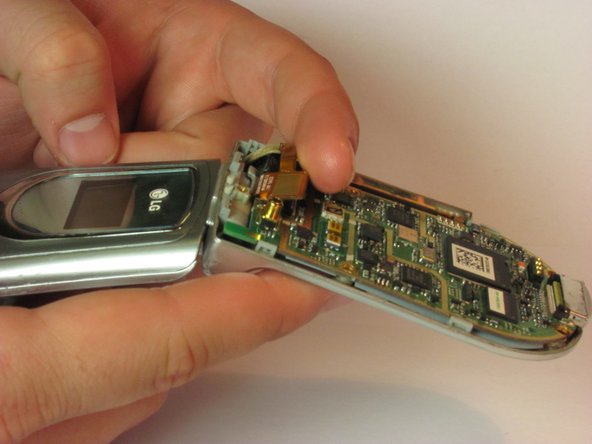
    • With your fingers, gently lift up the gold connector until it is completely disconnected.

  7. LG VX4500 keyboard replacement duplicate, Keyboard: 手順 7、 1の画像 1
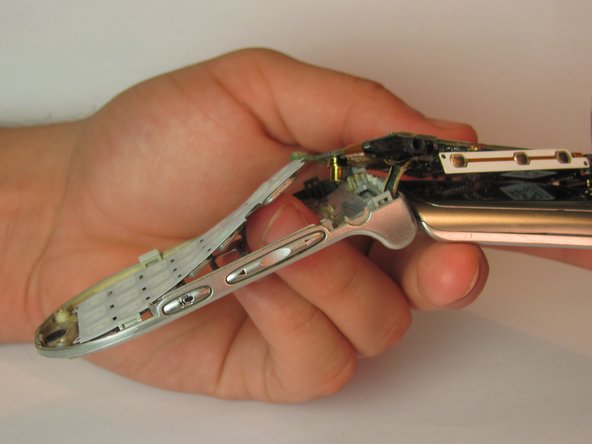
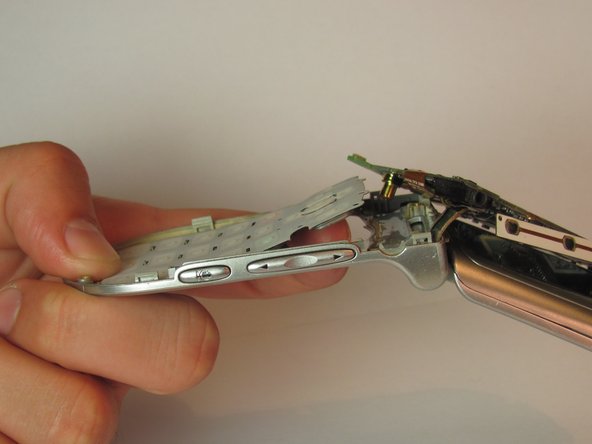
    • Move the logic board out of the way to reveal the keyboard underneath.

  8. LG VX4500 keyboard replacement duplicate: 手順 8、 2の画像 1 LG VX4500 keyboard replacement duplicate: 手順 8、 2の画像 2
    • Pop the keyboard out using a your finger until the entire keyboard is out.

終わりに

To reassemble your device, follow these instructions in reverse order.

作成者

8人の作成者と共同で作成されました。

iDeleted

メンバー登録日: 07/07/10

2,101 ポイント

39のガイドは作成済み

0 件のコメント

コメントを追加

統計データ:

過去 24時間: 0

過去 7 日: 0

過去 30 日: 0

今までの合計 318