メインコンテンツにスキップ

LG Optimus L90 Touch Screen Replacement

アーカイブされたガイド
このガイドは将来的な使用のためにのみ保存されてます。ご自身の修理作業には更新バージョンをご利用ください。

必要な工具と部品

  1. LG Optimus L90 Touch Screen Replacement, Battery: 手順 1、 3の画像 1 LG Optimus L90 Touch Screen Replacement, Battery: 手順 1、 3の画像 2 LG Optimus L90 Touch Screen Replacement, Battery: 手順 1、 3の画像 3
    • Carefully slide an opening pick between the the rear cover and the body of the phone.

    • Using the pick, separate the cover from the back of the phone.

    • Remove the rear cover.

  2. LG Optimus L90 Touch Screen Replacement: 手順 2、 2の画像 1 LG Optimus L90 Touch Screen Replacement: 手順 2、 2の画像 2
    • Insert a plastic opening tool int o the small recess at the bottom of the battery.

    • Use the plastic opening tool to lift up the bottom of the battery.

    • Remove the battery from the phone.

  3. LG Optimus L90 Touch Screen Replacement, Motherboard: 手順 3、 2の画像 1 LG Optimus L90 Touch Screen Replacement, Motherboard: 手順 3、 2の画像 2
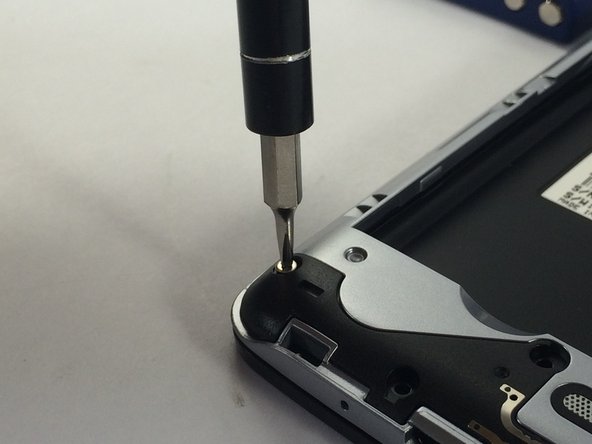
    • Remove the eleven JIS #000 screws securing the midframe to the phone.

  4. LG Optimus L90 Touch Screen Replacement: 手順 4、 3の画像 1 LG Optimus L90 Touch Screen Replacement: 手順 4、 3の画像 2 LG Optimus L90 Touch Screen Replacement: 手順 4、 3の画像 3
    • Using an opening pick, carefully separate the midframe from the motherboard.

  5. LG Optimus L90 Touch Screen Replacement: 手順 5、 3の画像 1 LG Optimus L90 Touch Screen Replacement: 手順 5、 3の画像 2 LG Optimus L90 Touch Screen Replacement: 手順 5、 3の画像 3
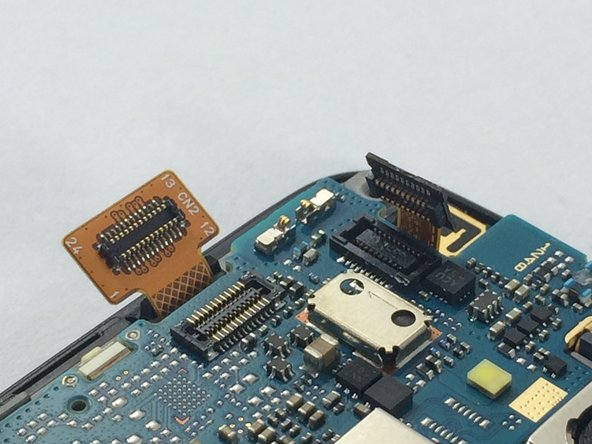
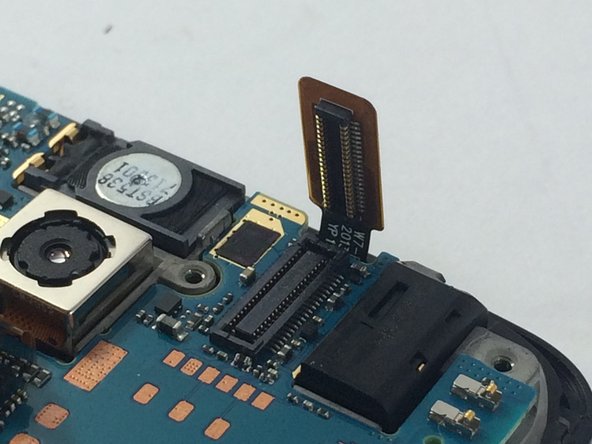
    • Disconnect the flex cables (gold tags with prongs) from the motherboard.

  6. LG Optimus L90 Touch Screen Replacement: 手順 6、 2の画像 1 LG Optimus L90 Touch Screen Replacement: 手順 6、 2の画像 2
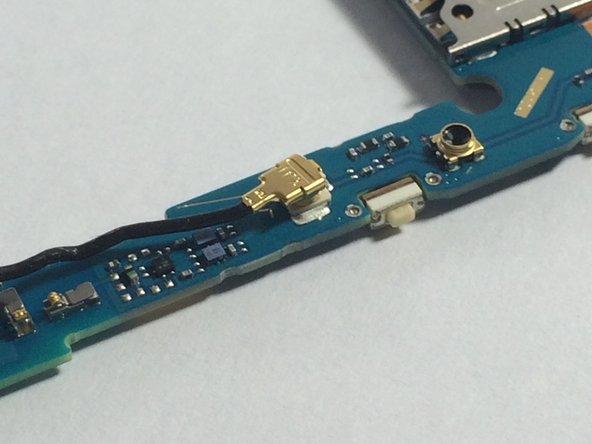
    • Disconnect the thin black cable in the bottom-right corner of the phone.

  7. LG Optimus L90 Touch Screen Replacement: 手順 7、 3の画像 1 LG Optimus L90 Touch Screen Replacement: 手順 7、 3の画像 2 LG Optimus L90 Touch Screen Replacement: 手順 7、 3の画像 3
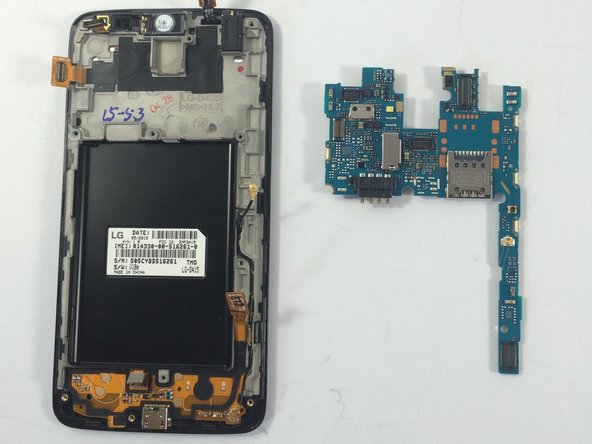
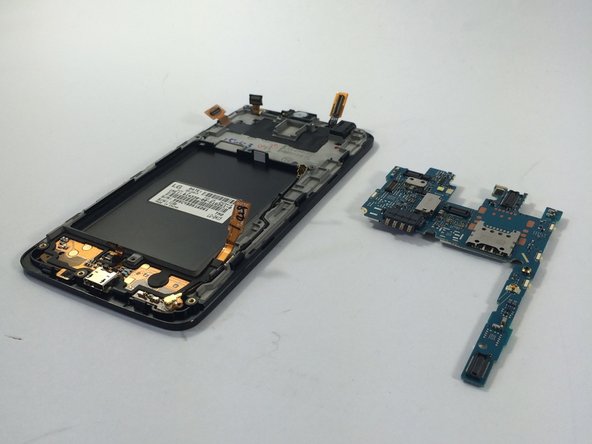
    • Gently pry the motherboard away from the phone.

  8. LG Optimus L90 Touch Screen Replacement, Touch Screen: 手順 8、 2の画像 1 LG Optimus L90 Touch Screen Replacement, Touch Screen: 手順 8、 2の画像 2
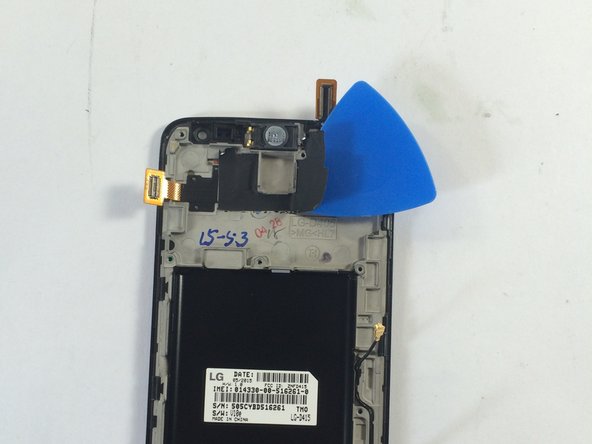
    • Once the motherboard is carefully removed, use your prying tool to remove the black tape that is located around the back camera. Place the tape off to the side when finished as you will need this later.

  9. LG Optimus L90 Touch Screen Replacement: 手順 9、 1の画像 1
    • Once the tape is removed, use your heat gun to heat up the screen of the phone for 1-2 minutes. This will soften the adhesive that binds the screen to the phone.

  10. LG Optimus L90 Touch Screen Replacement: 手順 10、 1の画像 1
    • Once the screen is up to a decent temperature, use your prying tool to separate the screen from the body of the phone. Once the damaged screen is removed the new one is ready to be inserted.

終わりに

To reassemble your device, follow these instructions in reverse order.

4 の人々がこのガイドを完成させました。

作成者

5人の作成者と共同で作成されました。

Alex Arruda

メンバー登録日: 03/04/16

511 ポイント

5のガイドは作成済み

チーム

UMass Dartmouth, Team 3-5, Bhusal Spring 2016 UMass Dartmouth, Team 3-5, Bhusal Spring 2016人のメンバー

UMASSD-BHUSAL-S16S3G5

2 メンバー

7のガイドは作成済み

0 件のコメント

コメントを追加

統計データ:

過去 24時間: 0

過去 7 日: 0

過去 30 日: 1

今までの合計 2,232