メインコンテンツにスキップ

LG Optimus F60 Front Camera Replacement

必要な工具と部品

  1. LG Optimus F60 Front Camera Replacement, Battery: 手順 1、 3の画像 1 LG Optimus F60 Front Camera Replacement, Battery: 手順 1、 3の画像 2 LG Optimus F60 Front Camera Replacement, Battery: 手順 1、 3の画像 3
    • Hold the phone in your hand and position the small plastic opening tool or your finger under the lip of the phone by the USB port.

    • Pry or lift up on the indent with the opening tool.

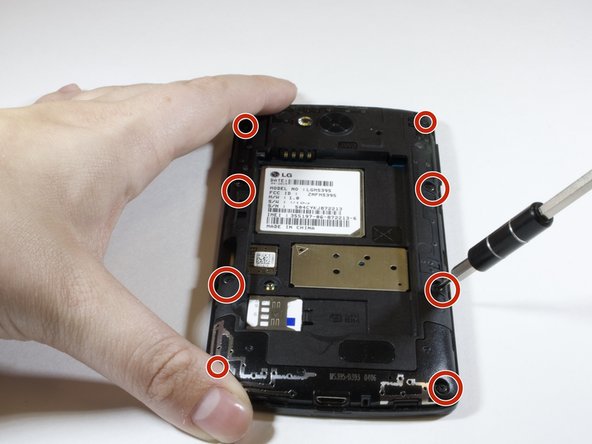
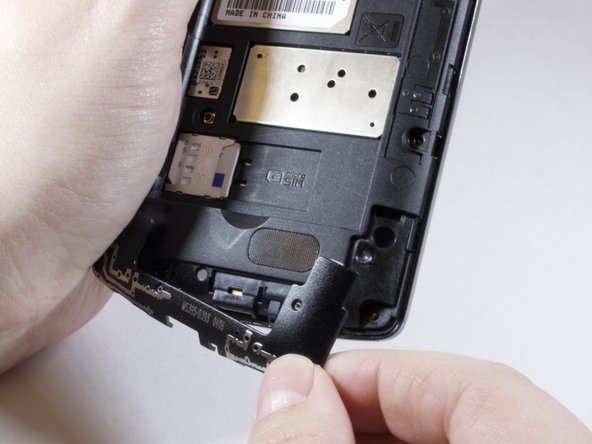
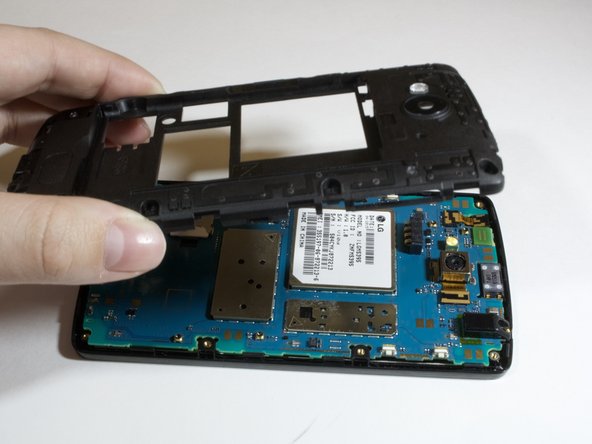
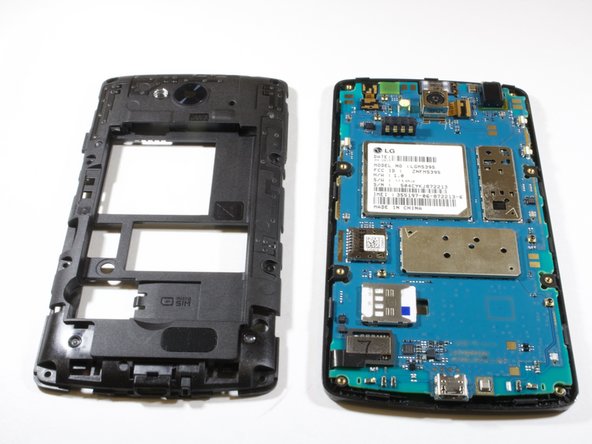
    • Remove the back panel.

  2. LG Optimus F60 Front Camera Replacement: 手順 2、 3の画像 1 LG Optimus F60 Front Camera Replacement: 手順 2、 3の画像 2 LG Optimus F60 Front Camera Replacement: 手順 2、 3の画像 3
    • Place the small plastic opening tool or your finger at the indentation at the base of the battery.

    • Pry upwards or lift with your finger and remove battery.

  3. LG Optimus F60 Front Camera Replacement, Front Camera: 手順 3、 2の画像 1 LG Optimus F60 Front Camera Replacement, Front Camera: 手順 3、 2の画像 2
    • Use the phillips #000 Screwdriver to unscrew eight 4mm screws.

  4. LG Optimus F60 Front Camera Replacement: 手順 4、 2の画像 1 LG Optimus F60 Front Camera Replacement: 手順 4、 2の画像 2
    • Insert the plastic opening tool in the indentation marked by the red square.

    • Pry the plastic opening tool upwards to release the lower back panel.

    • Remove the lower back panel from the device.

  5. LG Optimus F60 Front Camera Replacement: 手順 5、 3の画像 1 LG Optimus F60 Front Camera Replacement: 手順 5、 3の画像 2 LG Optimus F60 Front Camera Replacement: 手順 5、 3の画像 3
    • Continue moving plastic opening tool around device until back panel is loose enough to remove.

    • Remove the back panel

  6. LG Optimus F60 Front Camera Replacement: 手順 6、 3の画像 1 LG Optimus F60 Front Camera Replacement: 手順 6、 3の画像 2 LG Optimus F60 Front Camera Replacement: 手順 6、 3の画像 3
    • Locate the digitizer connection on the lower left hand side of the device.

    • Use the tweezers to lift up and gently remove the connector.

  7. LG Optimus F60 Front Camera Replacement: 手順 7、 3の画像 1 LG Optimus F60 Front Camera Replacement: 手順 7、 3の画像 2 LG Optimus F60 Front Camera Replacement: 手順 7、 3の画像 3
    • Locate the front camera on the upper left hand side of the device. The camera is marked in red.

    • Use the tweezers to remove the front camera from the connector marked in orange.

    • Remove and replace front camera.

終わりに

To reassemble your device, follow these instructions in reverse order.

作成者

2人の作成者と共同で作成されました。

Austin Johnson

メンバー登録日: 04/09/18

171 ポイント

1ガイドが承認済み

チーム

0 件のコメント

コメントを追加

統計データ:

過去 24時間: 0

過去 7 日: 0

過去 30 日: 0

今までの合計 202