メインコンテンツにスキップ

LG LX150 Motherboard Replacement

必要な工具と部品

  1. LG LX150 Motherboard Replacement, Back Cover: 手順 1、 3の画像 1 LG LX150 Motherboard Replacement, Back Cover: 手順 1、 3の画像 2 LG LX150 Motherboard Replacement, Back Cover: 手順 1、 3の画像 3
    • First locate the button and the bottom of the cover where the arrow is. Press down on the button.

    • While pushing down on the button, slide the cover up towards the hinge until the cover comes off.

    • The battery will be visible after removing the back cover.

  2. LG LX150 Motherboard Replacement, Battery: 手順 2、 2の画像 1 LG LX150 Motherboard Replacement, Battery: 手順 2、 2の画像 2
    • Simultaneously push the battery forward and pull up from the bottom.

  3. LG LX150 Motherboard Replacement: 手順 3、 1の画像 1
    • Once the battery is loose it can be easily removed. The phone's ID tag will be visible once the battery is removed.

    • Be careful of damaged or leaking batteries. If your battery appears damaged, remove it with care and find a replacement.

  4. LG LX150 Motherboard Replacement, Internal Back Cover: 手順 4、 3の画像 1 LG LX150 Motherboard Replacement, Internal Back Cover: 手順 4、 3の画像 2 LG LX150 Motherboard Replacement, Internal Back Cover: 手順 4、 3の画像 3
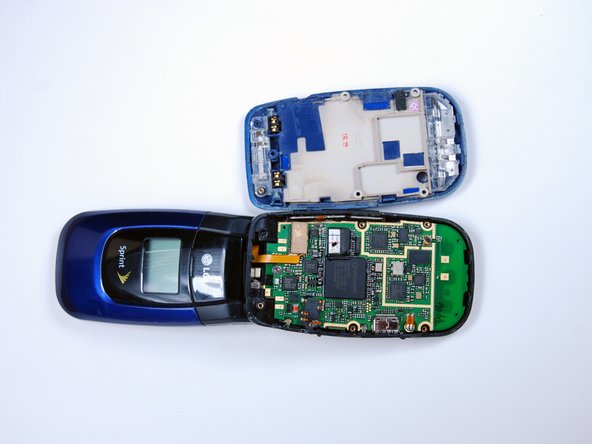
    • Remove the 7 phillips screws indicated by the red arrows using the phillips #0 screwdriver.

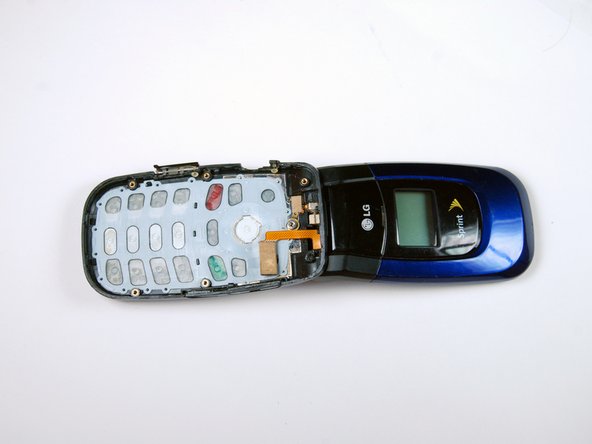
    • Insert the flat end of the spudger in-between the black and blue phone casing on the side of the phone and split the the blue and black apart. Work your way around the perimeter of the cover, loosening all corners.

  5. LG LX150 Motherboard Replacement: 手順 5、 2の画像 1 LG LX150 Motherboard Replacement: 手順 5、 2の画像 2
    • Remove the internal back cover after loosening all the corners.

    • The second picture below is what you will see after removing the internal back cover.

  6. LG LX150 Motherboard Replacement, Motherboard: 手順 6、 1の画像 1
    • Lift the motherboard from the bottom to loosen it.

  7. LG LX150 Motherboard Replacement: 手順 7、 1の画像 1
    • Remove the pin socket that connects the screen to the motherboard by pulling up away from the motherboard.

  8. LG LX150 Motherboard Replacement: 手順 8、 2の画像 1 LG LX150 Motherboard Replacement: 手順 8、 2の画像 2
    • Remove the motherboard.

    • The keypad will now be visible, as shown in the second picture.

終わりに

To reassemble your device, follow these instructions in reverse order.

ある他の人がこのガイドを完成しました。

作成者

6人の作成者と共同で作成されました。

Daniel Simpson

メンバー登録日: 04/18/10

60 ポイント

2のガイドは作成済み

チーム

Cal Poly, Team 10-44, Garner Spring 2010 Cal Poly, Team 10-44, Garner Spring 2010人のメンバー

CPSU-GARNER-S10S10G44

4 メンバー

18のガイドは作成済み

0 件のコメント

コメントを追加

統計データ:

過去 24時間: 0

過去 7 日: 1

過去 30 日: 2

今までの合計 1,475