メインコンテンツにスキップ

LG K20 PLUS Volume Buttons Replacement

必要な工具と部品

  1. LG K20 PLUS Volume Buttons Replacement, Remove the back cover and battery: 手順 1、 2の画像 1 LG K20 PLUS Volume Buttons Replacement, Remove the back cover and battery: 手順 1、 2の画像 2
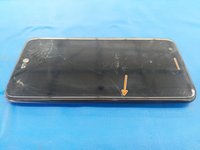
    • Remove the back cover by inserting a fingernail or opening pick here and disengaging the plastic clips.

    • Lift battery up here

  2. 注意: 手順 2-3 は、作業進行中としてマークされている ガイド から引用されています。

    LG K20 PLUS Volume Buttons Replacement, Midframe: 手順 2、 1の画像 1
    • Remove 11 Philips screws.

  3. LG K20 PLUS Volume Buttons Replacement: 手順 3、 2の画像 1 LG K20 PLUS Volume Buttons Replacement: 手順 3、 2の画像 2
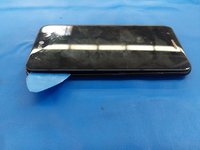
    • Use fingernails or insert an opening pick into the gap between the digitizer and the midframe and pull the midframe outwards to disengage the plastic clips.

    • Carefully disengage the clips on the bottom as the headphone jack goes through the midframe.

    • Once all the clips have been disengaged, move the midframe outwards and downwards to disengage it from the headphone jack.

  4. LG K20 PLUS Volume Buttons Replacement, Rear-Facing Camera: 手順 4、 1の画像 1
    • Use a Halberd spudger or an opening pick to disconnect the front camera flex from its connector on the motherboard.

  5. 注意: 手順 5 は、作業進行中としてマークされている ガイド から引用されています。

    LG K20 PLUS Volume Buttons Replacement, Motherboard Removal: 手順 5、 1の画像 1
    • Using the tip of a Halberd spudger or an opening pick, disconnect the display flex cable from its socket on the motherboard.

    • Starting from the bottom, insert an opening pick between the motherboard and frame and lever apart.

    • Be careful not to break the long section of the motherboard.

    • The top part of the motherboard is lightly adhered to the frame.

    • After the motherboard is removed, compare the original and replacement part. Some components may already be installed on the replacement display assembly.

  6. LG K20 PLUS Volume Buttons Replacement, Volume Buttons Removal: 手順 6、 1の画像 1
    • The volume button assembly is held onto the frame with fragile plastic tabs.

    • Use the tip of a spudger or similar tool to gently pry the plastic tabs upwards and outwards.

終わりに

To reassemble your device, follow these instructions in reverse order.

ある他の人がこのガイドを完成しました。

作成者

1人の作成者と共同作成されました。

Patrick

メンバー登録日: 05/14/14

6,574 ポイント

21のガイドは作成済み

0 件のコメント

コメントを追加

統計データ:

過去 24時間: 0

過去 7 日: 0

過去 30 日: 5

今までの合計 930