メインコンテンツにスキップ

LG Incite Camera Replacement

必要な工具と部品

  1. LG Incite Camera Replacement, Battery: 手順 1、 1の画像 1
    • Hold the phone camera-side up and locate the rear cover.

  2. LG Incite Camera Replacement: 手順 2、 1の画像 1
    • Place a thumb below the camera, apply a little pressure, and slide the cover toward the bottom of the phone.

  3. LG Incite Camera Replacement: 手順 3、 1の画像 1
    • Place the plastic opening tool in the small slot below and to the left of the battery.

    • Pry the battery upward to remove it.

  4. LG Incite Camera Replacement, Back Panel: 手順 4、 1の画像 1
    • Using the #00 Philips screw driver, unscrew the four 4.5mm screws located around the battery compartment.

  5. LG Incite Camera Replacement: 手順 5、 1の画像 1
    • Wedge the plastic opening tool between the screen and the body of the device, using care to avoid damaging internal components.

    • Gently move the tool around the perimeter of the screen to separate it from the body.

    • You should not completely separate the screen from the device in this step.

  6. LG Incite Camera Replacement: 手順 6、 1の画像 1
    • Flip the device over so the battery compartment faces up.

    • Press the scroll wheel, located in the upper-left corner, into the device to avoid damage.

    • Gently insert the plastic opening tool into the seam between the frame and front cover to separate the back panel from the device.

    • The volume, lock, and camera buttons are loose, so be careful not to misplace them.

  7. LG Incite Camera Replacement, Camera: 手順 7、 2の画像 1 LG Incite Camera Replacement, Camera: 手順 7、 2の画像 2
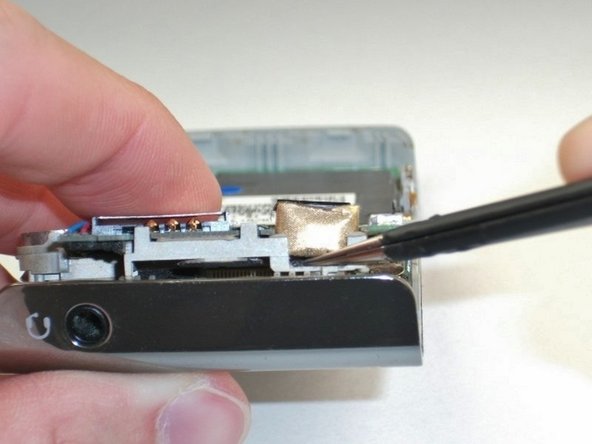
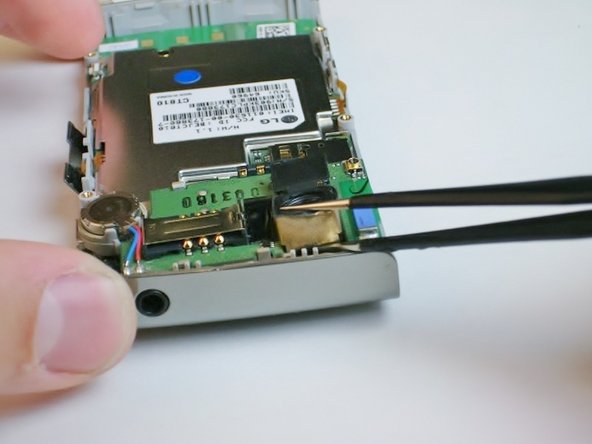
    • Locate the camera near the upper-left corner and use the metal tweezers to carefully detach the black tab.

  8. LG Incite Camera Replacement: 手順 8、 3の画像 1 LG Incite Camera Replacement: 手順 8、 3の画像 2 LG Incite Camera Replacement: 手順 8、 3の画像 3
    • Carefully slide the metal tweezers underneath the camera in order to lift it out.

    • Do not puncture the gold lining surrounding the camera.

    • The camera is glued in place, so there may be a slight resistance.

終わりに

To reassemble your device, follow these instructions in reverse order.

ある他の人がこのガイドを完成しました。

作成者

7人の作成者と共同で作成されました。

Kimberly Kha

メンバー登録日: 04/16/13

163 ポイント

5のガイドは作成済み

チーム

Cal Poly, Team 2-18, Maness Spring 2013 Cal Poly, Team 2-18, Maness Spring 2013人のメンバー

CPSU-MANESS-S13S2G18

4 メンバー

11のガイドは作成済み

0 件のコメント

コメントを追加

統計データ:

過去 24時間: 0

過去 7 日: 1

過去 30 日: 1

今までの合計 552