メインコンテンツにスキップ

LG G Stylo Headphone Port Replacement

必要な工具と部品

  1. LG G Stylo Headphone Port Replacement, Battery: 手順 1、 2の画像 1 LG G Stylo Headphone Port Replacement, Battery: 手順 1、 2の画像 2
    • Make sure that you power off the phone before beginning.

    • Remove the back cover by placing the plastic opening tool on the bottom left side of the device and gently prying up.

    • There is a small slit that fits the plastic opening tool perfectly on the left side.

  2. LG G Stylo Headphone Port Replacement: 手順 2、 2の画像 1 LG G Stylo Headphone Port Replacement: 手順 2、 2の画像 2
    • Insert the plastic opening tool into the indent at the bottom of the battery and lift up. Fully remove the battery with your fingers.

  3. LG G Stylo Headphone Port Replacement, Motherboard: 手順 3、 2の画像 1 LG G Stylo Headphone Port Replacement, Motherboard: 手順 3、 2の画像 2
    • Carefully use the Phillips #00 screwdriver to remove the eleven 3.9mm visible screws found on the back. The screws to be removed are marked with the given indicators.

  4. LG G Stylo Headphone Port Replacement: 手順 4、 3の画像 1 LG G Stylo Headphone Port Replacement: 手順 4、 3の画像 2 LG G Stylo Headphone Port Replacement: 手順 4、 3の画像 3
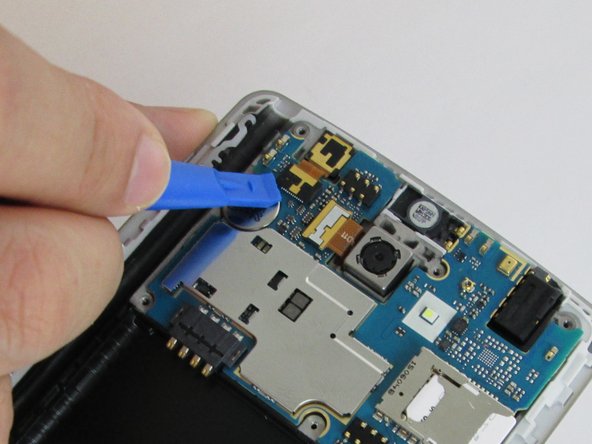
    • When you have finished removing all of the screws, place the plastic opening tool in the groove at the bottom left corner of the motherboard cover and lift up.

    • Make sure to remove the SIM card before you remove the motherboard cover. You can get the cover off without doing this, but the SIM card will be stuck underneath the cover once you put it back together.

    • This part could be more difficult if you have never removed the motherboard cover. If difficulty arises, pry the plastic opening tool into each groove along the edge of the motherboard cover until it releases.

    • Once a clip is released, you can detach the motherboard cover with your fingers and set aside.

  5. LG G Stylo Headphone Port Replacement: 手順 5、 3の画像 1 LG G Stylo Headphone Port Replacement: 手順 5、 3の画像 2 LG G Stylo Headphone Port Replacement: 手順 5、 3の画像 3
    • Carefully place the plastic opening tool under the ribbons where the cables are connecting and lift up to detach the cables.

    • Keep in mind to be careful with the ribbons, because they are small components and important for the device's functionality.

    • The third photo attached depicts what the ribbons look like when they are successfully detached.

  6. LG G Stylo Headphone Port Replacement: 手順 6、 2の画像 1 LG G Stylo Headphone Port Replacement: 手順 6、 2の画像 2
    • Fully remove the motherboard by prying upward with the plastic opening tool.

    • This step will be quite simple if all the ribbons have been detached correctly.

  7. LG G Stylo Headphone Port Replacement, Headphone Port: 手順 7、 2の画像 1 LG G Stylo Headphone Port Replacement, Headphone Port: 手順 7、 2の画像 2
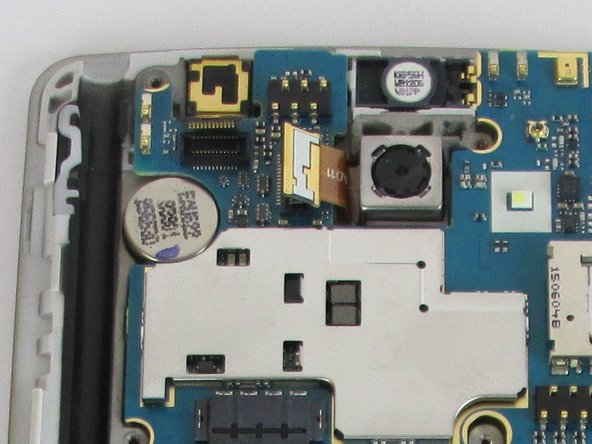
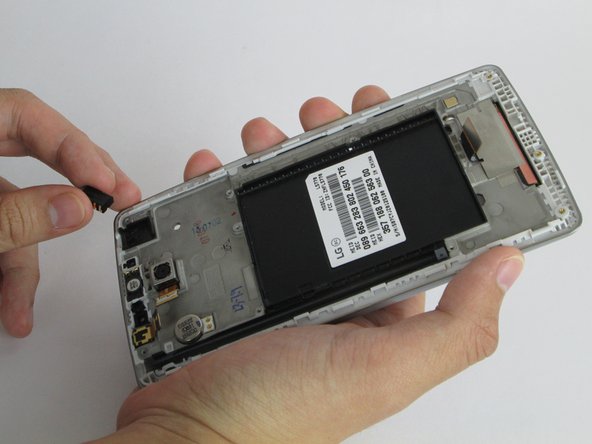
    • Place the plastic opening tool under the headphone jack in the bottom corner and lift up. Remove the headphone port with your fingers after you have pried it loose.

    • The headphone port is held in place with adhesive so it may take some time to pry it loose.

終わりに

To reassemble your device, follow these instructions in reverse order.

3 の人々がこのガイドを完成させました。

作成者

1人の作成者と共同作成されました。

Kimberly Young

メンバー登録日: 02/09/16

761 ポイント

3のガイドは作成済み

チーム

USF Tampa, Team 11-7, Cheng Spring 2016 USF Tampa, Team 11-7, Cheng Spring 2016人のメンバー

USFT-CHENG-S16S11G7

4 メンバー

14のガイドは作成済み

2 件のコメント

What kind of adhesive to you use to replace jack?

Greg Dodge - 返信

Hi i need the photo of the back of the main board g4 stylus(h540) at place of rfmd and pf plz send it to my gmail

Samimkh82@gmail.com

Tnx for help

صمیم خویی - 返信

コメントを追加

統計データ:

過去 24時間: 0

過去 7 日: 0

過去 30 日: 4

今までの合計 4,982